INSTALLATION, USE & CARE INSTRUCTIONS
INSTALLATION
9
PREPARE THE CABINET (cont’d)
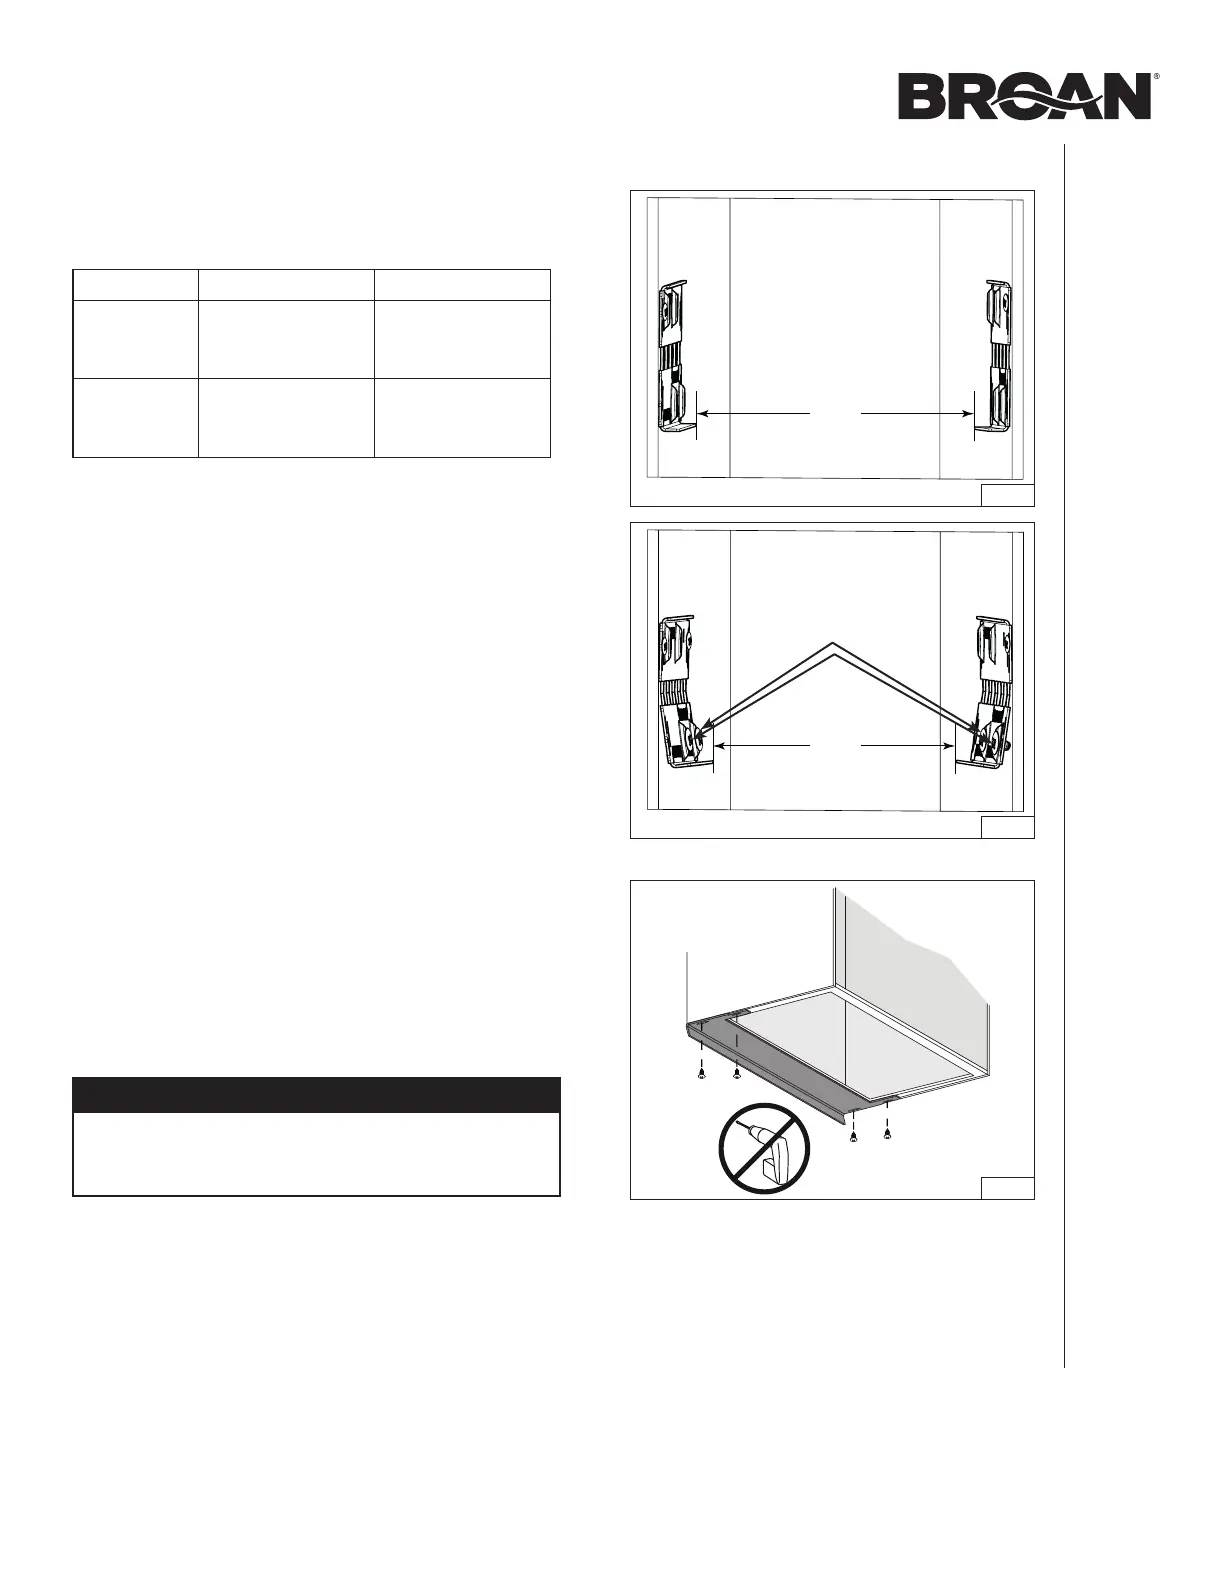
7. Measure the distance between both bottom bracket
edges (F) (FIG. 10). The table below shows the appropriate
distance needed.
Unit narrow edge wide edge
BBN1243SS
F
From 21-7/8”
to < 22-1/16”
F
From 22-1/16”
to 22-5/16”
BBN1303SS
F
From 27-7/8”
to < 28-1/16”
F
From 28-1/16”
to 28-5/16”
If the measured distance needs to be shortened, screw two
no. 8-32 x 1/4” machine screws, in each bottom embossed
cabinet brackets hole; this will slightly bend the bottom part
of the brackets (FIG. 11). Screw both brackets until the
appropriate distance is obtained.
F
FIG. 10
FIG. 12
CAUTION
Never use an electric screwdriver or drill to screw the
filler to the bottom edge of cabinet; use a standard
screwdriver.
BBn1243SS and BBn1303SS unitS only:
8. There are 3 different sizes of filler included with these
units, designed to fit up to 13-in. depth cabinets. For up
to 15-in. depth cabinets, another set of 4 fillers is available
(for BBN1243SS unit: HADTBN24, for BBN1303SS:
HADTBN30).
Choose the filler that fits to cover the back
bottom edge of the cabinet. Use 4 no. 6 x 3/4” truss head
wood screws (included) to mount it (FIG. 12).
F
FIG. 11
Screws in bottom
embossed holes