Nuvoton Nu-Link Debug Adapter User Manual
Oct 24, 2019 - 22 - Revision V1.01
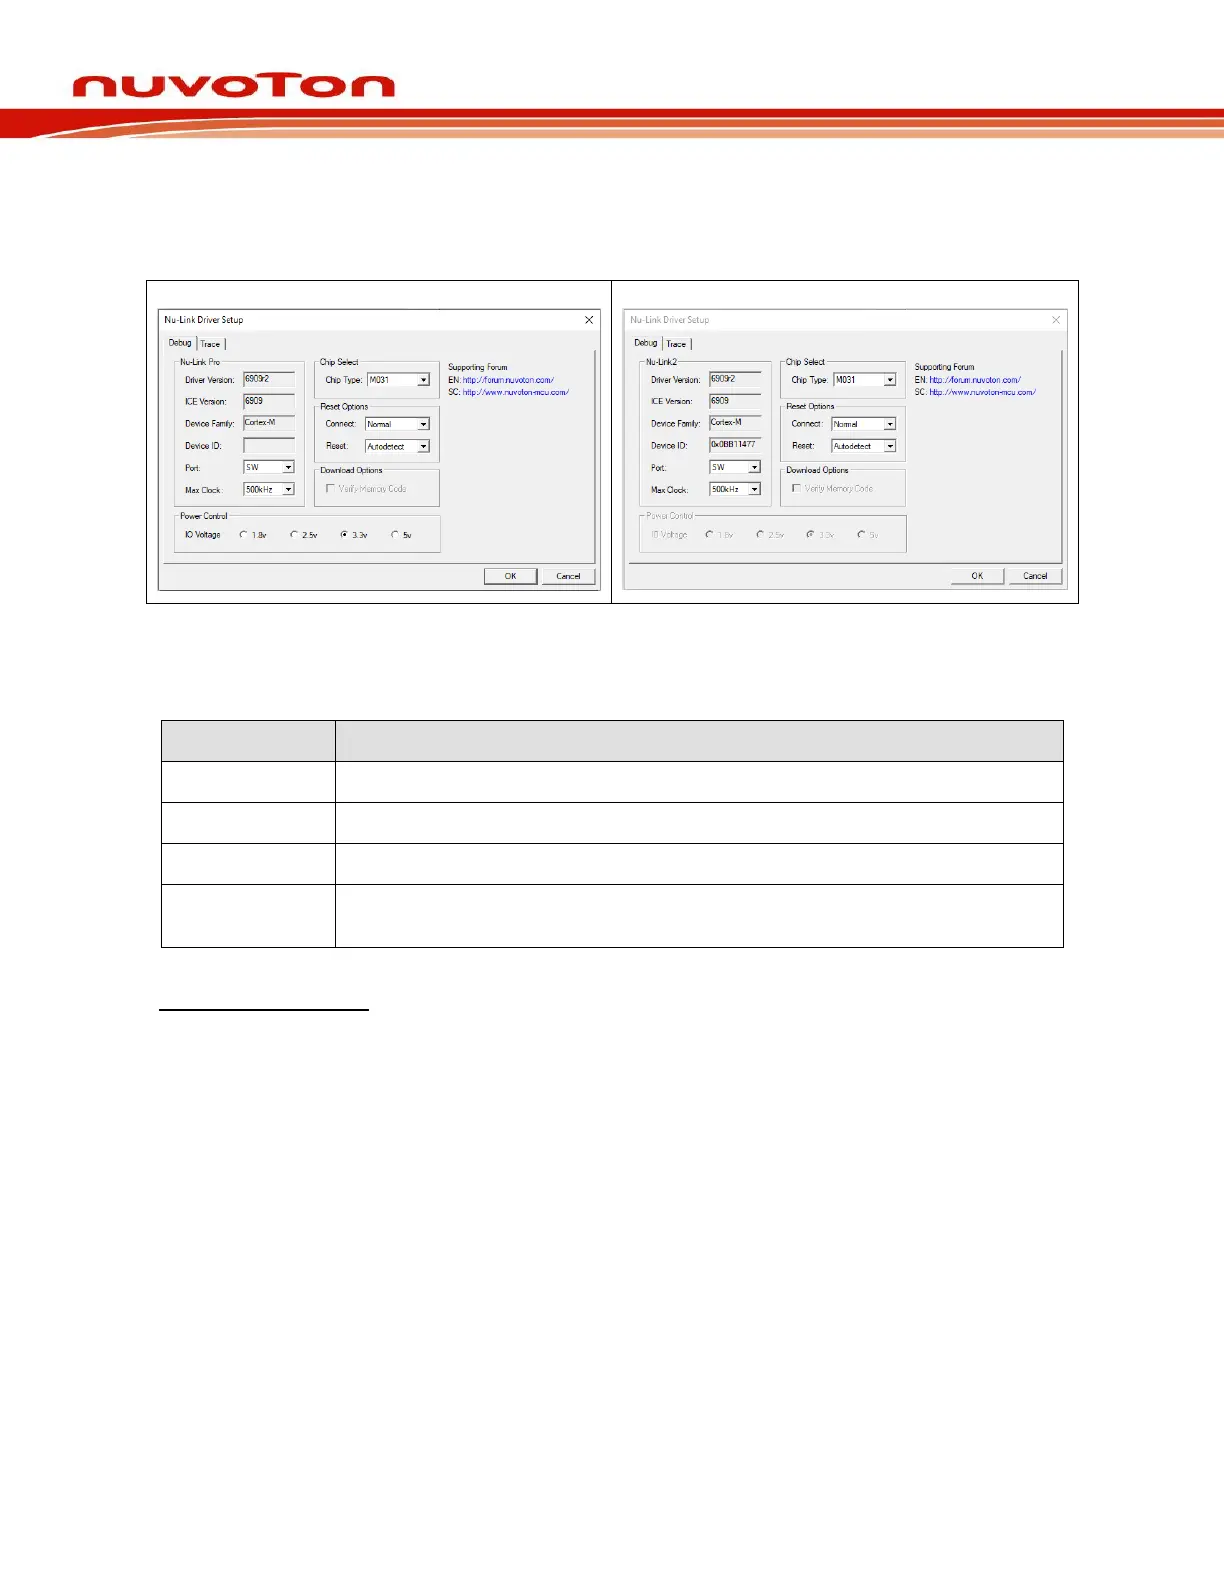
Step: 5: Click the Settings button to open the Debug form, as shown in Figure 4-11. Refer to Table
4-1 for each setting description. The setting options shown in the Debug form may vary
depending on the type of the Nu-Link Adapter used.
Nu-Link & Nu-Link-Me & Nu-Link2-Me
Figure 4-11 Nu-Link Adapter Parameter Settings
Table 4-1 Debugger Function Settings Description
Display the Nu-Link Adapter driver version in the host
Specify the Target chip type
Select Auto detect to reset the target chip
Specify the SWD port I/O voltage for the target chip; options include 1.8V, 2.5V,
3.3V, and 5V
Programmer Settings:
Step 6: Invoke Project → Options for Target → Utilities, select “Nuvoton Nu-Link M0
Debugger” when the Use Target Driver for Flash Programming option is enabled, and
then select the Update Target before Debugging option, as shown in Figure 4-12.