Nuvoton Nu-Link Debug Adapter User Manual
Oct 24, 2019 - 28 - Revision V1.01
4.2.4 NuEclipse GCC
Step 1: Install NuEclipse GCC, which does not require any driver installation.
Step 2: Open NuEclipse GCC and open the project to be set.
Please also refer to the UM_NuEclipse_EN.
Debugger Settings:
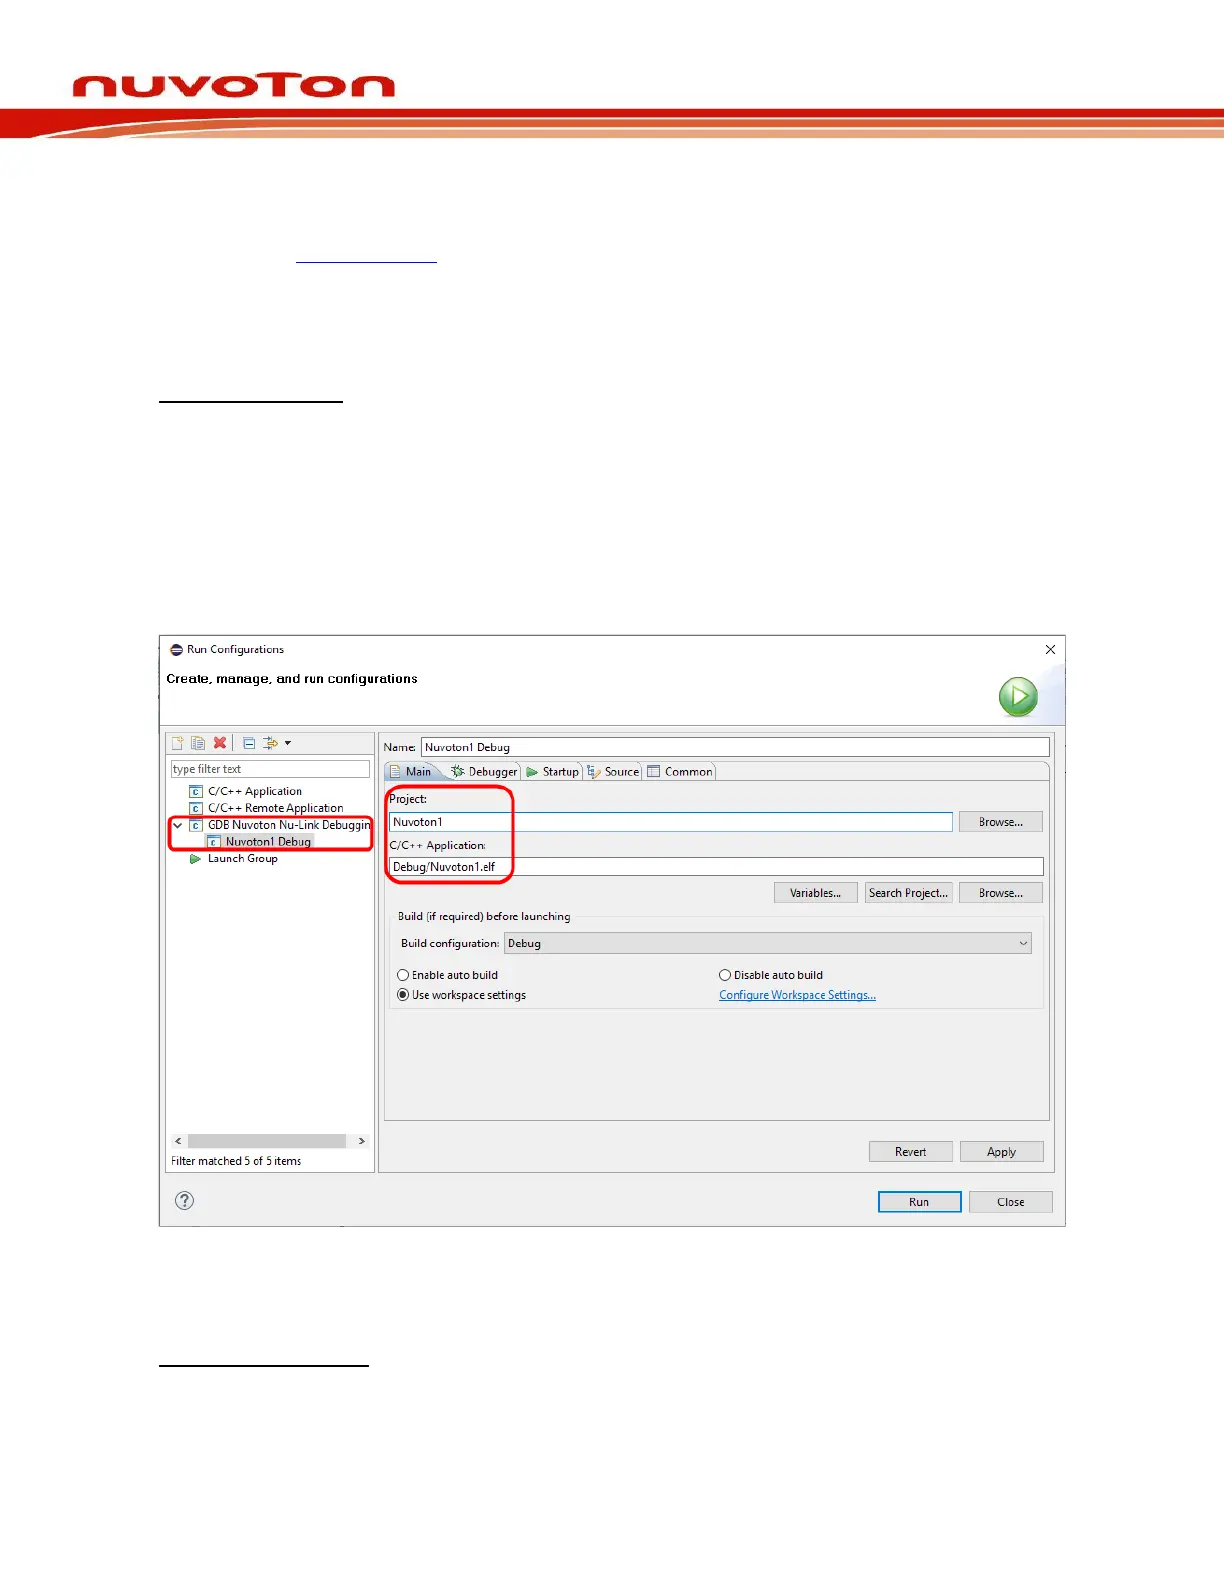
Step 3: Into the debug mode, we have to prepare a debug configuration, which contains all the
necessary information about the debug mode. Click Run > Debug Configuration… to open
the debug configuration dialog. Double click on the GDB Nuvoton NuLink Debugging
group. The Nuvoton Nu-Link debug configuration appears on the right-hand side. In the Main
tab, the name of Project should coincide with the project name. The C/C++ Application
should point to the .elf application generated by the build process. As shown in Figure 4-21. If
the project name or C/C++ Application is incorrect, please select the expected project first in
the project view, build the project to generate the executable, and expand the tree to make
sure the existence of the generated executable. Then repeat the former operations again.
Figure 4-21 NuEclipse GCC Debug Configuration
Programmer Settings:
Step 4: The Debugger tab is used to provide the OpenOCD and GDB Client setup. OpenOCD
requires correct configuration files to know how to work with adapters and target chips. The
configuration files are specified in the Config options field. Nuvoton’s adapter is Nu-Link,