Installation instructions
Adesys bv, Wateringen, NL
26 Octalarm-T2 / T4 / T8 / T16
nc
AL 1
AL 2
AL 3
AL 4
AL 5
AL 6
AL 7
AL 8
sensor
net
reset in
gnd
gnd
gnd
AL9..16
+12V
150mA
T16
no
+
-
in
nc nc nc
AL 1 AL 1 AL 1
AL 2 AL 2 AL 2
AL 3 AL 3
AL 4 AL 4
AL 5
AL 6
AL 7
AL 8
sensor
net
sensor
net
reset in reset in
gnd gnd
gnd
gnd gnd gnd
+12V
150mA
+12V
150mA
+12V
150mA
T8 T4 T2
no no no
+
+
--
in
in
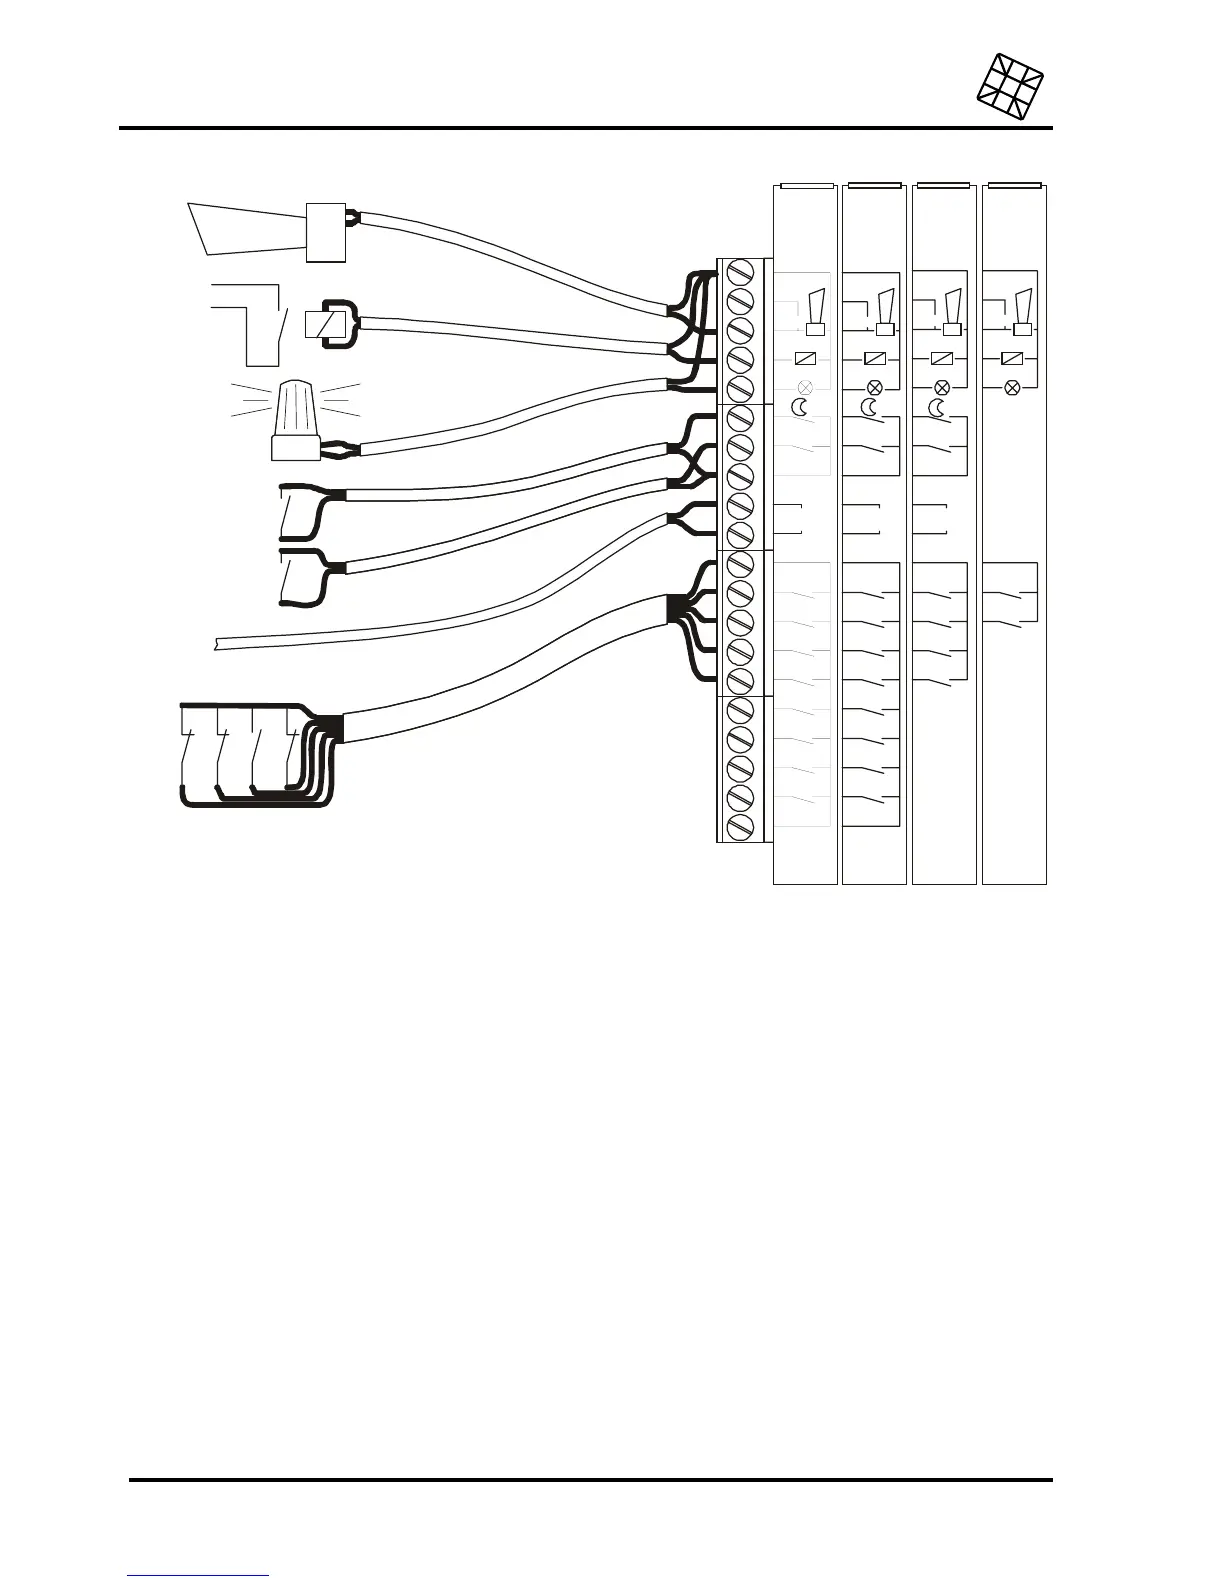
op afstand
te sc h a k e le n
alarmzoemer
octalarm
flitslicht
dag/nacht
schakelaar
externe
resetknop
sensornet
kabel
alarmcontacten
16.3 Connection of inputs
All inputs have to be activated by potential-free contacts.
16.3.1 Alarm inputs
Both normally open and normally closed contacts can be applied.
For the connection, it is possible to choose between:
•
a direct connection to the Octalarm, or
•
a connection through Sensornet (only possible for Octalarm -T4 and -T8). Using a Sensornet
connection can save on wiring, because all inputs are connected using one single two-core cable.
The Octalarm-T16 works with either type of connection: the alarm contacts for points 1-8 should be
connected directly, points 9-16 should be connected via the Sensor network.
16.3.1.1 Direct connection
Connect the potential-free alarm contact to the alarm input AL .. and to the GND terminal.
 Loading...