Replacing consumables > 60
F
USER
UNIT
The fuser unit is included as one of the regular replacement parts. When you are to replace
a fuser unit, open the box of the regular replacement parts and get the new fuser unit
ready.
R
EPLACING
THE
FUSER
UNIT
1. Switch off the power of the printer and leave it idle for 30 minutes until the fuser
unit cools down.
2. Open cover A.
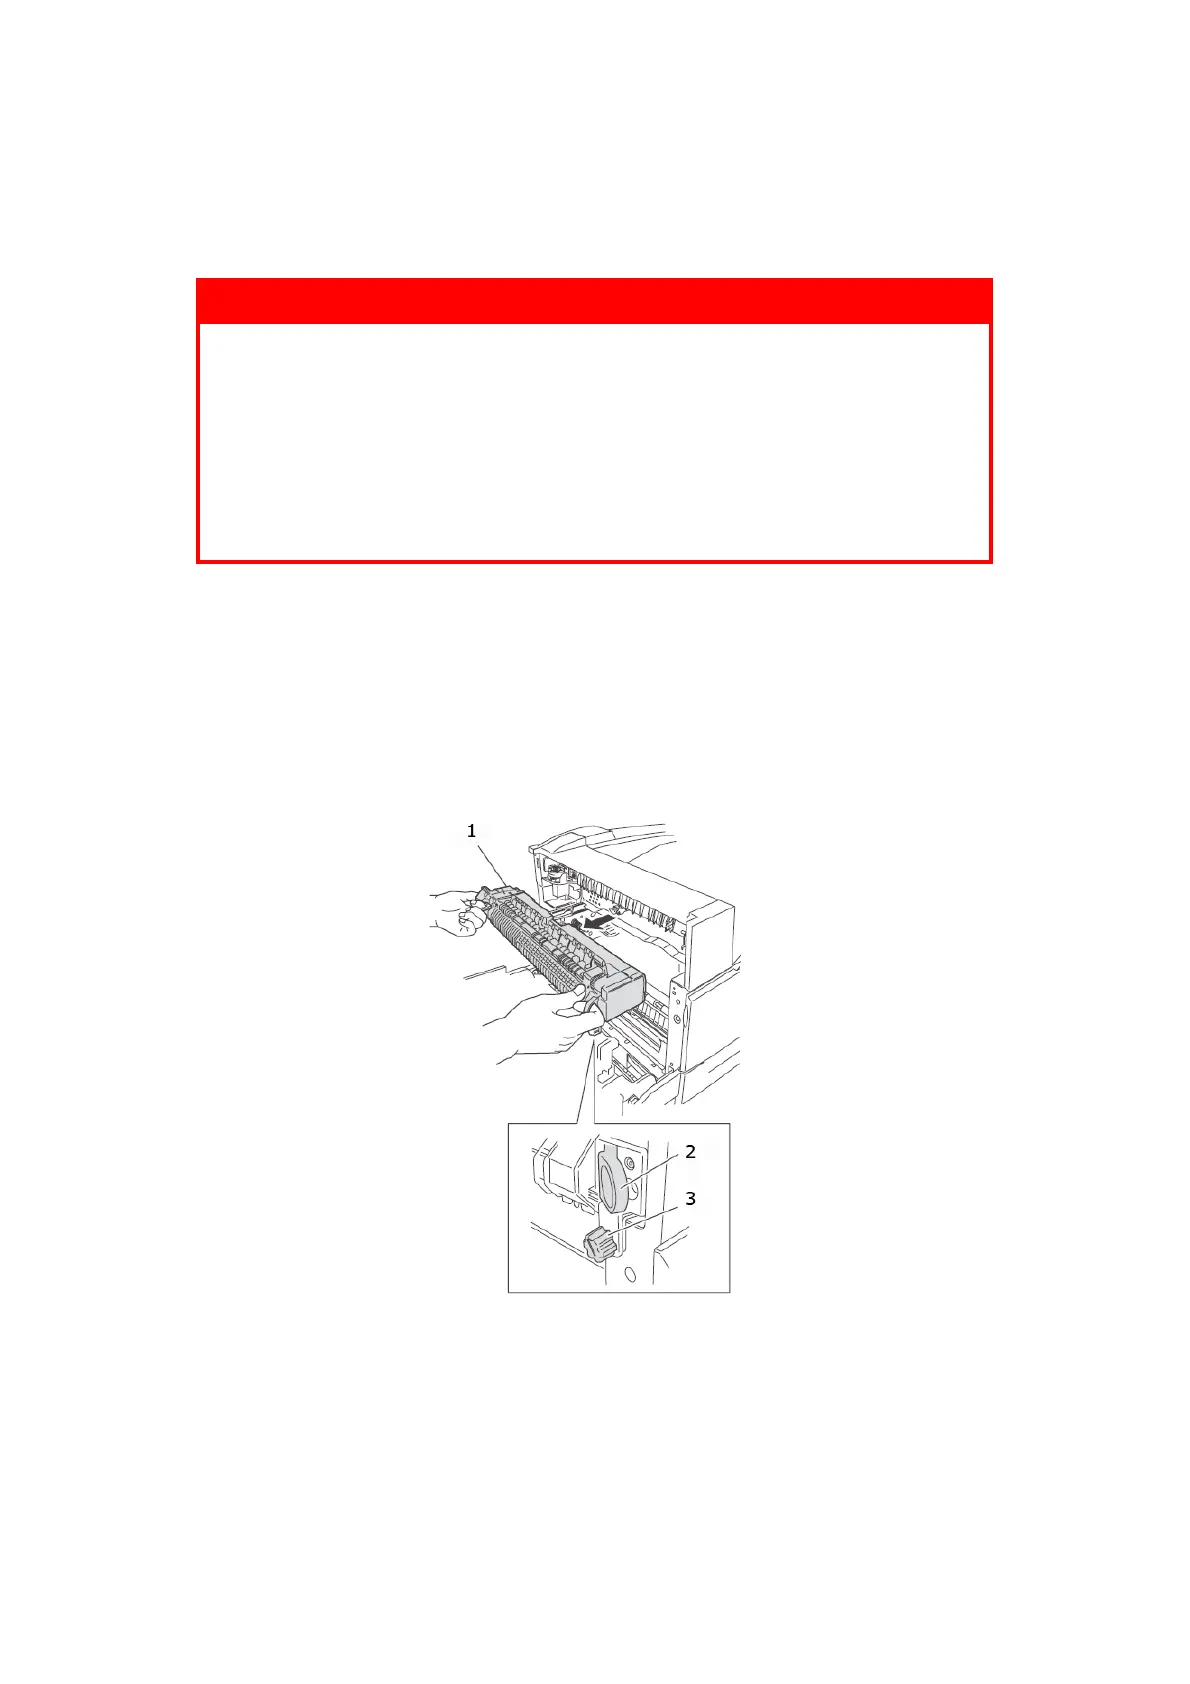
3. Loosen the two knobs (3) securing the fuser to the frame.
4. Pull the fuser (1) towards you by holding the two handles (2).
5. Unpack the new fuser from its container.
6. Insert carefully the fuser by holding the two handles.
7. Secure the fuser by tightening the two knobs.
8. Close cover A.
9. Switch the printer power on.
WARNING!
> Never touch a labelled area found on or near the heat roller.
You can get burned. If a sheet of paper is wrapped around the
heat roller, do not try to remove it by yourself to avoid injuries
or burns. Switch off the printer immediately, and contact your
service provider.
> Be sure to switch off and unplug the machine before accessing
the interior of the machine for cleaning, maintenance, or fault
clearance. Access to a live machine’s interior can cause electric
shock.