- 19 -
2. Setting Up
5
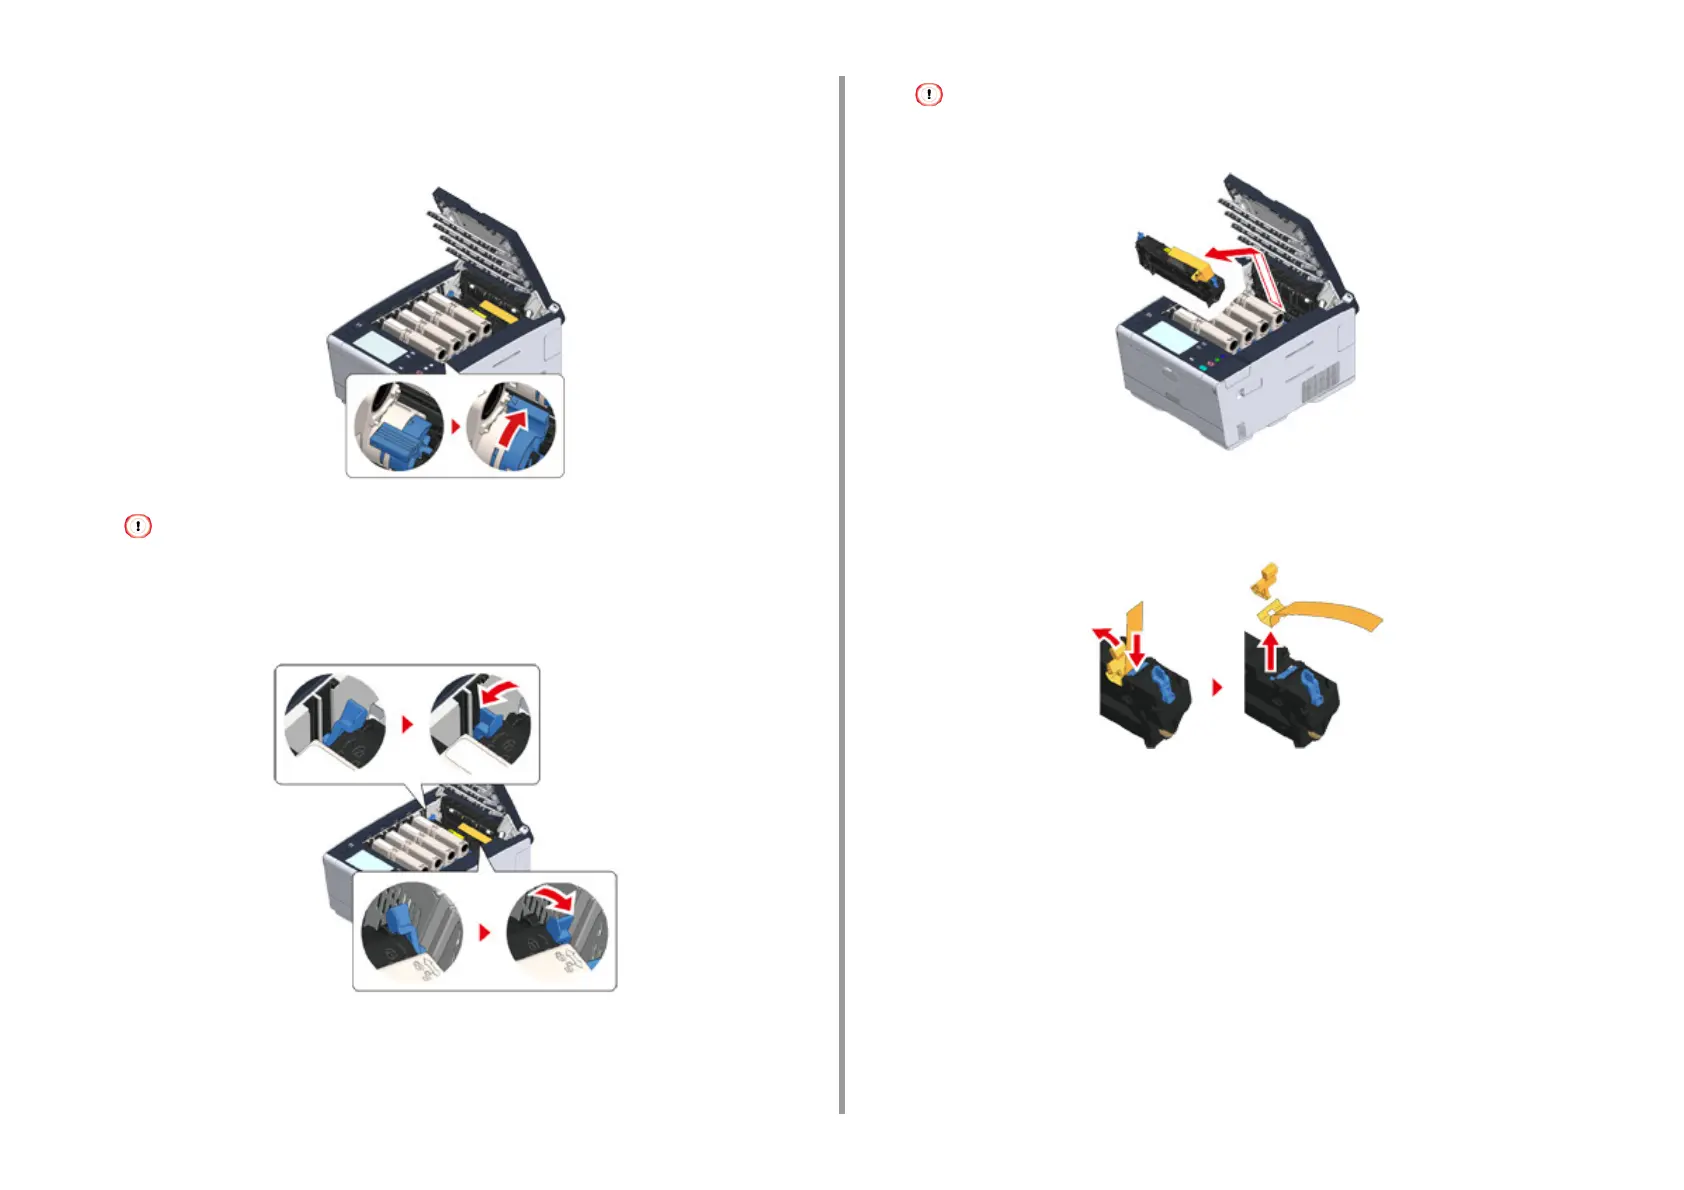
Pinch the tip of blue lever of the toner cartridge and turn forward until the tip
aligns on the lug of the cartridge.
Turn the levers of all 4 toner cartridges.
If you close the output tray without turning the blue lever, it may cause a malfunction. Be sure to turn the blue
lever until its top aligns on the lug in the back of the toner cartridge.
6
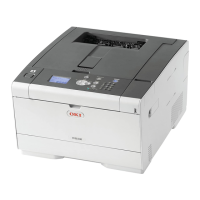
Pull the locking levers on the fuser unit toward you to unlock.
7
Hold the fuser unit handle and lift the fuser unit out of the machine.
While removing the fuser unit, be careful not to hit it to the LED head.
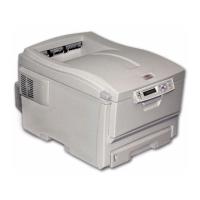
8
Push the blue lever on the fuser unit and remove the orange safety stopper
and film.
9
Hold the fuser unit handle and aligning the fuser unit to the grooves behind the
toner cartridges, place the fuser unit into the machine.