EasyManuals Logo

Oki Microline 320 User Manual

Oki Microline 320
29 pages
To Next Page IconTo Next Page
To Previous Page IconTo Previous Page
Page #11 background imageLoading...
Page #11 background image
E – 10
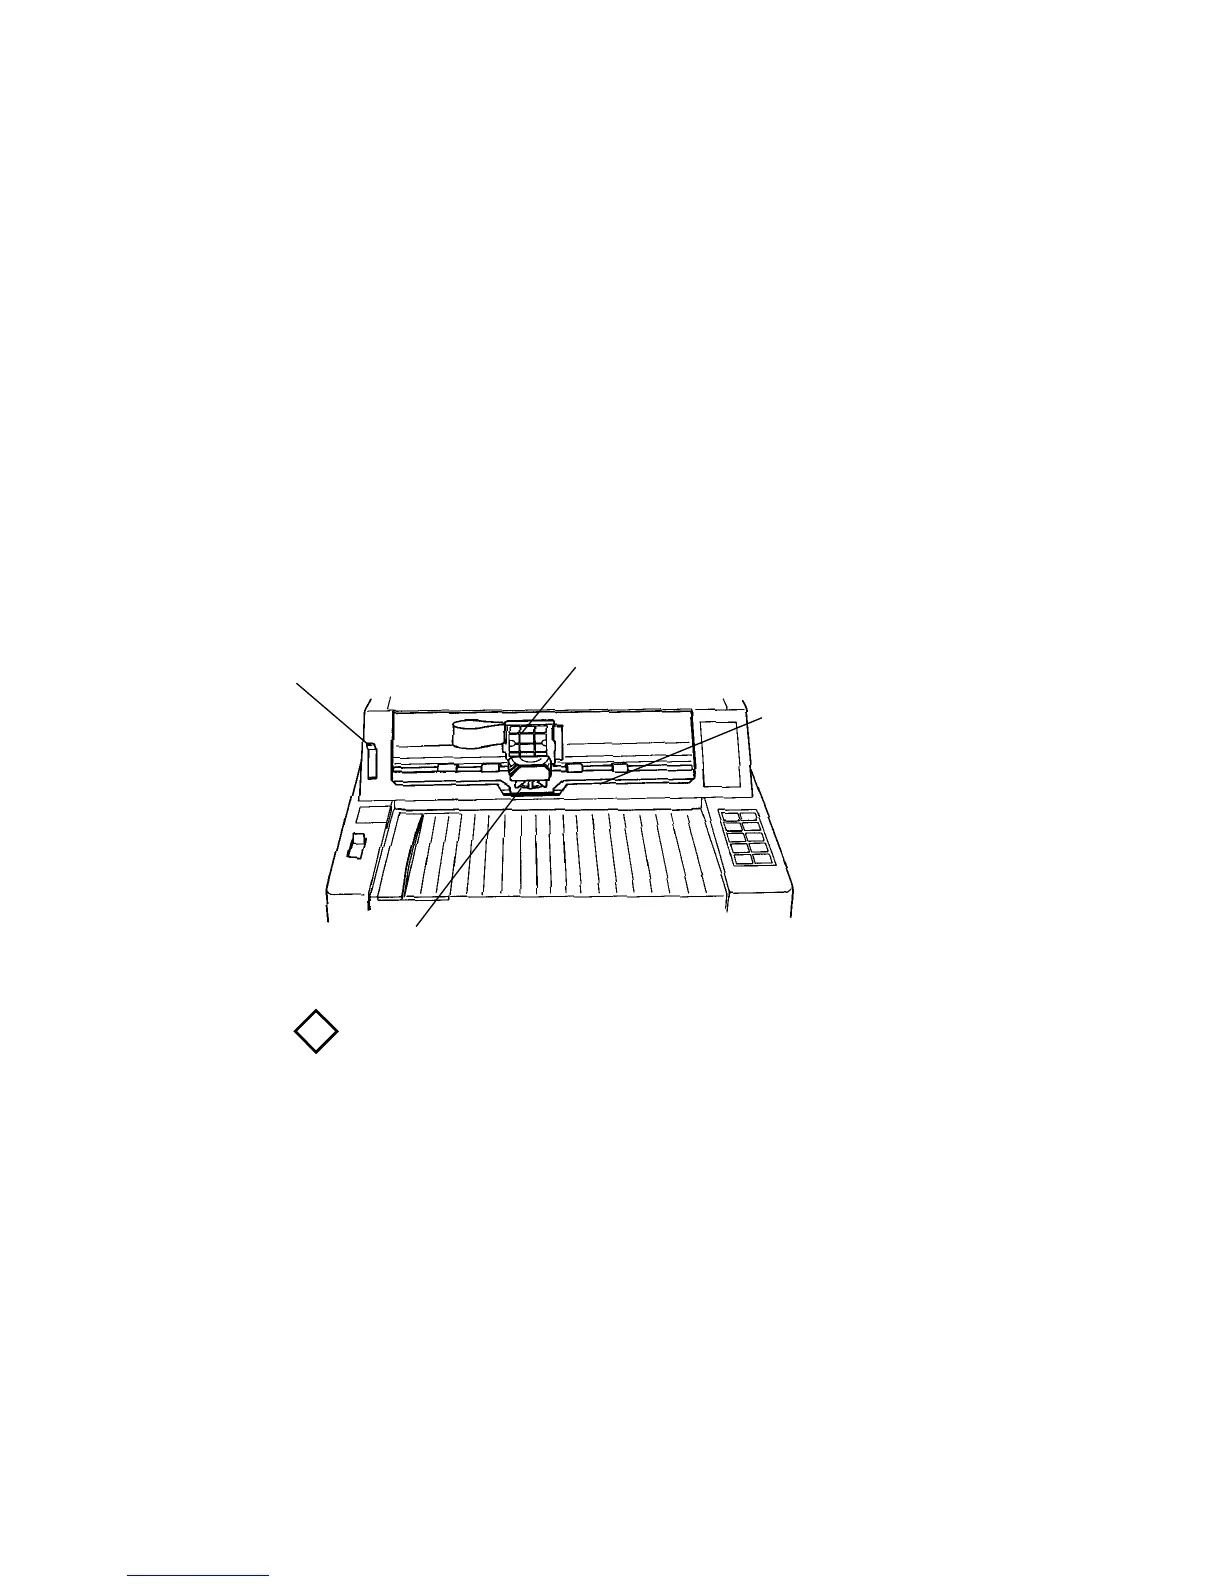
Installing the Ribbon Cartridge
1. Set the headgap lever to the “R” position.
2. Open the access cover.
3. Slide the print head gently towards the centre to
give yourself some working room. There is a
cut-out at the centre of the sheet guide for
changing cartridges.
Important:
a) The printhead gets very hot during extended
periods of printing, be sure to let it cool off before you
touch it.
b) Make sure that you are using the correct ribbon. If
you attempt to use any other ribbon it may cause print
quality problems.
4. Hold the ribbon cartridge with the blue take-up
knob facing up.
Headgap lever
Sheet guide
Printhead
Cut-out
!

Other manuals for Oki Microline 320

Questions and Answers:

Question and Answer IconNeed help?

Do you have a question about the Oki Microline 320 and is the answer not in the manual?

Oki Microline 320 Specifications

General IconGeneral
Print MethodImpact Dot Matrix
EmulationEpson FX, IBM ProPrinter
Print DirectionBidirectional
Resolution240 x 216 dpi
ConnectivityParallel
Paper HandlingContinuous Forms, Cut Sheet
Paper WidthUp to 10 inches
Noise Level55 dBA
Number of Pins9-Pin

Related product manuals