SW5
S7 S9
S6
S5 S1S4 S0S3a
S3b S2
SW4 SW6SW2 SW3 SW1
D1S10 S8
B
EN - 14
ENGLISH
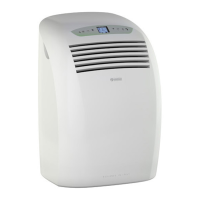
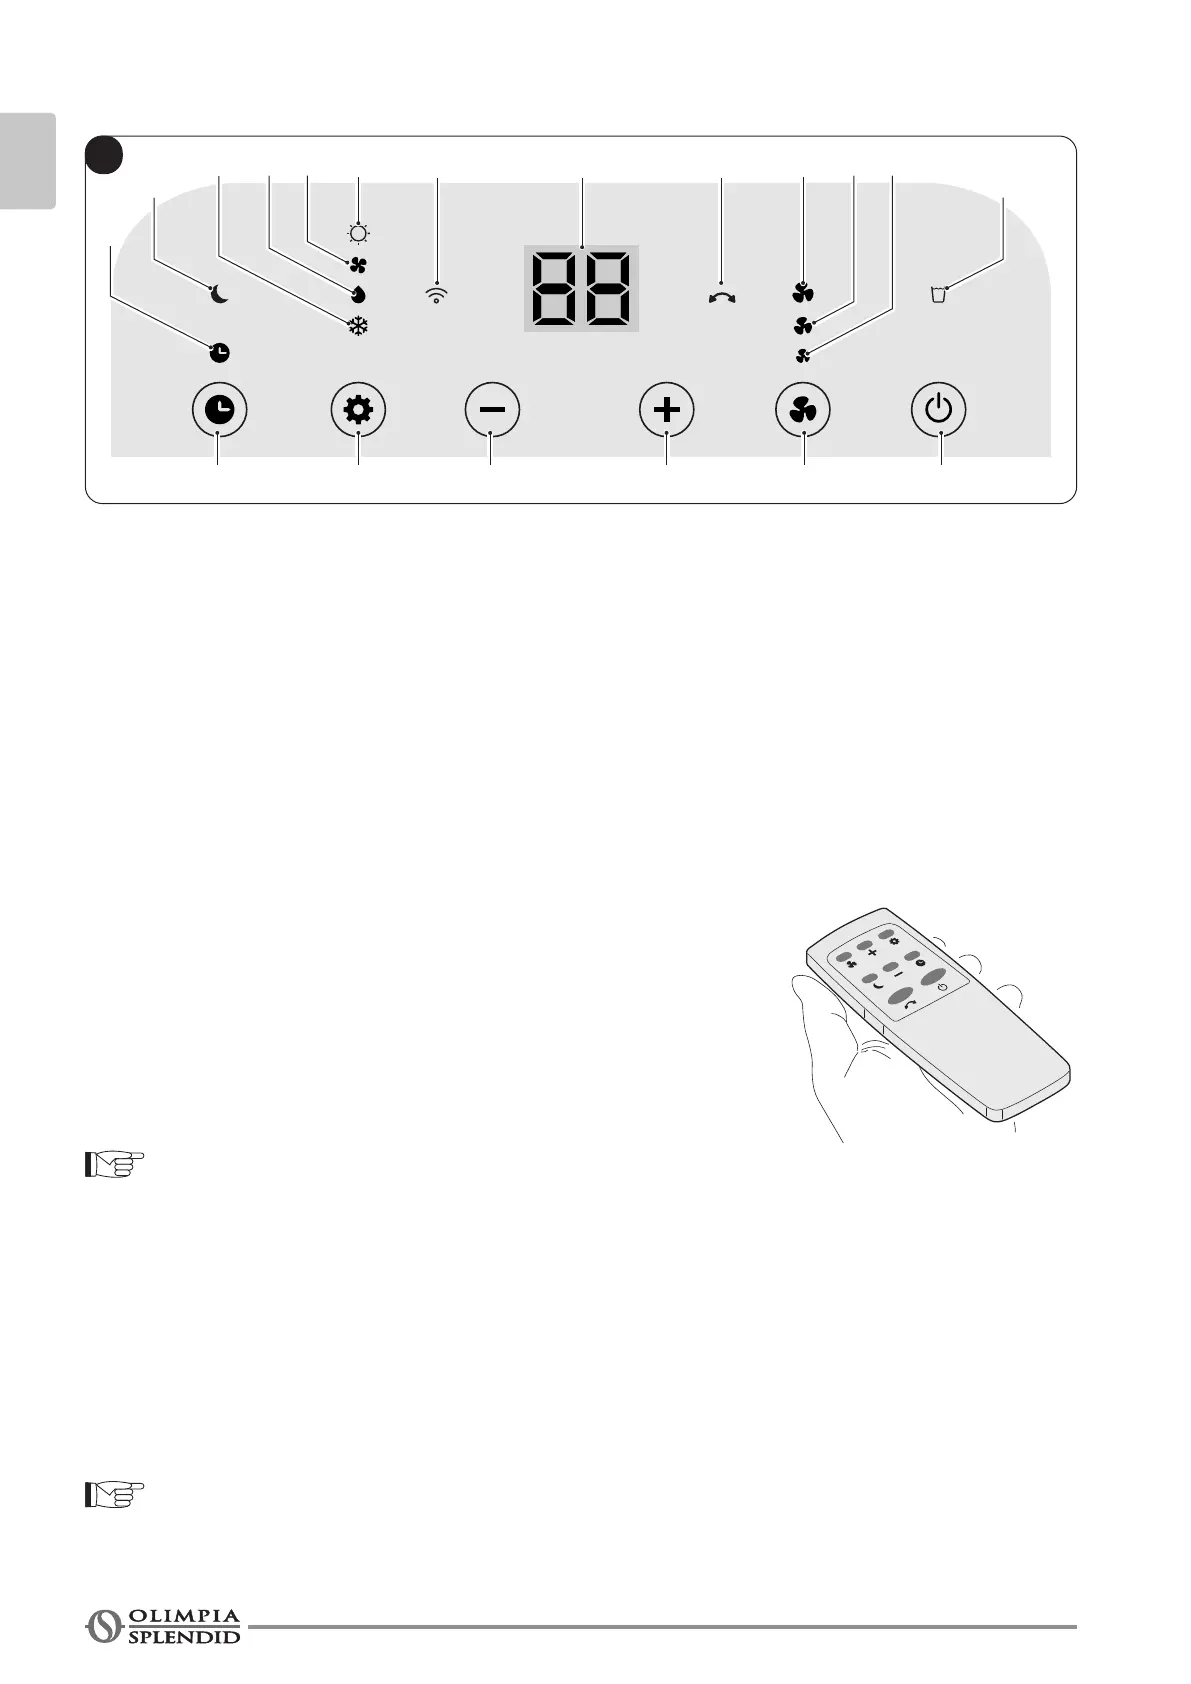
3.2 - CONTROL PANEL SYMBOLS AND KEYS (Fig.B)
• SW1: Running / Stand-by;
• SW2: Working mode selection
cooling =˃
=˃ dehumidication =˃
=˃ fan only =˃
=˃ heating (active only in the version with
heat pump)=˃
=˃ cooling =˃ ...
• SW3: Temperature/delay set increase;
• SW4: Temperature/delay set decrease;
• SW5: Timer mode;
• SW6: Fan mode / WiFI mode;
• D1: Set temperature/Timer
• S0: “High” ventilation LED;
• S1: “Medium” ventilation LED;
• S2: “Low” ventilation LED;
• S3a: Cooling mode LED;
• S3b: Heating mode LED (only in version with heat
pump
)
;
• S4: Dehumidication mode LED;
• S5: Fan mode LED;
• S6: Timer mode LED;
• S7: Sleep mode LED;
• S8: Swing LED;
• S9: Water tank full LED;
• S10: WiFI mode LED.
3.3 - USE OF THE REMOTE CONTROL
The remote control supplied with the air conditioner is the tool
which allows You to use the appliance in the most comfortable
manner.
It should be handled with care and in particular:
• Keep it dry (do not clean it with water or leave it outdoors in
bad weather).
• Avoid dropping or bumping it.
• Keep it out of direct sunlight.
• The remote control operates by means of an infrared beam.
• During use, there must not be any obstacle between the remote control and the air-conditioner.
• Ifotherappliancesintheroomhaveremotecontrols(TV,stereo,etc...),theremaybeinterference.
• Electronicanduorescentlightsmayalsointerferewithtransmissionsbetweenremotecontrol
and air-conditioner.
• Remove the batteries in case of prolonged disuse of the remote control.
3.3.a - Insertion of batteries
To insert the batteries correctly (not supplied):
a. Remove the batteries compartment cover (gure 14).
b. Insert the batteries into the relevant compartment (gure 14).
Check the polarity indicated on the bottom of the compartment .
c. Close the compartment correctly.
 Loading...