10
1. Control lock key position: PRG.
2. Type the [numbers] representing the desired percentage
rate. Up to four digits ranging from 0 to 99.99 can be used.
Two digits must be placed before the decimal point and
two must be placed after.
3. Define whether the percentage rate is a discount or an
add on by pressing the related code indicated below:
0 = Percent add on
1 = Percent discount
4. Assign, if needed, a percentage limitation to the add-ons
and discounts. Up to four digits ranging from 0 to 99.99
can be used. Two digits must be placed before the
decimal point and two digits after.
5. Press
or to assign the rate and function to
the respective key.
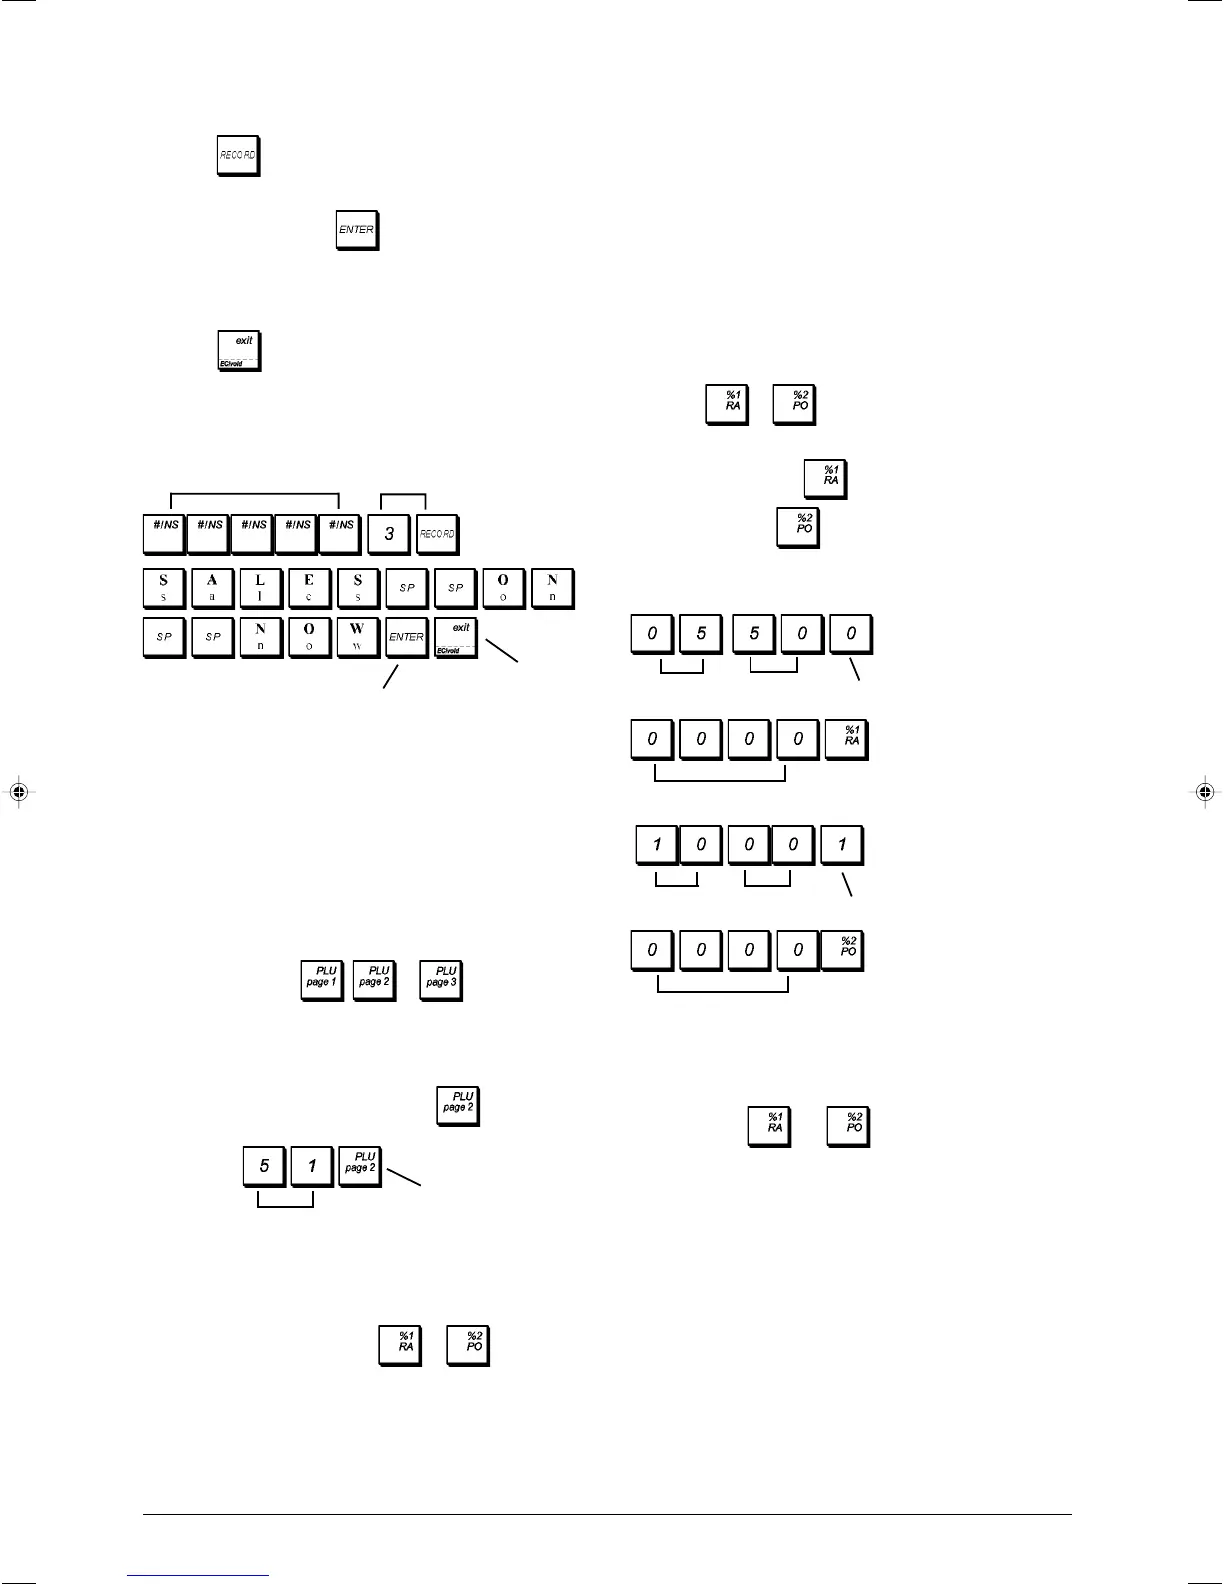
Example: Program the key with a standard 5.50%
add on rate and the
key with a standard 10%
discount rate, without limitation.
Type/Press:
Paid Out (PO) or Received on Account (RA)
A High Digit Lock Out (HDLO) and receipt print status can be
assigned to the
and keys when these keys are
used for Paid out and Received on account transactions. By
assigning an HDLO status, you make sure that Paid out and
received on account amounts do not exceed a maximum
value. By programming the receipt print status, you decide
whether or not the receipt header is printed on PO and RA
receipts. Make your selections by using the following options
(defaults in bold):
HDLO PO/RA Receipt Header
0 = No HDLO 0 = Print receipt header
1 = 0.01 - 0.09 1= Do not print receipt header
2 = 0.01 - 0.99
3 = 0.01 - 9.99
4 = 0.01 - 99.99
5 = 0.01 - 999.99
6 = 0.01 - 9999.99
Units
Decimals
Percent
add on code
3. To jump to a specific header or footer line to personalize,
type the [line number] on the numeric keypad and then
press
.
4. Enter the letters or characters of the string you wish to
define and then press
. You are now prompted to
personalize the following line.
5. Repeat steps 3 and 4 if you wish to program the remaining
programmable header or footer lines.
6. Press to exit.
Example: Change the third line of the default header to
SALES ON NOW using the CAPS Character Table.
Type/Press:
PLU Page Programming
Your cash register comes with 126 PLUs organized into the
following 3 levels (or pages): PLUs 1 to 42 on PLU Page 1,
PLUs 201 to 242 on PLU Page 2 and PLUs 301 to 342 on PLU
Page 3. You can redefine the PLU page contents by assign-
ing the range of 42 PLUs wanted to each page or level.
1. Control lock key position: PRG
2. Type the first PLU number [1 to 1500] of the range of 42
PLUs that you wish to assign and press the correspond-
ing PLU Page key
, or .
3. If the newly assigned PLUs are not programmed with a
price, proceed to do so as explained in section "Program
Fixed Price Look-Ups (PLUs)".
Example: Assign PLU range 51 to 92 to
.
Type/Press:
Percent Discount (-%) or Add On (+%)
Setting this option automatically calculates the preset dis-
count or add on rate each time
or is pressed.
The percentage rate can be discounted from, or added on to,
an individual item or sales transaction total. You can also
assign a percentage limitation to the add-ons or discounts so
that add-ons or discounts above the defined percentage will
be disabled.
Switch to Recipt header
definition mode
Confirm entered
header
Exit
Receipt header
line selection
PLU page or level
Range start PLU
Percent
discount code
Units
Decimals
No limitation
No limitation
 Loading...