17
ENGLISH
NOTE: By default, all the clerks are assigned the following
8-digit operational status code: 0000000. They are therefore
programmed as Normal clerks enabled to perform the op-
erations indicated above.
If a certain operations are disabled for a certain clerk, the
same clerk can, however, still perform such operations in
the Manager mode. In this case the control lock key must be
switched to the MGR position so all of the activities indicated
above, with the exception of operating in the Training Mode,
can be performed.
With the Clerk System active:
1. Control lock key position: PRG.
2. Type the number
to corresponding to
the clerk you want to program and then press .
3. Type the [VOID entries code], [Refund entries code],
[Negative % entries code], [Paid out entries code],
[Negative department and PLU transactions code],
[Coupon entries code], [Extra invoice issue] and
[Training mode code] in this order and by referring to
the previous table. An 8-digit status code must be entered.
4. Press
.
5. Define a three-digit secret code by typing three [numeric
keys] and then press
.
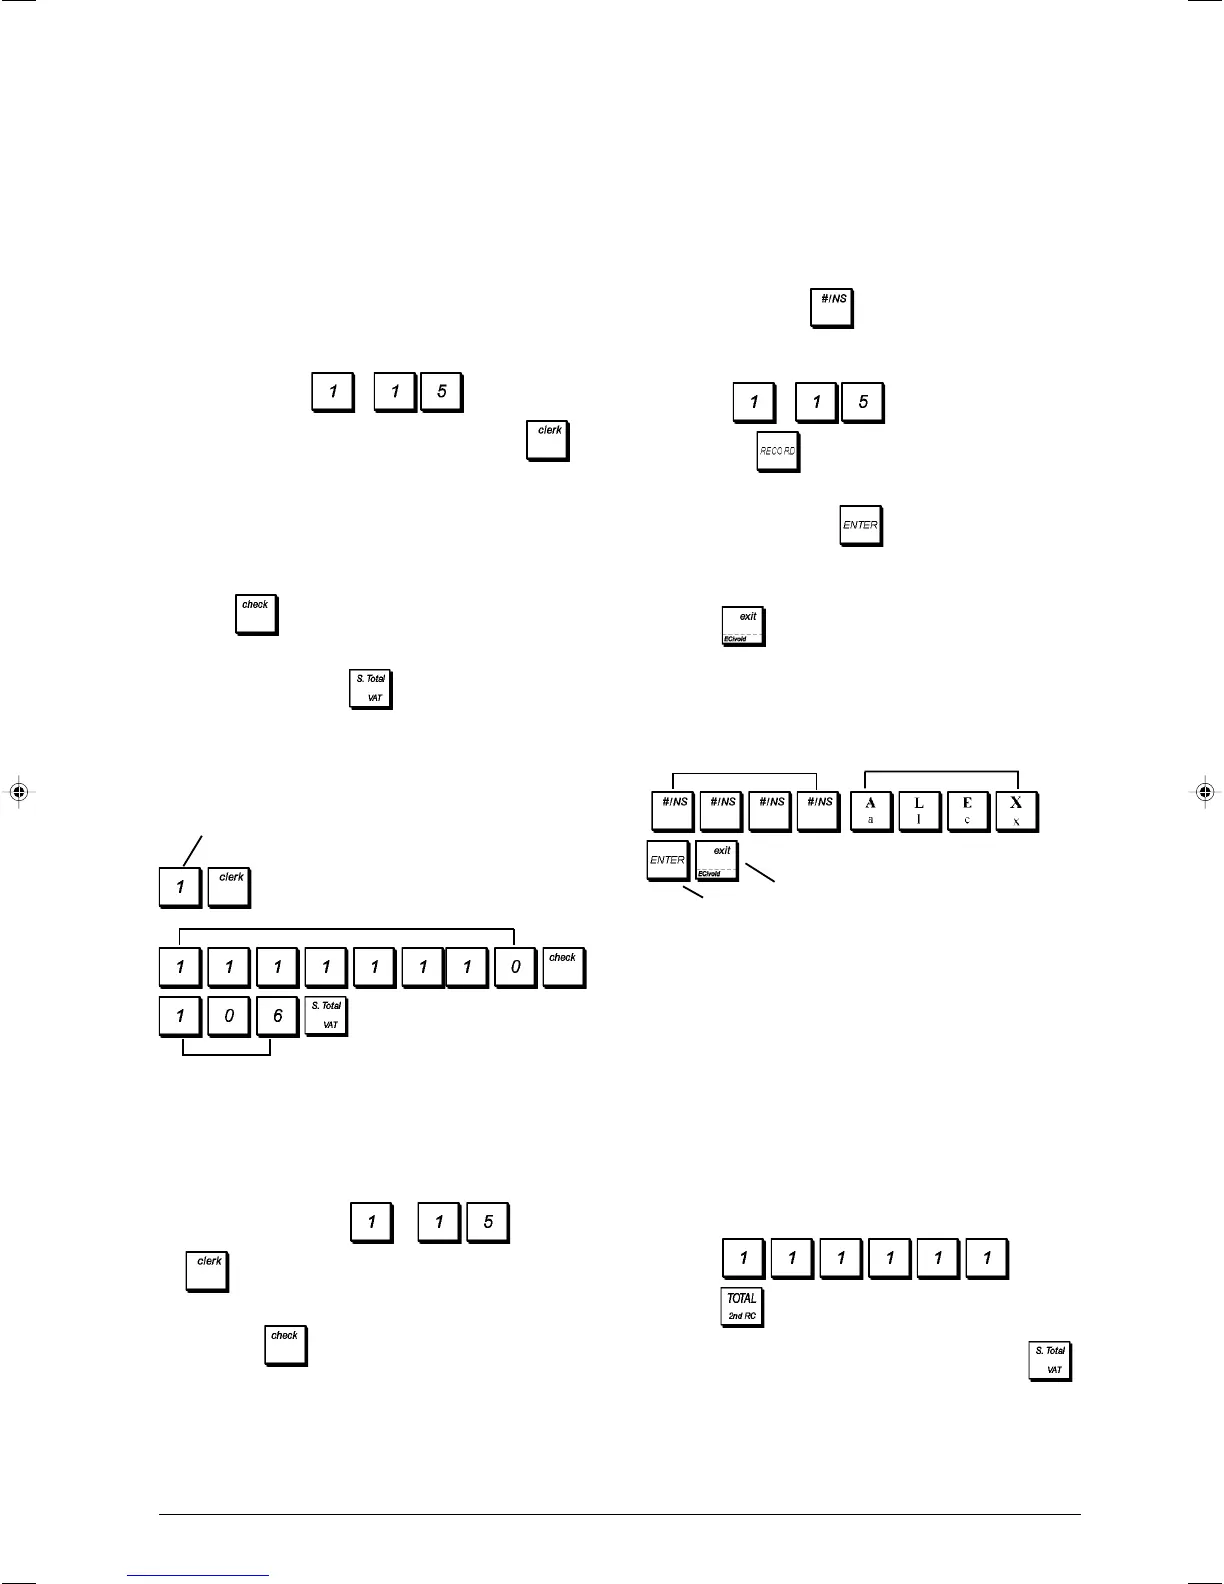
Example: Disable Clerk 1 for all activities, program as a
non-training clerk and assign secret code 106.
Type/Press:
Entering a Clerk Number/Secret Code Before
Cash Register Operations
1. Control lock key position: REG or MGR.
2. Type a Clerk number
to and press
.
3. Type the corresponding three-digit code (if programmed)
and press .
The clerk number is displayed (1 .....15) to identify the clerk
that is in use and that it is now possible to carry out
transactions. The clerk number or programmed name is
printed on the sales receipt and on the management reports.
Switch to clerk name
definition mode
Confirm entered clerk name
Exit
Clerk name entry
Clerk number
8-digit status code
3-digit secret code
Clerk Names
You can program a clerk name or identifier of up to 24
characters long by using the keypad or the Character Table.
It will be automatically printed on all receipts, journal records
and management reports.
1. Control lock key position: PRG. Text programming keypad
sheet installed.
2. Switch the cash register to the Clerk name definition
mode by pressing
repeatedly until displaying the
message indicating the first Clerk number.
3. To jump to a specific clerk to identify, type the clerk
number
to on the numeric keypad and
then press .
4. Enter the letters or characters of the string you wish to
define and then press . You are now prompted to
identify the following clerk.
5. Repeat steps 3 and 4 for all desired clerk names.
6. Press
to exit.
Example: Program Alex as the name for Clerk number 1
by using the CAPS character table.
Type/Press:
Manager Passwords
You can define two different manager passwords, one to
prevent unauthorized access to the machine's PRG and Z
modes and one to prevent unauthorized access to the X
mode.
Since the management report taken in the Z mode resets
transaction totals to zero, a management password pre-
vents the accidental resetting of these totals by unauthorized
personnel. The X mode password safeguards the confiden-
tiality of transaction report data.
Defining a PRG and Z Mode Manager
Password
1. Control lock key position: PRG.
2. Press
and then
press
.
3. Type your 4-digit manager password and press
.
NOTE: If you define a manager password of 0000, the
password security protection feature will not work.
 Loading...