D.
Condenser
Adjustment
®
Fig. 14
Fig.
15
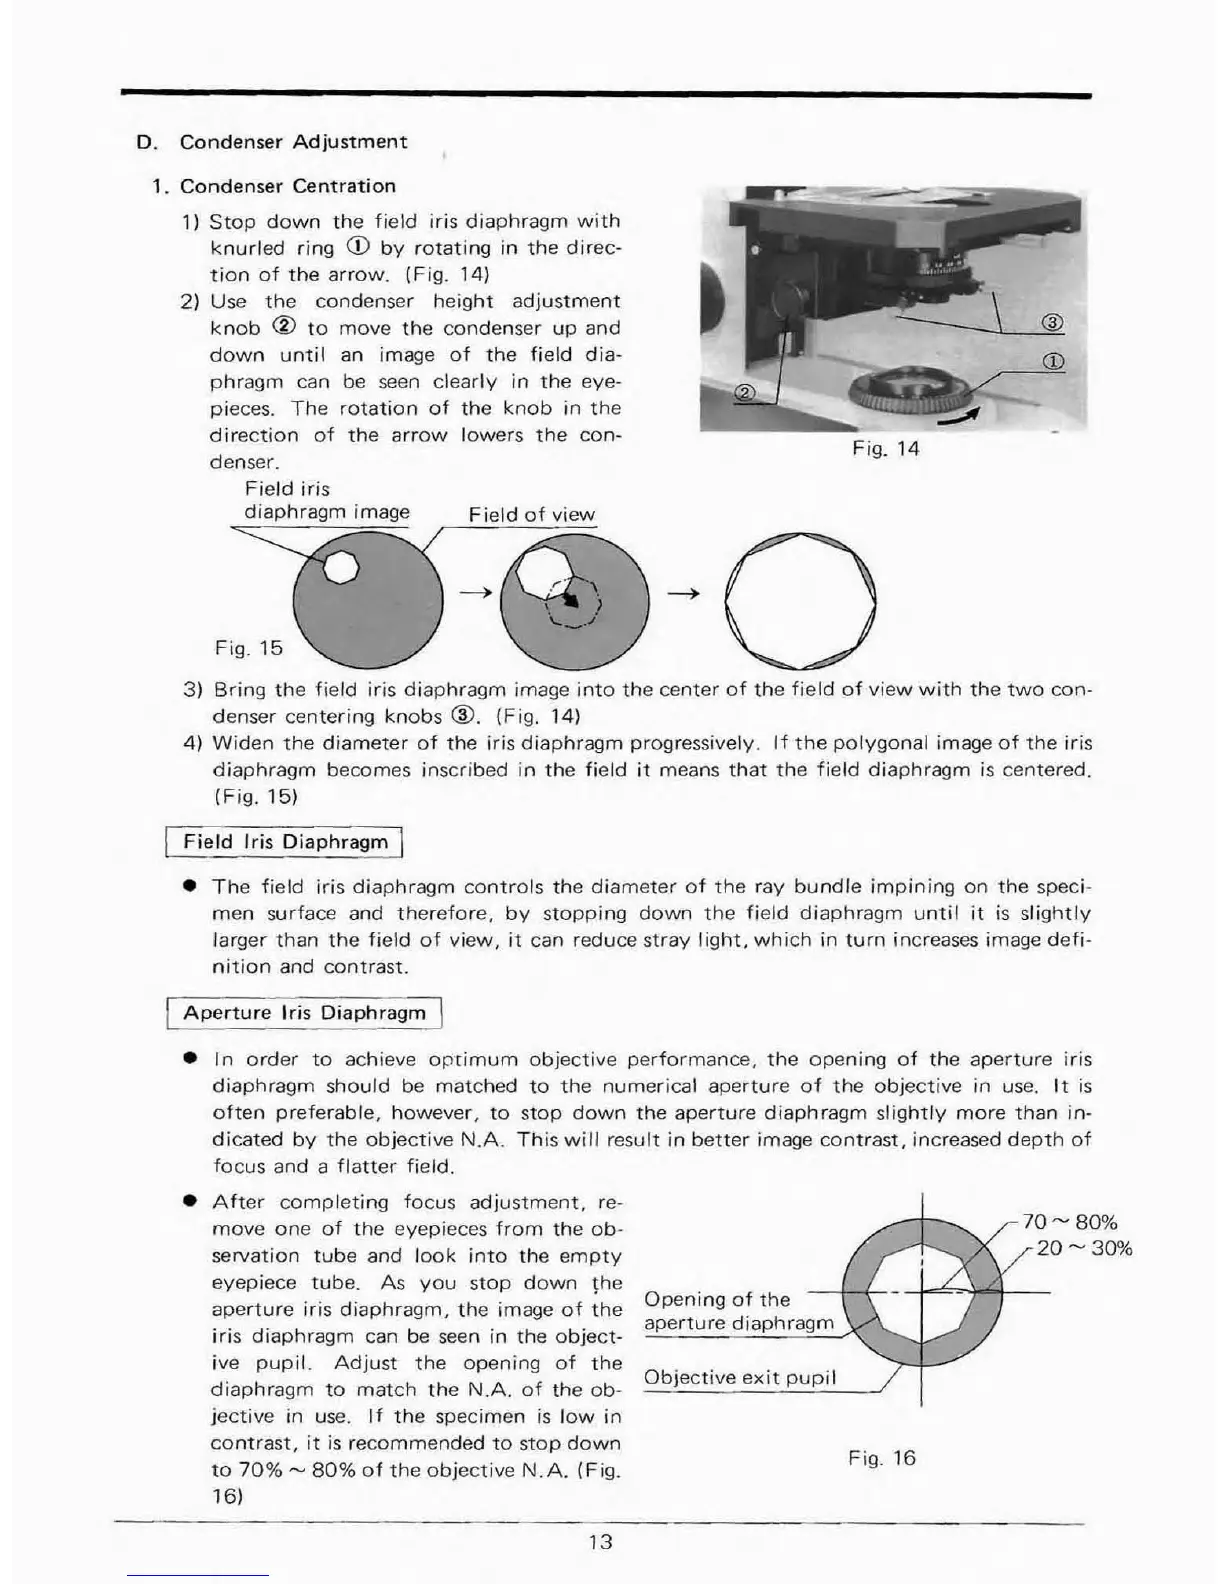
1. Condenser Centration
1)
Stop
down
the
field
iris
diaphragm
with
knurled
ring
CD
by
rotating
in
the
direc-
tion
of
the
arrow.
(Fig. 14)
2) Use
the
condenser
height
adjustment
knob
®
to
move
the
condenser
up
and
down
until
an image
of
the
field
dia-
phragm can be
seen
clearly
in
the
eye-
pieces.
The
rotation
of
the
knob
in
the
direction
of
the
arrow
lowers
the
con-
denser.
Field iris
diaphragm
image
Field
of
view
3)
Bring
the
field
iris
diaphragm
image
into
the
center
of
the
field
of
view
with
the
two
con-
denser
centering
knobs
®.
(Fig. 14)
4)
Widen
the
diameter
of
the
iris diaphragm progressively.
If
the
polygonal image
of
the
iris
diaphragm
becomes
inscribed
in
the
field
it
means
that
the
field
diaphragm
is centered.
(Fig.
15)
Field
Iris
Diaphragm
I
•
The
field
iris
diaphragm
controls
the
diameter
of
the
ray
bundle
impining
on
the
speci-
men
surface
and
therefore,
by
stopping
down
the
field
diaphragm
until
it
is
slightly
larger than
the
field
of
view,
it
can reduce stray light, which
in
turn increases image defi-
nition
and contrast.
70-80%
20
- 30","
Fig.
16
Opening
of
the
aperture diaphragm
Objective
exit
pupil
Aperture
Iris Diaphragm I
• In order
to
achieve opTimum objective performance,
the
opening
of
the aperture iris
diaphragm should be matched
to
the
numerical aperture
of
the
objective in
use.
It
is
often
preferable, however, to stop
down
the aperture diaphragm slightly more than in-
dicated
by
the
objective
N.A.
This
will
result
in
better
image contrast, increased
depth
of
focus
and
a
flatter
field.
•
After
completing focus
adjustment,
re-
move one
of
the
eyepieces
from
the
ob-
servation
tube
and
look
into
the
empty
eyepiece tube. As
you
stop
down
the
aperture iris diaphragm, the image
of
the
iris diaphragm can
be
seen
in
the object-
ive
pupil.
Adjust
the
opening
of
the
diaphragm
to
match
the
N.A.
of
the
ob-
jective
in
use.
If
the
specimen
is
low
in
contrast,
it
is
recommended
to
stop
down
to
70%
-
80%
of
the
objective
N.A.
(Fig.
161
13