Fig. 6
Fig. 7
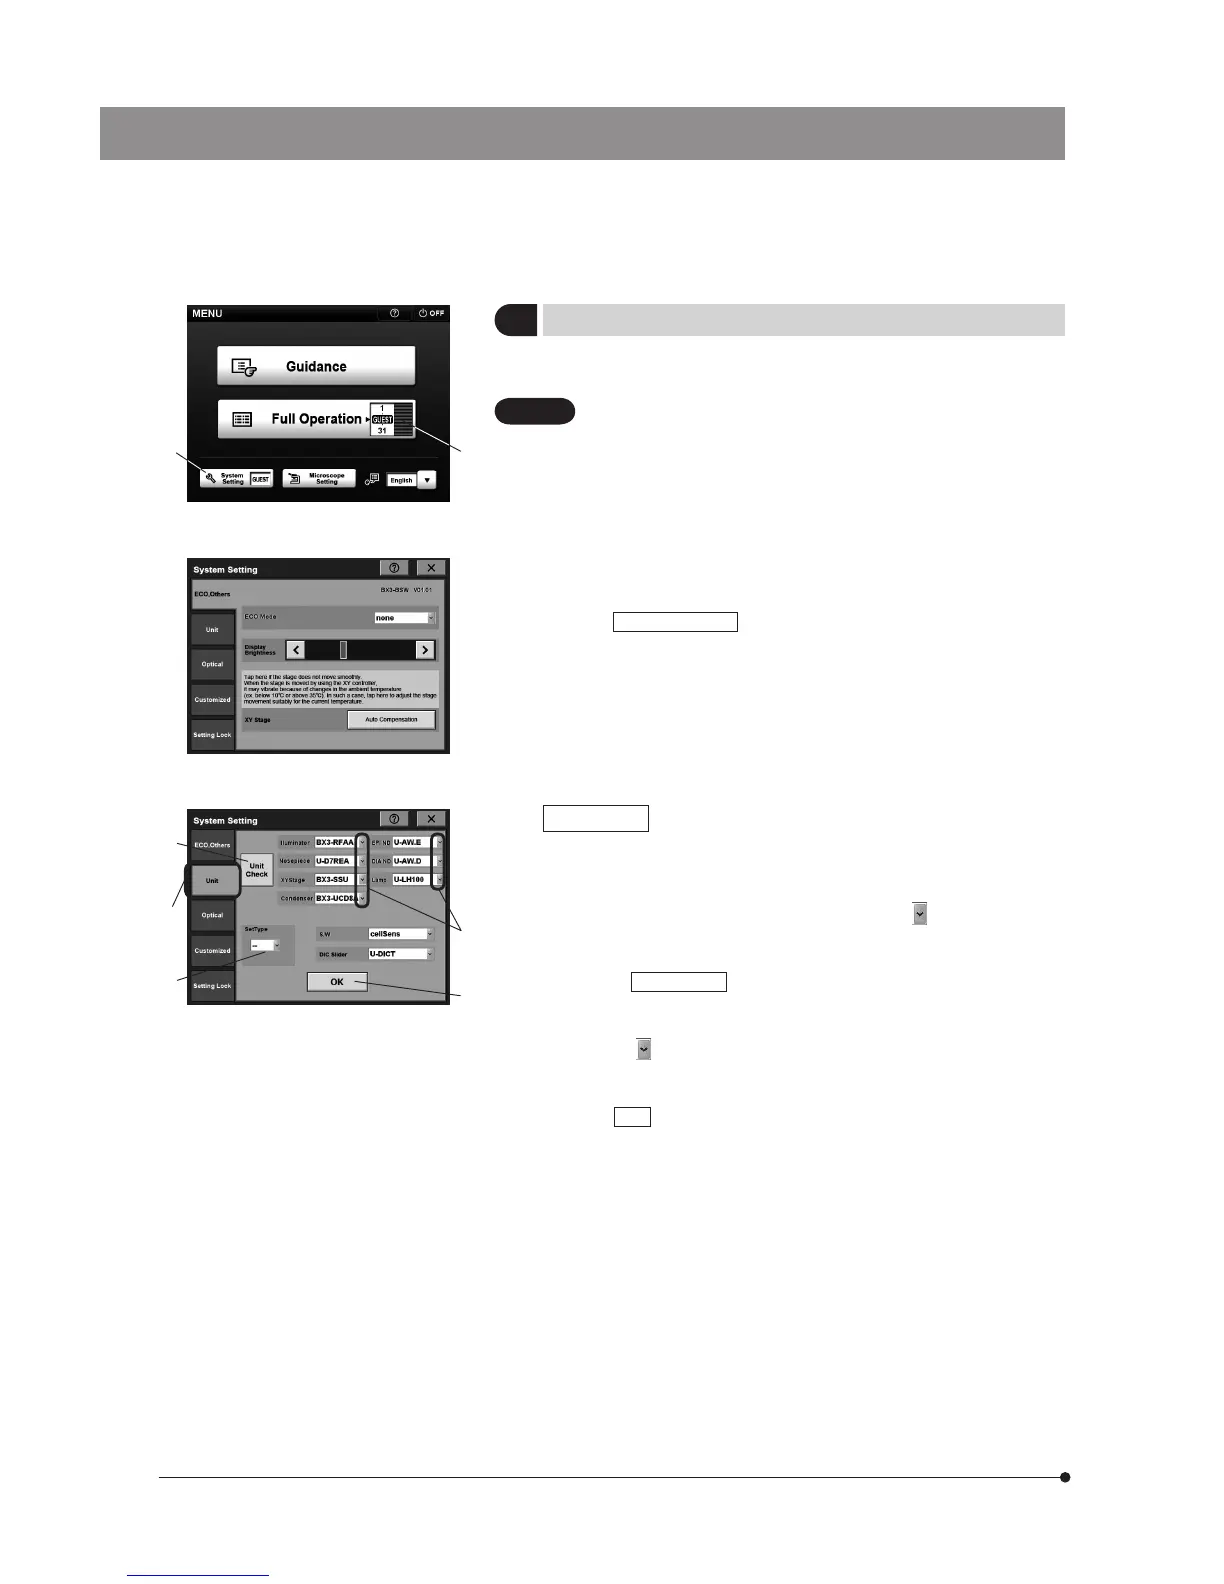
1
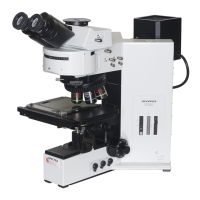
2
3 System Setting
(Figs. 6 to 14)
The system setup is required when using the system for the first time or
after replacing a unit connected to the microscope.
The microscope cannot be controlled unless the unit setting
and optical setting are completed. Be sure to set them.
1. On the [MENU] display, drag the [USER] dial 1 up or down to select one
of 1 to 31 or “GUEST.”
1 to 31: The microscope status at power OFF will be saved under
the selected number so that it can be reproduced when the
microscope is started up later.
GUEST: The microscope status is not saved and the microscope is started
up in the initial status next time it is started.
2. Tap the
System Setting
button 2. The [System Setting] display appears
on the touch panel screen (Fig. 7).
Unit Setting
This tab is used to set the units connected to the BX63.
1. Tap the [Unit] tab 1 in the [System Setting] display to open the [Unit]
display (Fig. 8).
2. Set the units connected to the BX63. When the
marking ² for the
desired module is tapped, the unit names are displayed. Select the units
used in the module and tap them.
} When the
Unit Check
button ³ is tapped, the information on the units
connected to the BX63 is acquired automatically and set. However, the
unit information on the lamp bulb and manual unit is not acquired.
} When the
marking | in [Set Type] is tapped, the set numbers are
displayed. Select a set number and tap it to set the units according to
the contents of the selected set. For the set contents, see page 46.
3. Tap the
OK
button ƒ to save the setting. If you want to set another item,
tap the tab for the desired setting. If you want to exit the system setting,
tap the [X] marking to close the [System Setting] screen.
CAUTION
Fig. 8
2
5
4
3
1