7
3-1 Base
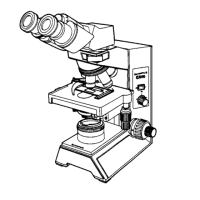
USING THE CONTROLS
33
1. Set the main switch @ to “ ” (ON).
2. Turn the light intensity knob ² clockwise in the direction of the arrow
to make the illumination brighter or counterclockwise to make it darker.
The numbers around the knob indicates the reference voltage values.
Fig. 3
Turning On the Bulb (Fig. 3)
1
Using the field iris diaphragm ring @, adjust the diameter of the field
iris for objective power to the extent that it just circumscribes the field
of view. When the field iris diaphragm is stopped down to circumscribe
the field of view, it will exclude extraneous light and improve image
contrast within the field of view.
#When using the 100X objective, the field iris diaphragm image will
not be visible within the field of view. Accordingly, stop down the
diaphragm to its smallest diameter.
Fig. 4
Field Iris Diaphragm (Fig. 4)
2
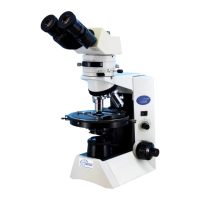
The dummy slider provided with the microscope frame can be used to
accommodate the optional transmitted light analyzer (U-ANT).
By preparing a transmitted light polarizer (U-POT) and polarizing light
condenser (CH3-CDP), simple polarized light observation becomes
possible.
Also refer to the instruction manual of the CX-POL.
Dummy Slider
3