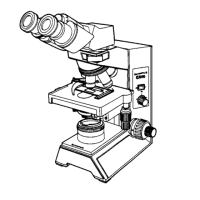
CX41
CONTENTS
IMPORTANT – Be sure to read this section for safe use of the equipment. –
3-1 Base.........................................................................................................................................................................................7
Turning On the Bulb Field Iris Diaphragm Dummy Slider
3-2 Focusing Block................................................................................................................................................................8
Adjusting the Coarse Adjustment Knob Tension Pre-focusing Lever
3-3 Stage................................................................................................................................................................................9-10
Placing the Specimen Moving the Specimen
3-4 Observation Tube..............................................................................................................................................10-12
Adjusting the Interpupillar Distance Adjusting the Tilt Adjusting the Diopter
Using the Eye Shades Light Intensity Ratio of Trinocular Tube U-CTR30-2
Photomicrography/TV Observation Using the Eyepiece Micrometer Disk
3-5 Condenser................................................................................................................................................................12-14
Centering the Field Iris Diaphragm Aperture Iris Diaphragm
Using Filters Using Darkfield Ring CH2-DS
Using Low-Power Light Adjustment Objective CX-LA
Compatibility of Option Units and Condensers
3-6 Immersion Objectives.............................................................................................................................................15
3-7 Simplified Phase Contrast Ring Slits CX-PH1/PH2/PH3 .........................................................16
1-3
1 NOMENCLATURE
4
2
5-6
3
7-16
5
19
6
20
7
21-24
SUMMARY OF BRIGHTFIELD OBSERVATION PROCEDURE
USING THE CONTROLS
SPECIFICATIONS
4
17-18
TROUBLESHOOTING GUIDE
OPTICAL CHARACTERISTICS
ASSEMBLY
– See this section for the replacement of the light bulb. –
PROPER SELECTION OF THE POWER SUPPLY CORD
Page
1 2 3
1
1 2
1
4
6
2
2
1
5
3
5
7
4
6
2
Correct assembly and adjustments are critical for the microscope to exhibit its full performance. If you are going to
assemble the microscope yourself, please read Chapter 7, “ASSEMBLY” (pages 21 to 24) carefully.
...................................................25-26
3