10
CX41
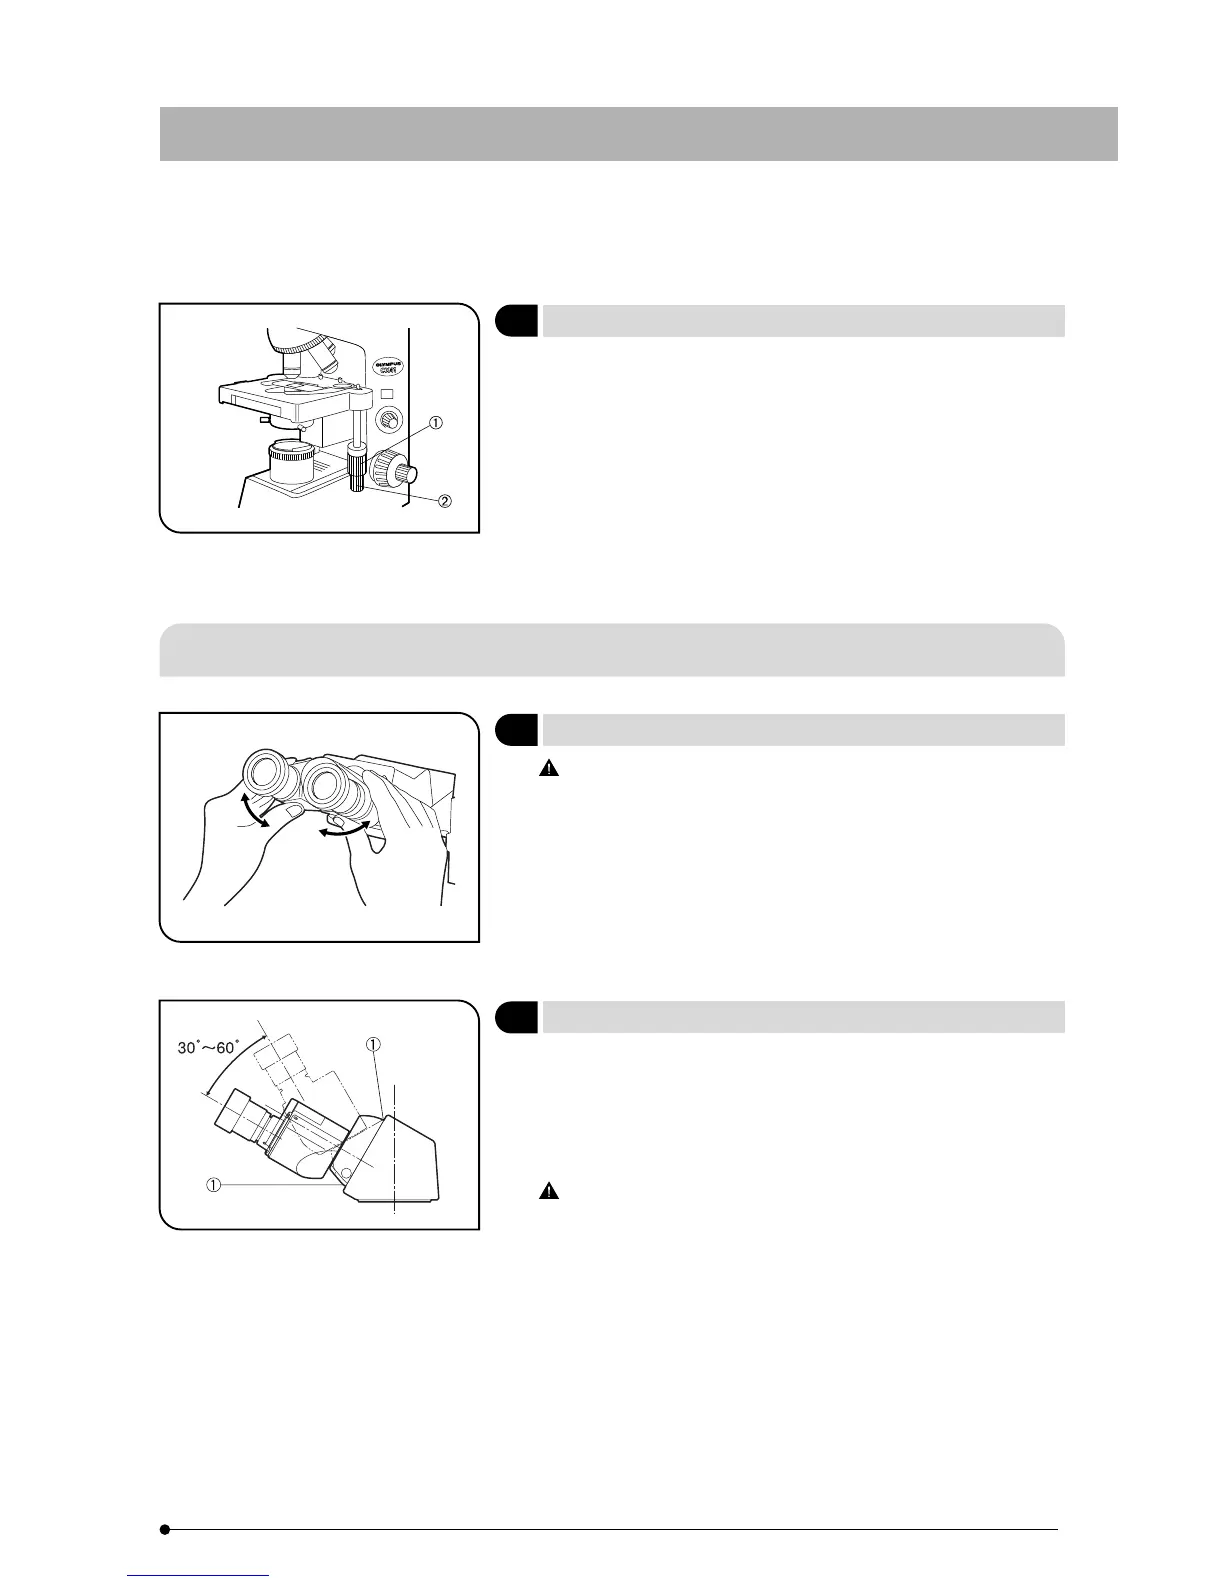
Turn the upper knob which is the Y-axis knob @ to move the
specimen in the vertical direction, and turn the lower knob which is the
X-axis knob ² to move it in the horizontal direction.
#Do not use the specimen holder or stage to move the specimen,
for this will damage the rotating mechanisms of the knobs.
#When the stage and specimen holder are stopped by the pre-
focusing dial, the tension of the X-axis/Y-axis knobs increases. In
this case, do not attempt to turn the knobs to move the stage
beyond the stopped position.
Fig. 8
Moving the Specimen (Fig. 8)
2
3-4 Observation Tube
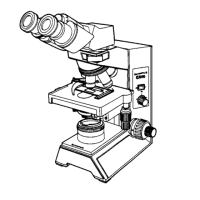
Be careful not have your finger caught by the clearance below the
binocular tube during interpupillary distance adjustment.
While looking through the eyepieces, adjust for binocular vision until
the left and right fields of view coincide completely. The index dot
·
indicates the interpupillary distance.
}Note your interpupillary distance so that it can be quickly duplicated.
Fig. 9
Adjusting the Interpupillar Distance (Fig. 9)
1
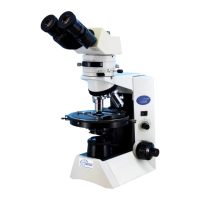
}The tilting observation tube can be adjusted to a height and angle
suitable for ease of observation.
Hold the binocular section with both hands and move it up or down
as desired.
#To prevent damage to the mechanism, do not apply an excessive
force above or below the upper and lower stop positions.
Be careful not to have your finger by the clearance @ on the cover
during tilt adjustment.
Fig. 10
Adjusting the Tilt (U-CTBI only) (Fig. 10)
2