Basic camera operations
1
29
EN
1
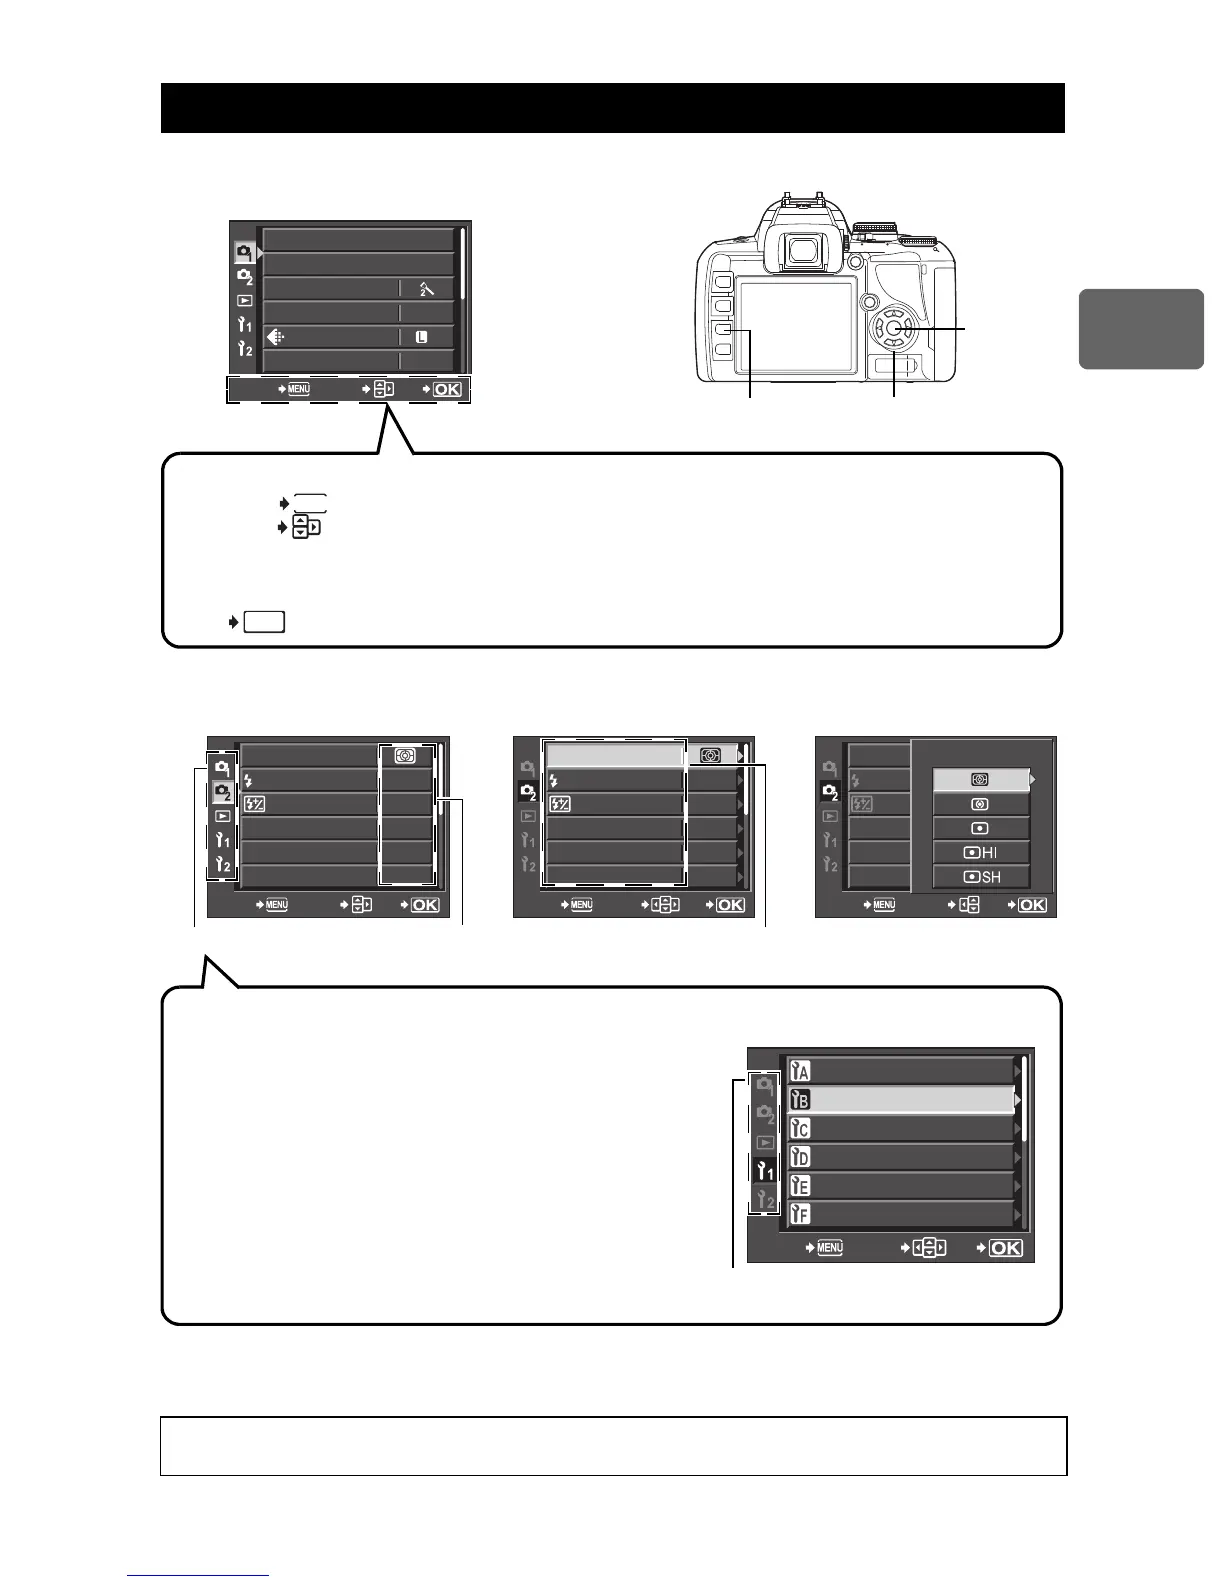
Press the
MENU
button.
•
The menu is displayed on the LCD monitor.
4
Press the
i
button to confirm your settings.
•
Press the
i
button repeatedly to exit the menu.
Using the menu
2
Use
ac
to select a tab
and
d
to set an item.
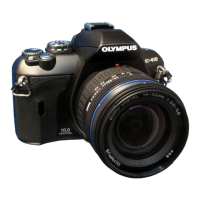
3
Use
ac
to select a function and
d
to go to the
setting screen.
For details on the functions that can be set with the menu, refer to “Menu
directory” (
g
P. 127).
MENU
button
p
Arrow pad
i
button
CARD SETUP
NORM
AUTO
CUSTOM RESET
PICTURE MODE
GRADATION
WB
CANCEL SELECT
GO
N
Operation guide is displayed at the bottom of the screen.
: Press the
MENU
button to cancel the setting.
: Press
dac
on the arrow pad to move the cursor and select an item.
The symbols displayed on the LCD monitor correspond to the arrow pad
shown below.
t
:
a
u
:
c
8
:
d
7
:
b
: Press the
i
button to confirm your settings.
MENU
CANCEL
Tab The current setting is displayed
METERING
S-AF
0.0
OFF
OFF
RC MODE
AF MODE
AF AREA
ANTI-SHOCK
z
AUTO
CANCEL SELECT
GO
S-AF
AUTO
0.0
METERING
OFF
OFF
RC MODE
AF MODE
AF AREA
ANTI-SHOCK
z
CANCEL SELECT
GO
METERING
RC MODE
AF MODE
AF AREA
ANTI-SHOCK
CANCEL SELECT
GO
METERING
Types of tabs
W
(Shooting menu 1)
Sets shooting functions.
X
(Shooting menu 2)
Sets shooting functions.
q
(Playback menu)
Sets playback functions.
Y
(Custom menu 1)
Customizes shooting functions. Depending on the
function being customized, the function is further
separated into 8 tabs (A to H).
Z
(Custom menu 2)
Sets the basic functions of the camera.
AF/MF
BUTTON/DIAL
DISP/
8
/PC
EXP/
e
/ISO
#
CUSTOM
CANCEL SELECT
GO
K
/COLOR/WB
Screenshot of menu with the
Y
tab selected
Tab