OlympusFV1000Userguide August3,2011
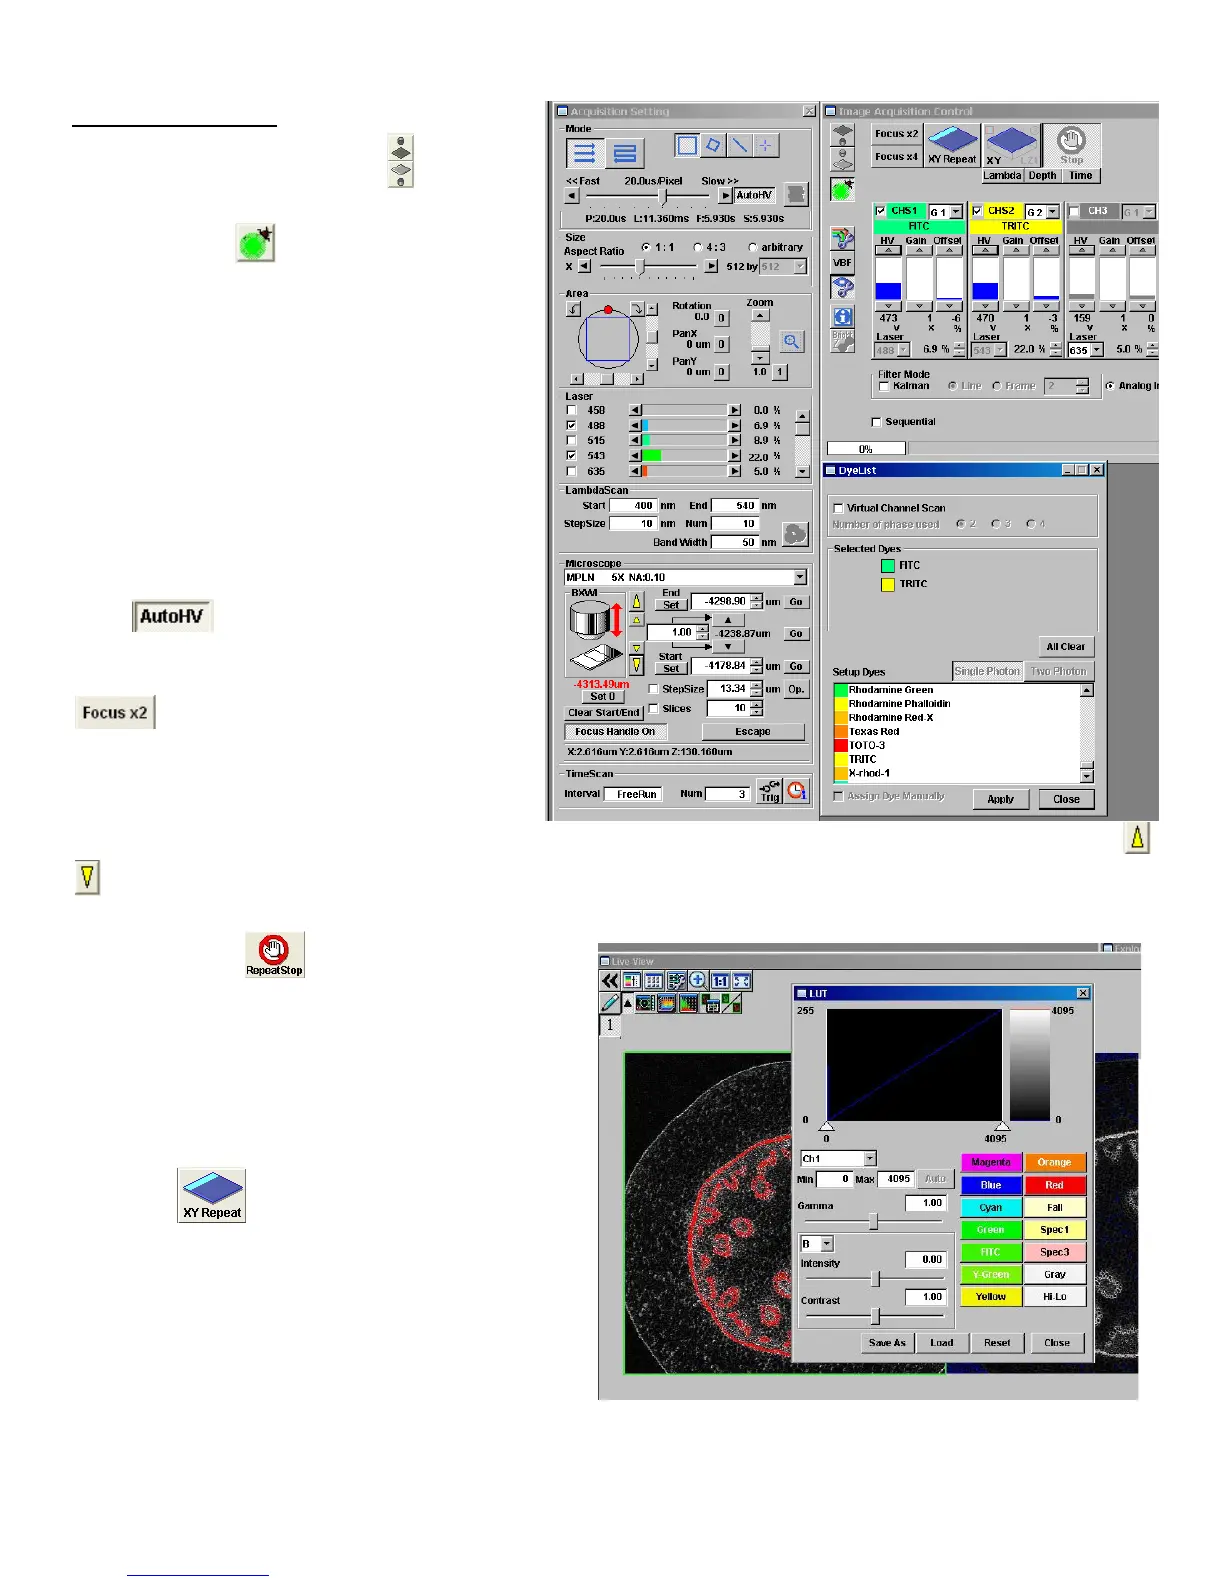
D.ImageAcquisition
Clickoffthelightsourcebuttontoturnoff
thenon‐laserlight.
ClickonDyelist buttonanddoubleclick
onthefluorescentdyesyouwanttouse(e.g.
FITCandTRITC)fromthelist.ClickApply
buttonb(ifAssignDyeManuallybuttoncis
checked,uncheckbeforepressingApply
button).Itwillactivatethelaserlinesandset
detectionchannelsupaccordingtothedyes
youselected.
ChooseImagesize(default‐512x512)from
Sizepanel d.
Pressbutton(ifnotpressed)to
automaticallyadjustHVandOffsetvalues
accordingtothescanspeedchange.Click
buttontoscanthesample.Itwill
scanfastat2us/pixelandshowlow‐quality
(pixelated)imageinaLiveViewwindow.
Whilescanning,focusontotheregionofinterestwiththeremotefocuscontrollerorbyclickingarrowhead
buttonsinthemicroscopewindow(largearrowheadmovetheobjectivebytheextentsetbyStepSizee,
andthesmallarrowheadsmovestheobjectivebythehalfofthelargearrowheadstepsize).
ClickStopbutton tostopscanning.
SettheLaseroutputlevel
f(settheMulti‐Arlaser
to1‐5%andtheHeNelaserto1‐25%,depending
onyoursamplecondition,butnolowerthan1%).
Setthescanspeedg to10~12.5us/pixelandclick
XYrepeat buttontoscan(youcanscan
imagefasterorslower,dependingonyoursample).
Detector(CHS)ChannelSetting
:Adjustthe
brightnessbyHV(andGain)andbackgroundblack
level(Offset)ofindividualchannels.KeeptheHV
valuebelow700(beyond700,thebackground
noisewillshowup).
c
e
d
g
b
f
h