4
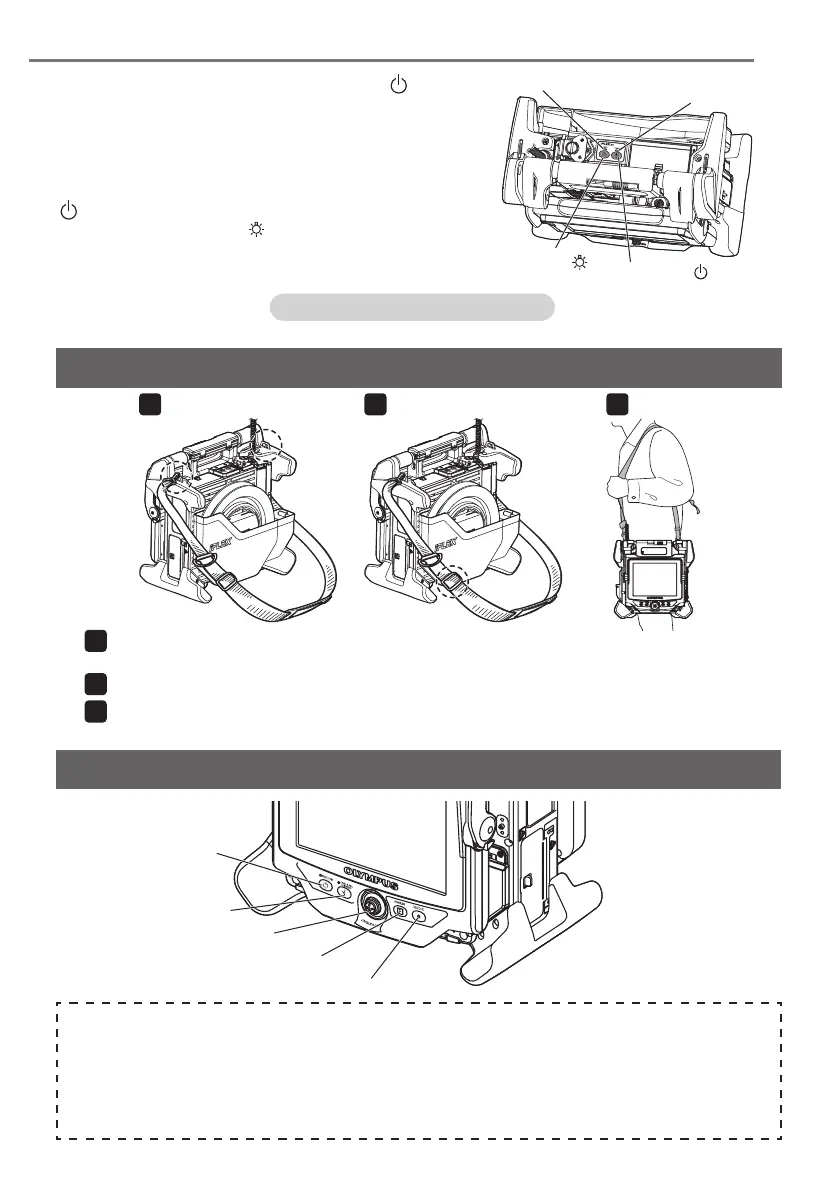
[POWER] button
( )
[POWER] indicator
[LIGHT] button (
)
[LIGHT] indicator
Setup is now complete.
6. Turning on power
To turn ON the power, press the [POWER] button ( )
of the main unit approx. one second.
After pressing the [POWER] button approx. one sec-
ond, the [POWER] indicator lights up and the power
turns on.
The display screen and menu operations become
enabled approx. 35 seconds after the [POWER] button
( ) is pressed.
Pressing the [LIGHT] button (
) turns ON or OFF the
light.
While the light turns ON, the [LIGHT] indicator lights
on.
1 2 3
Using the strap
When the shoulder strap is not attached to the main unit, attach the shoulder strap hooks to the
two belt brackets.
Adjust the length of the shoulder strap by the length adjuster buckle.
Hang the shoulder strap on your shoulder and hold the shoulder strap firmly with your hand.
2
[ROTATE] button
[FREEZE] button
[RECORD] button
[ANGLE SEL/CENTER] button
[ANGLE/LOCK] joystick
Part names and functions
Perform the angulation operation
Operate the [ANGLE/LOCK] joystick carefully in the direction you want to observe.
Lock the angulation status
1. While the angulation section is bent, press the [ANGLE/LOCK] joystick to lock the angulation
section.
2. Even though the angulation is locked, the angulation operation can be adjusted finely by operating
the [ANGLE/LOCK] joystick.