If the beep cannot be heard on your Olympus Analytical Instruments, check if “BEEP ON/OFF” in the “SETUP” menu is set to “OFF”. If so, set it to “ON.”
S
Samantha GomezAug 25, 2025
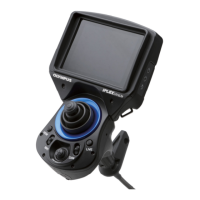
Why my Olympus Analytical Instruments system cannot be turned on?
K
Kenneth BrennanAug 25, 2025
If your Olympus Analytical Instruments system is not turning on, verify the following:
* Ensure the AC adapter or battery is correctly connected.
* Confirm the power button on the main unit is set to the 'on' position.
* Make sure you are using the designated AC adapter or battery.
L
Laurie WongAug 25, 2025
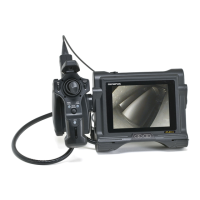
How to fix the issue when the illumination does not light on Olympus Analytical Instruments?
J
jose54Aug 26, 2025
If the illumination on your Olympus Analytical Instruments is not working, consider these potential causes:
* Ensure the LIGHT button is activated.
* Check that the optical adapter is properly attached.
* Clean any dirt from the electrodes on the optical adapter or the insertion tube distal end.
* If the LEDs on the distal end of the optical adapter are not working, replace the optical adapter.
A
Andre RamirezAug 26, 2025
What to do if an error message appears when a USB Flash Drive is connected to Olympus IPLEX LX Analytical Instruments?
A
Amber DeckerAug 27, 2025
If you receive an error message when connecting a USB Flash Drive to your Olympus Analytical Instruments, the issue could be:
* The USB Flash Drive is not recommended for this system. To solve this, stop the inspection, turn the instrument off and then on again, and use a recommended USB Flash Drive.
* A USB device other than a USB Flash Drive is connected. Try disconnecting all USB devices except the USB Flash Drive.
K
kimweaverAug 27, 2025
Why does the self-check trigger during use and display a message on Olympus IPLEX LX?
M
Michele SchmidtAug 27, 2025
If the self-check function triggers during use and displays a message with an alarm on your Olympus Analytical Instruments, it indicates that the inside of the main unit was too hot. To resolve this, terminate the inspection, allow the instrument to cool down, and then turn the power back on.
S
Sherri MirandaSep 14, 2025
Why does a message appear when increasing the light emitted on Olympus IPLEX LX?
M
Michelle SloanSep 14, 2025
If a message appears when increasing the light emitted to use the high beam on your Olympus Analytical Instruments (LX only), it indicates that the distal end of the insertion tube is too hot. Cool the distal end of the insertion tube to use the high beam.
R
Robert WeberSep 12, 2025
Why is the color reproduction poor on Olympus Analytical Instruments?
L
lericksonSep 12, 2025
If the color reproduction is poor on your Olympus Analytical Instruments, the white balance might be set improperly. Try re-adjusting the white balance.
A
Andrew BowenSep 13, 2025
Why is the image noisy on Olympus Analytical Instruments?
G
Gary RobertsSep 13, 2025
If the image appears noisy on your Olympus Analytical Instruments, the automatic brightness control may be set erroneously. Perform the [BRT] lever operation to configure the proper setting.
P
Pedro LeonSep 5, 2025
Why is the illumination dim on my Olympus Analytical Instruments?
C
chapmankellySep 5, 2025
If the illumination appears dim on your Olympus Analytical Instruments, consider these factors:
* The optical adapter tip is dirty. Clean it with a clean piece of gauze or cotton swab.
* Extended use under high ambient temperatures causes decreased light emissions. In this case, replace the optical adapter.
D
Douglas AyersSep 2, 2025
What to do if the Olympus IPLEX LX Analytical Instruments system cannot be turned off?
H
hdavisSep 2, 2025
If your Olympus Analytical Instruments system cannot be turned off, it suggests that the main unit is damaged. To turn off the power, remove the AC adapter or the battery from the main unit.