Preparation for Use
MOBILE WORKSTATION WM-NP2
42
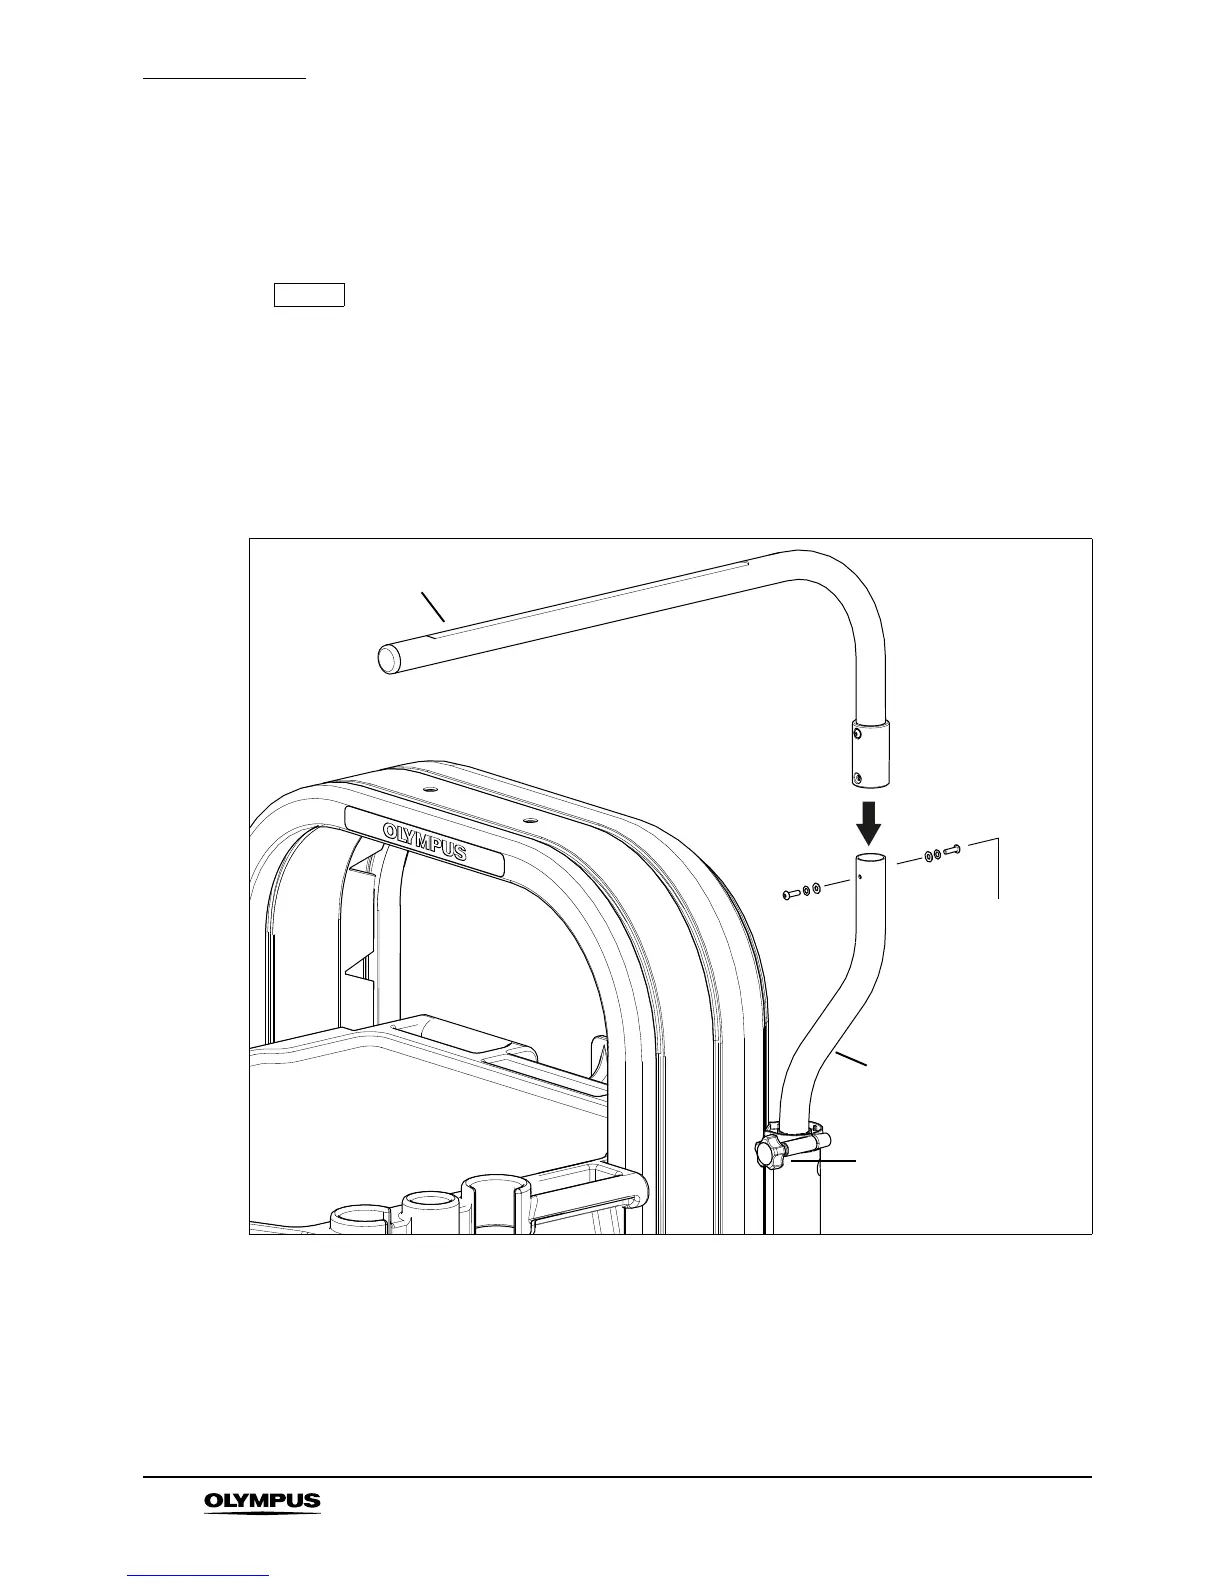
4.6 Scope hanger assembly
If you purchase the set containing a scope hanger, it is delivered with the scope pole and pole
support mounted on the right hand side of the product. Use the steps shown below to mount other
parts.
The scope hanger can be mounted on either left or right hand side of the
workstation. To install on the left hand side, refer to step 6.
1. Remove the two M4 screws, crinkle washers and plain washers from the vertical scope pole
as shown in Figure 4.18.
2. Locate the horizontal scope pole onto the vertical pole, align the fixing holes and secure
using the M4 screws and washers removed previously (Figure 4.18).
3. Referring to Figure 4.19, slide the scope hanger onto the horizontal scope pole. Move to the
required position and tighten the handwheel. Repeat for second scope hanger. To remove,
loosen the handwheel and slide off.
Figure 4.18