4 Maintenance and Inspection
4-2 Replacing the battery
BN50T/BN75T/BN100T/BN150T/BN220T/BN300T
4-6
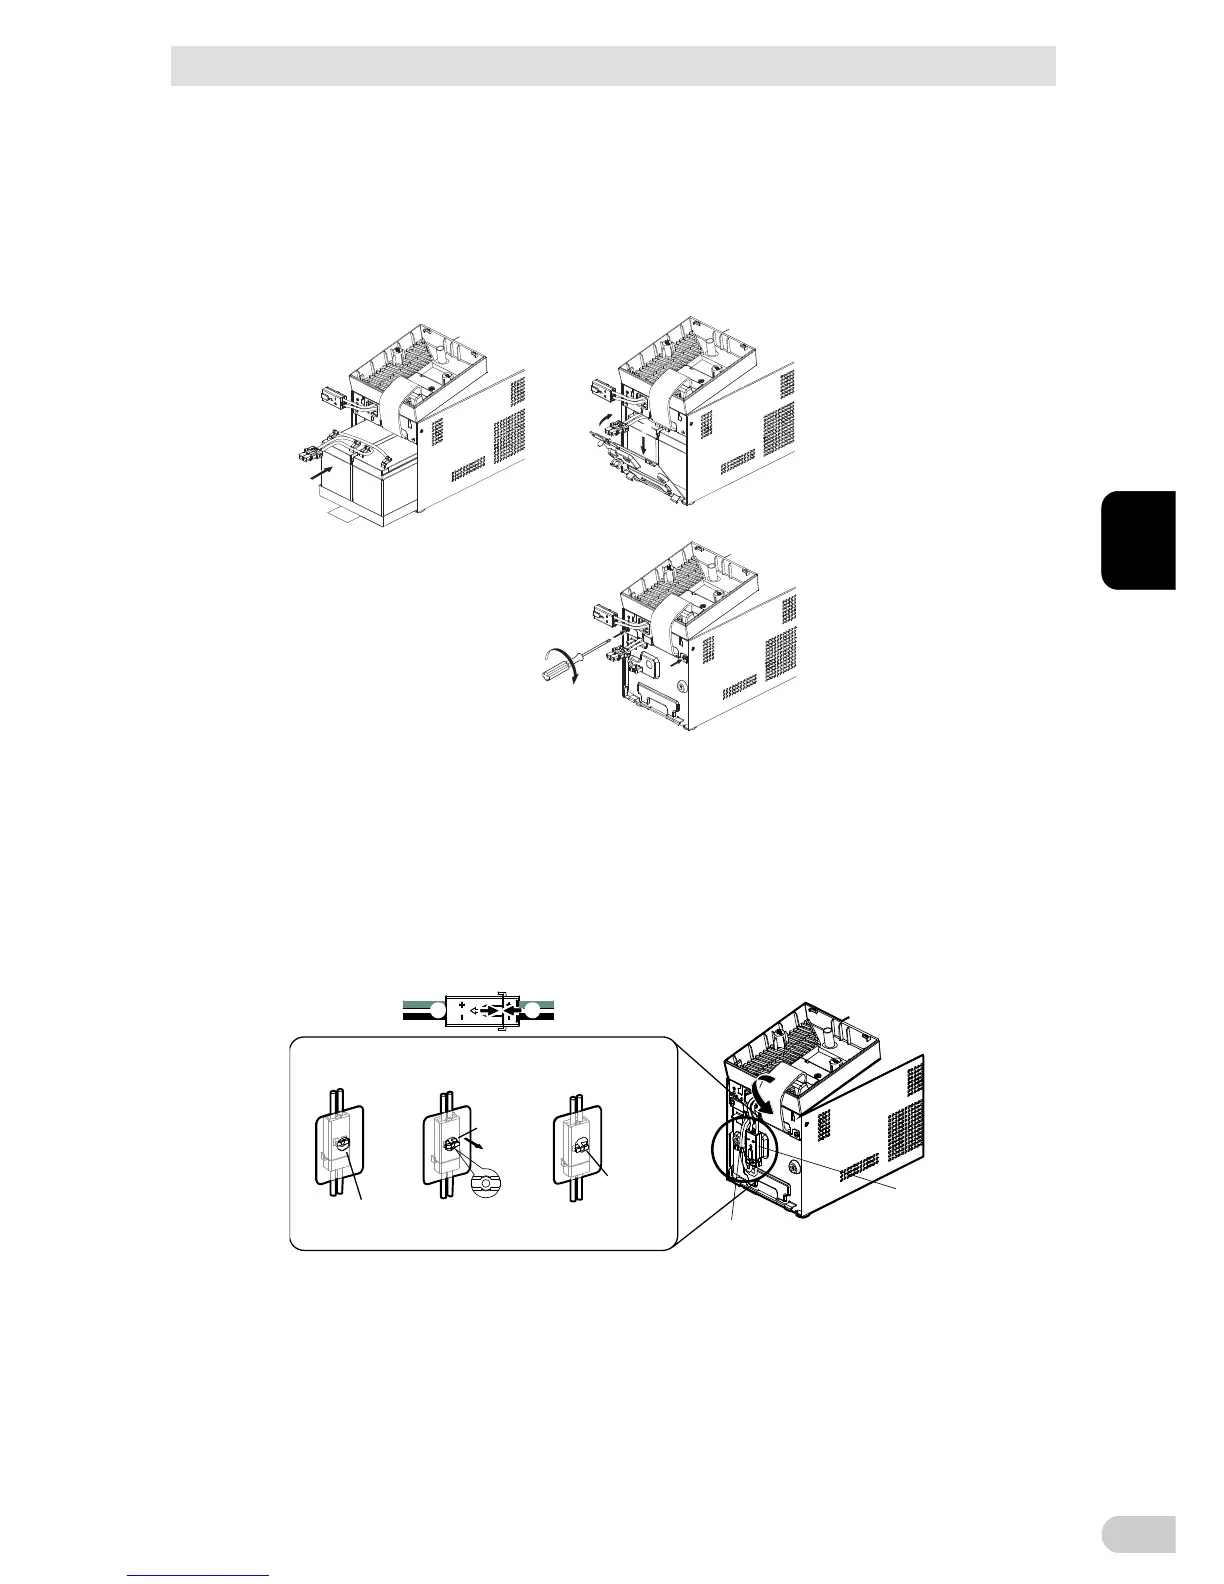
3. Turn the 2 screws that fix the plate cover counter-clockwise to remove them. 1)
Pull the plate cover towards you 2) and lift it up to remove it.3)
1)
Remove the 2 screws.
3)
2)
4. Hold the pullout label at the bottom of the battery pack and remove the battery pack.
Caution (for maintenance)
Do not hold the connector or cable of the battery pack.
Use the red tape on the top of the battery pack, which is 10 cm from the inner edge of
the battery, to gauge how much further you need to pull the battery to remove it. Hold
the battery securely with both hands so as not to drop it.
Battery connector
Pullout label
(Pull this to remove.)
Battery pack
4 Maintenance and Inspection
4-2 Replacing the battery
BN50T/BN75T/BN100T/BN150T/BN220T/BN300T
4
4-7
5. Insert a new battery into the UPS as far as it will go. 1)
Replacement battery pack
BN50T/BN75T: Model BNB75T
Attach the plate cover in order of 2) to 3).
Use a screwdriver to securely tighten (clockwise) the 2 screws you removed. 4)
Do not pinch the cable with the plate cover.
1)
4)
3)
2)
Tighten the 2 screws.
6. Insert the battery connector until it is locked. 1)
Hold the battery connector, move the connector hook to the center of the fastening hole
in the plate (2)-1), insert through the hole (2)-2), and lower the connector to lock in the
hole (2)-3).
Install the battery cable in the cable holder. 3)
Lower the front panel 4).
Note: You may hear a “pop” sound when you connect the battery if it is replaced after the
unit’s operation is stopped, but this sound is not abnormal.
Connector’s hook
align the hole
Connector
move
through
the hole
Connector
locked
2)-1 2)-2 2)-3
4)
1) 1)
Back of the plate cover
3) Cable holder
Battery connecto
 Loading...