Page 5 of 31
OnCommand® Link Package
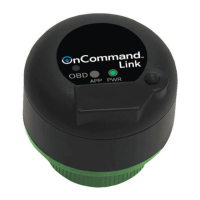
The package provided to you for the OnCommand® Link contains the following:
1. OnCommand® Link device
2. A label containing the device identification (SSID) and password
3. Welcome card
This User Guide will help you to:
1. Install OnCommand® Link, a smart device that plugs into a vehicle’s 9-pin diagnostic port.
2. Connect OnCommand® Link to a personal user device, such as a smartphone, tablet or laptop.
3. Connect OnCommand® Link to the Internet by connecting it to an available Wi-Fi access point
using device configuration.
4. Use OnCommand® Link to read data from the vehicle CAN bus, send data to the personal user
device, check for a calibration update, and perform an update (if applicable).
5. View Standard Health Reports generated by OnCommand® Link through the OnCommand™
Connection Portal or International® Service Portal. Check Standard Health Reports section for
details.
If you encounter any issues while performing these steps, please check the Technical Assistance section.
Preparatory Steps
To prepare for using OnCommand® Link, please do the following:
1. Choose a personal user device, such as a smartphone, tablet or laptop that will be used to
initiate programming operations and gather data for Standard Health Reports.
2. Check the vehicle’s battery voltage. A voltage of less than 10.5 volts or more than 15.5 volts will
prevent programming.
3. Allow for sufficient time to complete the setup and perform a calibration update – up to 30
minutes for setup and 15 to 25 minutes for performing a calibration update, if applicable.
4. Ensure that the vehicle is parked on a level surface in a safe, secure location.
5. Check Maximum Wi-Fi Reception Distances section to learn about appropriate Wi-Fi range
provided by OnCommand® Link devices.
Maximum Wi-Fi Reception Distances
Table below summarizes the expected maximum distances to be maintained from OnCommand® Link
devices and personal devices/Wi-Fi network.