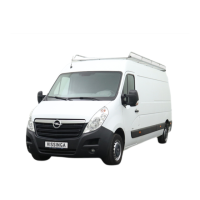
unscrew the union nuts and carefully
withdraw the pipes (see illustration). Plug or
tape over the pipe ends and master cylinder
orifices to minimise the loss of brake fluid and
to prevent the entry of dirt into the system.
Wash off any spilt fluid immediately with cold
water.
4 Where necessary, unscrew the pressure
regulating valve(s) from the master cylinder.
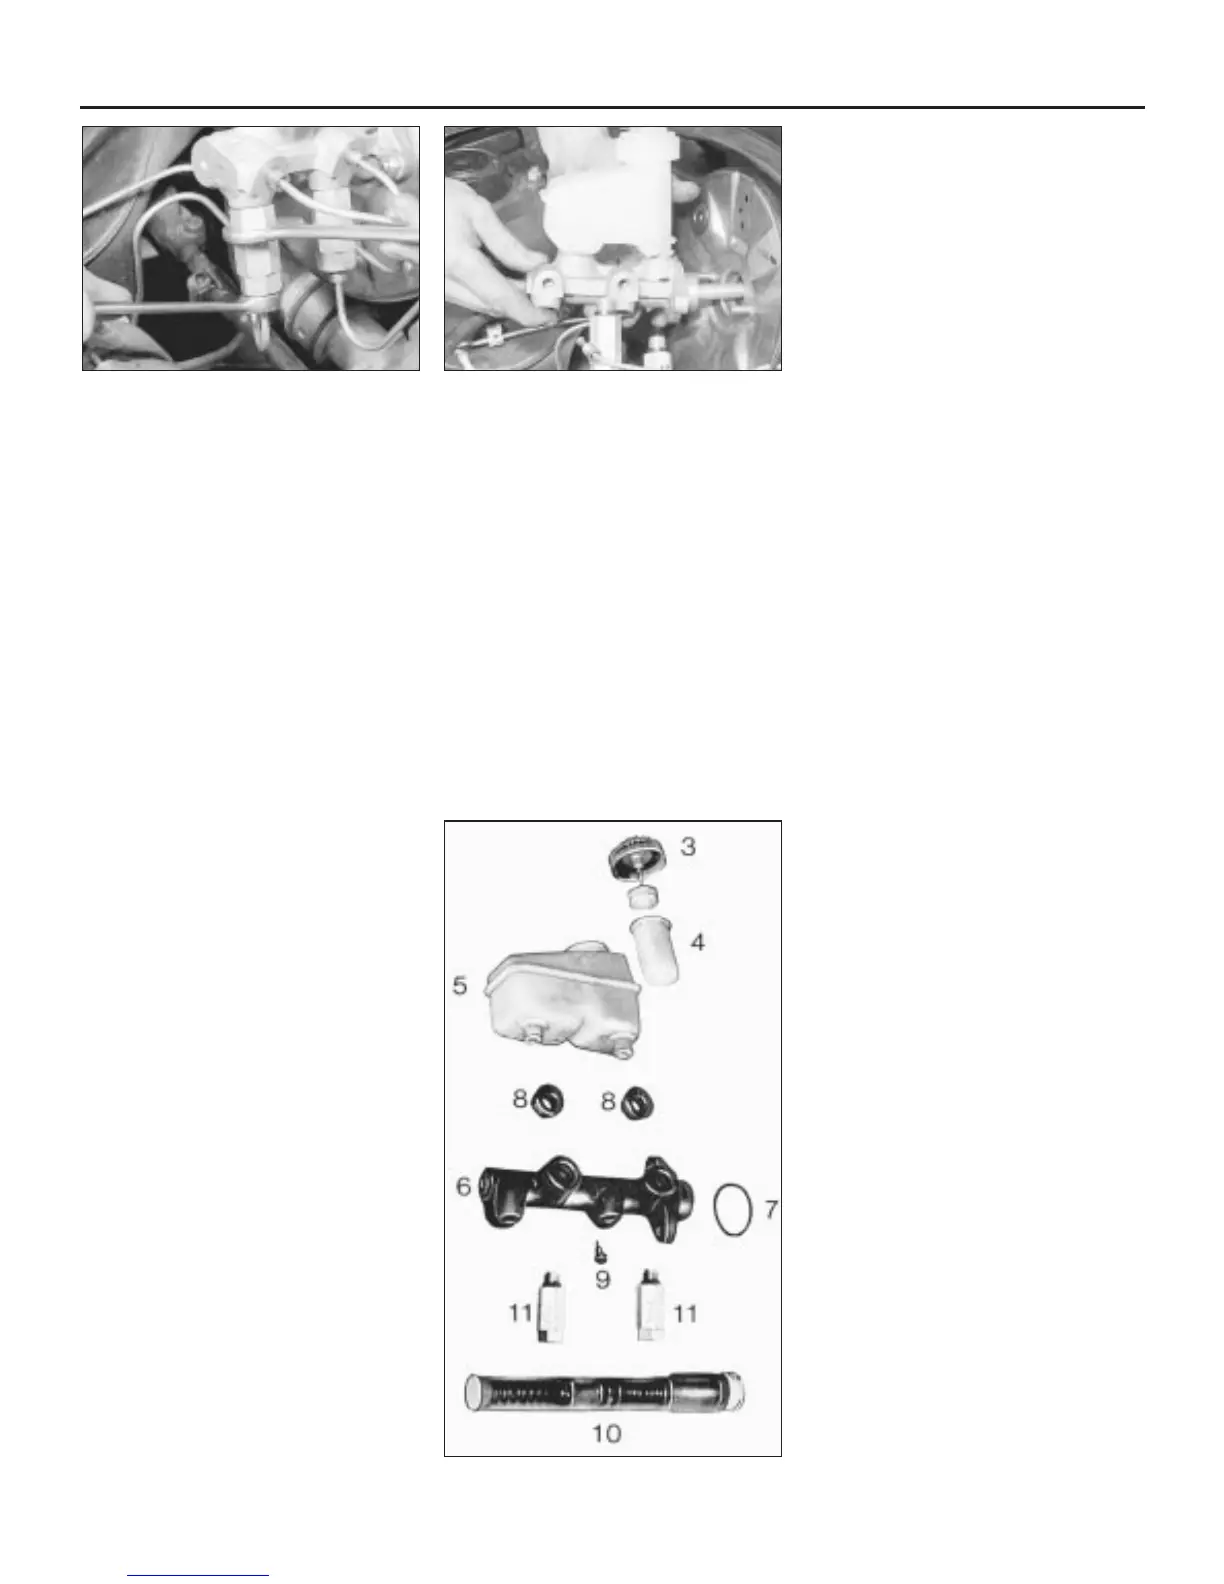
5 Unbolt the master cylinder from the brake
vacuum servo unit (booster) (see illustration).
Overhaul
Note: On models equipped with ABS, the
master cylinder is a sealed unit and cannot be
overhauled. If the cylinder is faulty it must be
renewed.
ATE type cylinder
6 With the master cylinder removed, clean
away all external dirt.
7 Prise the fluid reservoir from the cylinder
body (see illustration).
8 Depress the primary (rear) piston slightly
and remove its retaining circlip.
9 Withdraw the primary piston. Make sure
that the stop washers do not catch in the
circlip groove.
10 Depress the secondary (front) piston with
a suitable rod and remove the stop screw
from the cylinder body.
11 Shake or tap out the secondary piston.
12 Clean all the parts in brake fluid or
methylated spirit. Examine the pistons and the
cylinder bore for scoring, rust, or evidence of
metal-to-metal contact; if found, renew the
cylinder complete. Strip the seals from the
primary piston if it is to be re-used noting
which way round they are fitted.
13 The makers do not supply a seal kit alone,
but provide a repair kit consisting of a
complete secondary piston and the other
necessary seals springs, washers etc in a
special assembly tube. Should a proprietary
seal kit be available, fit new seals using the
fingers only, and make sure that the new seals
are fitted the same way round as the old ones.
The remainder of this Section describes the
fitting of the maker’s repair kit.
14 Lubricate the cylinder bore with brake
fluid or brake rubber grease.
15 Clamp the cylinder in a soft-jawed vice
with the bore more or less horizontal. Screw in
the stop screw a little way, but not so far that
it protrudes into the bore.
16 Remove the large plug from the assembly
tube. Remove all the components from the
short part of the tube and push the short part
into the long part until they are flush.
17 Insert the assembly tube into the cylinder
bore as far as the collar on the short sleeve.
Use a blunt rod to push the secondary piston
into the bore until it contacts the end of the
cylinder. Nip up the stop screw, withdraw the
rod and sleeve and tighten the stop screw
fully.
18 Reposition the master cylinder in the vice
with the bore opening facing upwards.
19 Smear the primary piston skirt and seal
grooves with the special grease provided in
the repair kit. Fit the stop washer to the
piston.
20 Adjust the assembly tube so that the end
of the long part is flush with the inner shoulder
of the short part.
21 Fit the front seal to the primary piston with
the open end of the seal facing the front of the
master cylinder. Place the assembly tube over
the cylinder to compress the seal, insert the
piston and tube part way into the bore and
withdraw the tube.
22 Place the intermediate ring on the primary
piston, then fit the other seal using the
assembly tube in a similar manner.
23 Place the end washer on the primary
piston, then depress the piston slightly and fit
the circlip. Make sure that the circlip is
properly seated and that the piston is free to
move.
24 Fit new sealing rings and press the fluid
reservoir into position.
25 Prime the cylinder by pouring clean brake
fluid into the reservoir and working the pistons
with a rod until fluid is ejected from all orifices.
GMF type cylinder
26 With the master cylinder removed, clean
off all external dirt (see illustration).
27 Remove the fluid reservoir by carefully
pulling it away from the master cylinder, at the
same time releasing the circlips with a
screwdriver.
28 Clamp the cylinder in a soft-jawed vice,
rear end uppermost, and prise out the
pushrod seal.
29 Use a blunt rod to depress the primary
(rear) piston by 10 mm or so until it can be
retained in the depressed position by inserting
a smooth rod (eg a knitting needle) onto the
primary inlet hole.
30 Carefully extract the circlip from the end
of the cylinder by prising it out with a
screwdriver.
31 Knock, shake or blow the pistons out of
the cylinder.
32 Clean all parts with brake fluid or
methylated spirit. Examine the pistons and the
cylinder bore for scoring, rust or evidence of
metal-to-metal contact; if found, renew the
cylinder complete.
33 The makers do not supply a kit of seals
alone, but provide a repair kit consisting of
both pistons in a special assembly tube.
Should a proprietary seal kit be obtained, note
the direction of fitting of the seals before
removing them from the pistons.
34 Lubricate the cylinder bore with brake
9•12 Braking system
13.3 Slackening the brake pipe union from
the pressure regulating valve
13.7 Exploded view of ATE master cylinder
3 Reservoir cap/low level switch
4 Float guide sleeve
5 Reservoir
6 Cylinder body
7 O-ring
8 Seals
9 Stop screw
10 Repair kit in assembly tube
11 Pressure regulating valve
13.5 Removing the master cylinder

 Loading...