a) Use sealing compound on the bracket
halves if they were separated (see
illustration).
b) Make sure the vacuum connection point
is in the correct position (see
illustration).
c) Use thread locking compound or new
self-locking nuts, as appropriate.
Removal
1 Remove the stop-lamp switch by turning it
90° left or right and withdrawing it from its
bracket (see illustration).
2 Unhook the pedal return spring.
3 Detach the clevis from the brake pedal by
removing the clevis pin retainer (split pin or
spring clip) and pushing the pin out.
4 Remove the split pin from the end of the
brake pedal shaft. Undo the shaft nut, remove
the washer and push the shaft out towards
the steering column. The pedal can now be
removed.
Refitting
5 Refit in the reverse order to removal, using
new split pins or other safety securing
devices. Lubricate the pivot points with
grease.
6 Before fitting the stop-lamp switch, pull its
plunger out as far as it will go. The switch will
adjust itself once it is fitted (see illustration).
Removal
1 Unscrew the yoke adjustment nut
completely and remove the yoke.
2 On models with rear drum brakes, remove
the brake drums, as described in Section 9.
3 Free the cable from the brackets on the
underbody, fuel tank and rear axle.
4 Unhook the ends of the inner cable from the
handbrake operating lever. On models with
rear drum brakes the levers are on the leading
brake shoes and on models with rear disc
brakes the lever is situated at the rear of the
backplate.
5 Prise out the retaining ring and free the
plastic sleeve from each brake backplate.
6 Withdraw the cable from the backplates
and remove it.
Refitting
7 Refit in the reverse order to removal, noting
that the dark cable guide is fitted uppermost
at the yoke, adjusting the handbrake as
described in Chapter 1.
Removal
1 Unscrew the yoke adjustment nut
completely and remove the yoke. Also remove
the rubber boot from the pull-rod.
2 Remove the driver’s seat by unbolting its
rails from the floor.
3 Free the centre console by removing its
single securing screw, which is concealed by
a plastic plug. Remove the electric window
and/or electric mirror switches, when fitted,
then slide the console rearwards to free it and
lift it off the handbrake lever.
4 Cut the carpet, as shown (see illustration).
5 Remove the two securing bolts and
withdraw the handbrake lever (see
illustration).
6 The handbrake warning switch can be
unbolted from the lever. The ratchet pawl and
segment can be renewed if facilities exist for
removing and refitting their fastening bushes
and rivets.
19 Handbrake lever - removal
and refitting
18 Handbrake cable - removal
and refitting
17 Brake pedal - removal and
refitting
Braking system 9•15
9
16.13b Fit the servo with the vacuum
connector (arrowed) positioned as shown
19.4 Cut the carpet along the line shown
(arrowed)
19.5 Unbolting the handbrake lever
17.6 Stop-lamp switch plunger in extended
position (top) and after fitting (bottom)
17.1 Stop-lamp switch ‘keyhole’ mounting
(arrowed)
16.13a Servo mounting bracket lower half
remains on bulkhead
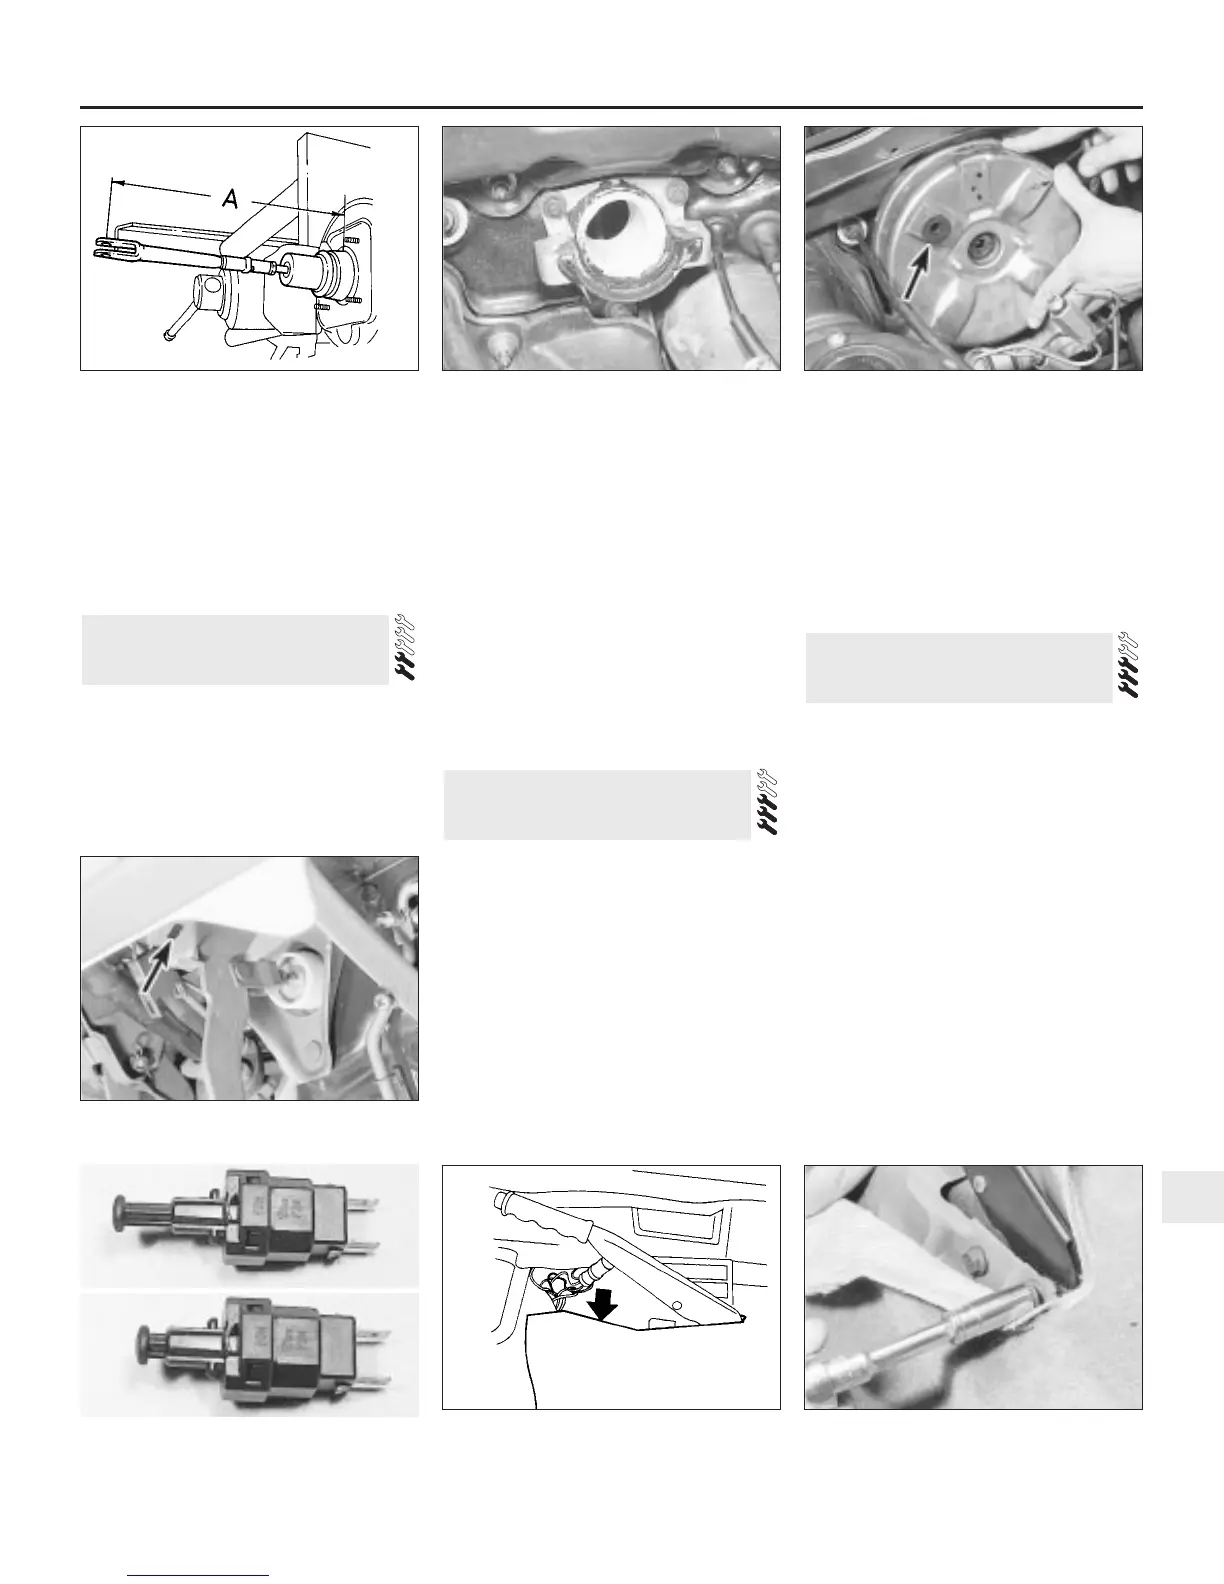
16.12 Servo clevis adjustment - Left-hand
drive models
A = 278.5 mm (10.97 in)

 Loading...