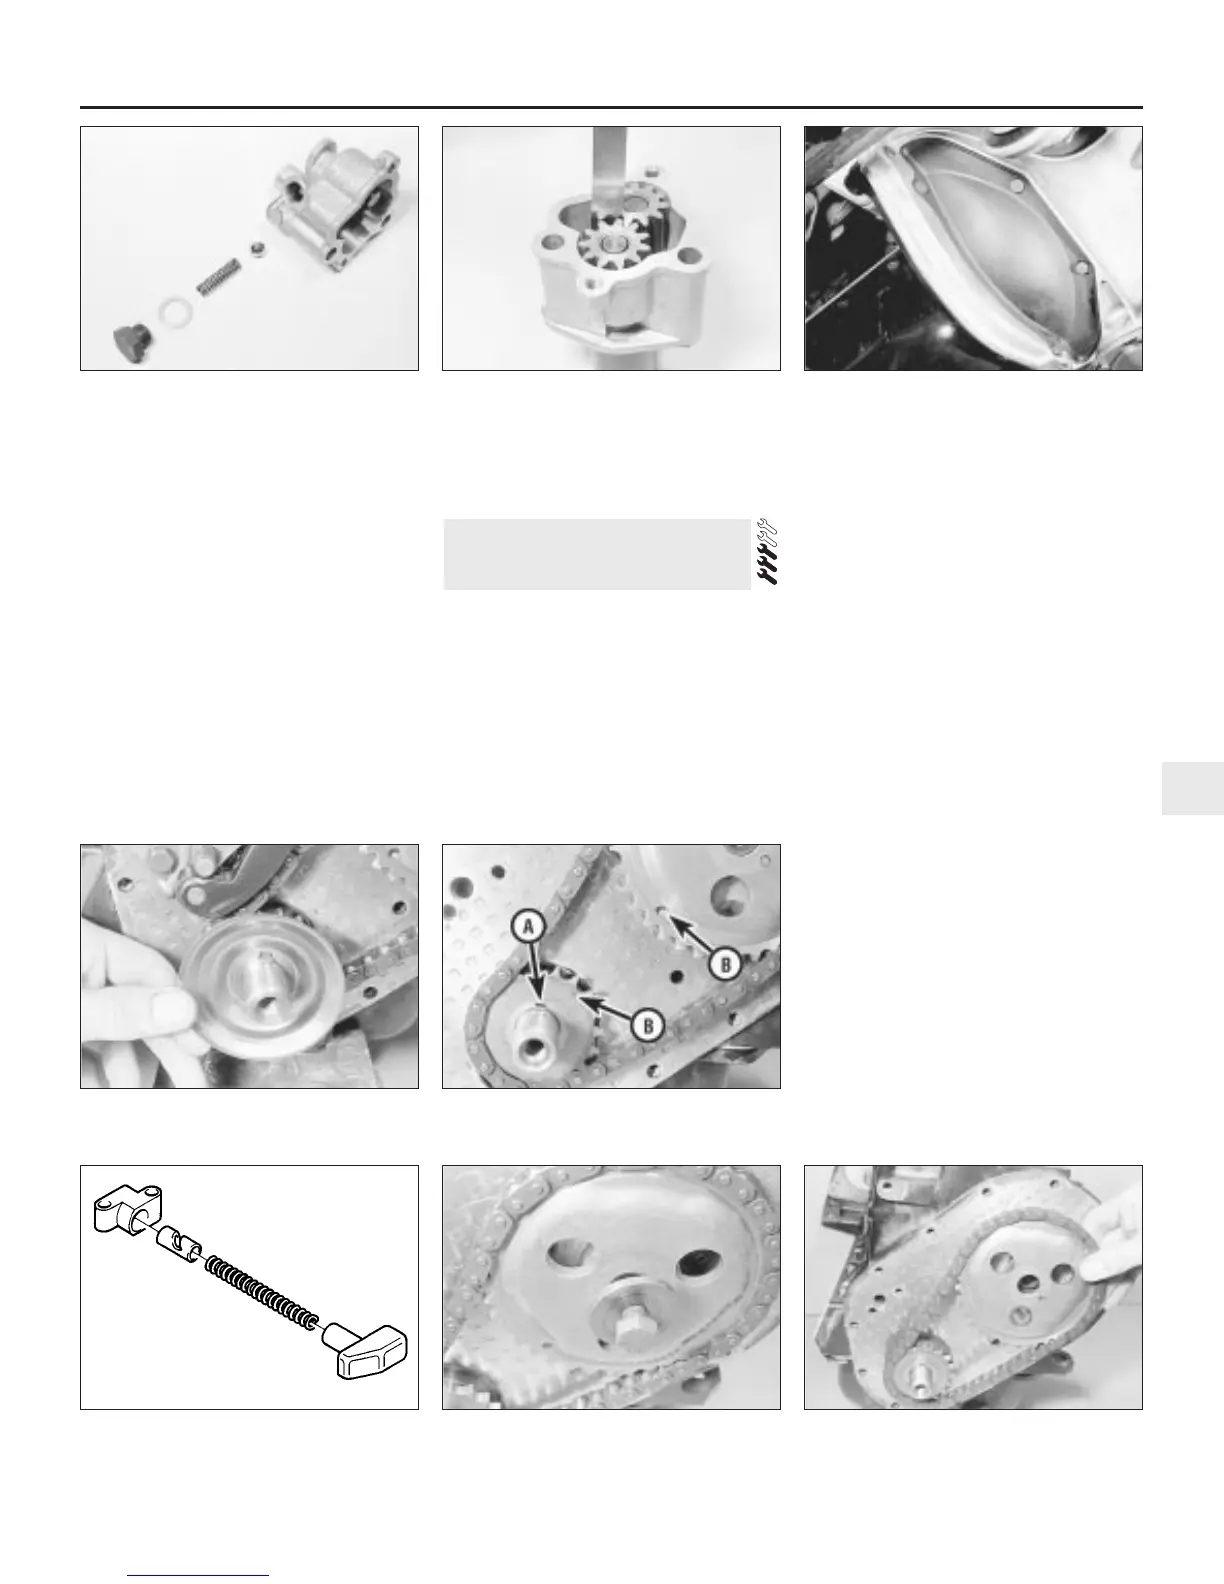
4 Undo the large nut on the side of the
housing and remove the sealing washer and
oil pressure relief spring and ball valve (see
illustration).
5 Clean all the parts in paraffin and dry with a
lint-free cloth.
6 Inspect the pump gears, housing, cover
and relief valve ball for scoring, scuff marks or
other signs of wear and renew the pump if
these signs are evident.
7 If the pump condition is satisfactory, check
the pump clearances as follows.
8 Using a feeler blade, check the backlash
between the gear teeth. Place a straight-edge
across the top edge of the gears and check
their projection. If any of the clearances
exceeds the tolerances given in the
Specifications, renew the pump (see
illustration).
9 If the clearances are satisfactory, refit the
relief valve assembly and assemble the pump
gears. Fill the pump with oil and refit the cover
using a new gasket. Tighten the cover
securing bolts and refit the pump.
Removal
1 For greater access remove the front
right-hand wheel trim and slacken the wheel
bolts. Jack up the front of the car, support it
securely on axle stands (see “Jacking and
Vehicle Support”) and remove the roadwheel.
2 Undo the four retaining bolts and remove
the clutch access plate at the base of the
bellhousing (see illustration).
3 Slacken the alternator mounting and
adjustment arm bolts, move the alternators
towards the engine and slip the drivebelt off
the pulleys.
4 Lock the flywheel by wedging a screwdriver
between the ring gear teeth and the side of
the bellhousing.
5 Using a socket or spanner undo the
crankshaft pulley retaining bolt and withdraw
the pulley.
6 Undo the bolts securing the timing cover to
the front of the engine and lift off the cover.
7 Withdraw the oil slinger from the
crankshaft, noting which way round it is fitted
(see illustration).
8 Temporarily refit the pulley and turn the
crankshaft until the crankshaft sprocket
keyway is uppermost and the timing marks on
the two sprockets are in alignment (see
illustration). Remove the pulley.
9 Undo the two retaining bolts and remove
the timing chain tensioner. One of two types
of tensioner may be fitted: simple
spring-operated, or oil pressure assisted. With
the oil pressure assisted type, restrain the
thrust pad to prevent premature ejection of
the tensioner components (see illustration).
10 Undo the camshaft sprocket retaining bolt
and remove the bolt and washer (see
illustration). Place a screwdriver through one
of the sprocket holes and in contact with the
camshaft retaining plate behind the sprocket
to stop it turning as the bolt is undone.
11 Withdraw the camshaft sprocket and
crankshaft sprocket from their respective
locations, using a screwdriver as a lever if
necessary, then remove the sprockets
complete with chain (see illustration).
12 Thoroughly clean all the components in
14 Timing gear components -
removal and refitting
OHV engine 2A•9
2A
14.2 Clutch access plate
14.11 Removing the sprockets and timing
chain
14.10 Camshaft sprocket retaining bolt
and washer
14.9 Timing chain tensioner - oil pressure
assisted type
14.7 Crankshaft oil slinger 14.8 Crankshaft sprocket keyway (A) and
sprocket timing marks (B)
13.8 Check the pump gear teeth backlash13.4 Oil pump and pressure relief valve
components

 Loading...