EN-42
Appendix
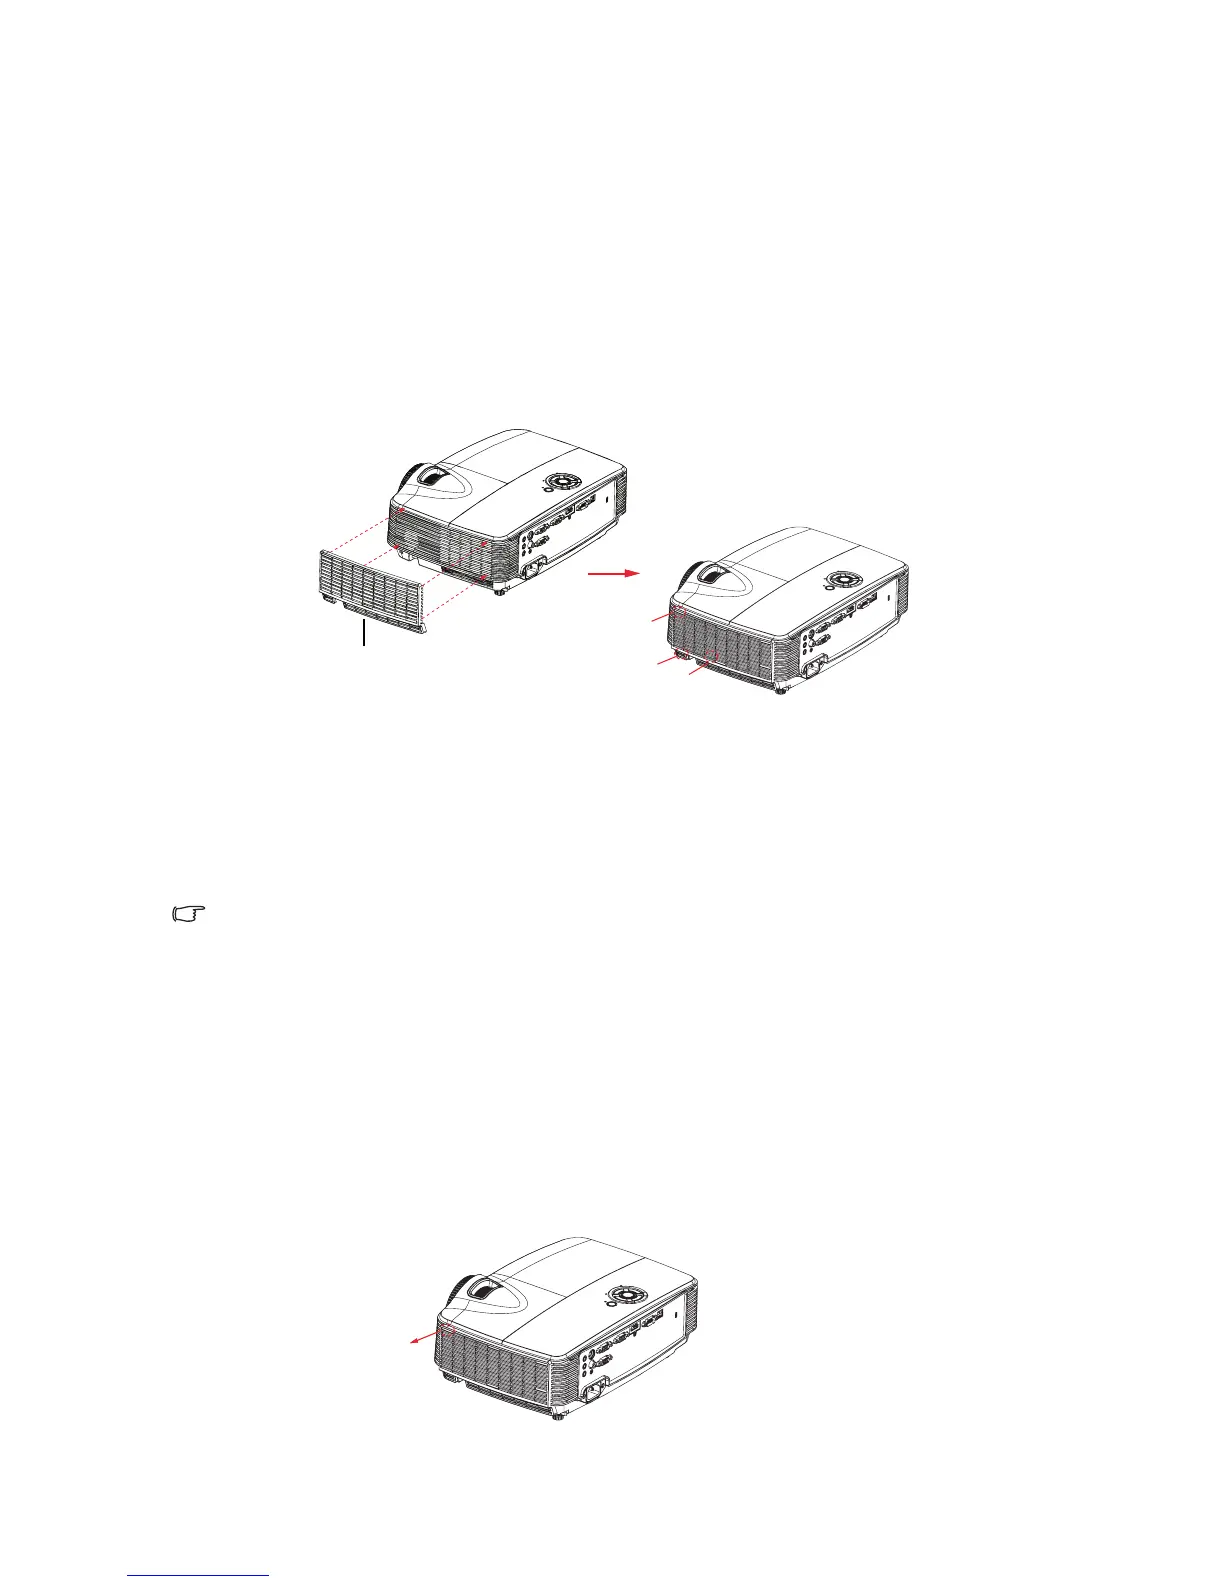
Installing the Dust Filter
Be sure to follow the steps to install the dust filter.
1. Align the filter with these two hook positions (#1 & #2), then press it close
to the projector from the left side to the right one.
2. Press the last hook position (#3) until it clicks.
3. Turn on the projector, then press “Menu”, go to
OPTIONS > Optional Filter > Optional Filter Installed and
select “Yes”.
4. Clean the dust filter periodically.
The dust filter should be cleaned or replaced periodically (suggest after every 500
hours or 3 months of use). If it is not cleaned periodically, it can become clogged
with dust and prevent the projector from being ventilated properly. This can cause
over heating and damage the projector. If the projector is used in a dusty
environment, be sure to cleaned or replaced the dust filter more frequently.
5. To remove the dust filter, take it apart from the upper-left side of the hook
position.
6. Turn on the projector, then press “Menu”, go to OPTIONS > Optional
Filter > Optional Filter Installed and select “No” when you pull out the dust
filter and would not install it again.
1
2
3
dust filter
 Loading...