7. Operating instructions
This chapter gives instructions for using the device. More specific instructions for using optics lenses are
given in the optics lens specific chapters.
7.1. Preparations
Smartscope is both charged and connected to PC (Personal Computer) using the provided cradle. When
Smartscope is not used, it may be stored in the cradle. Storing device in the cradle is not harmful for the
battery.
Device can be connected to the cradle with optics attached.
7.2. Connection to a PC
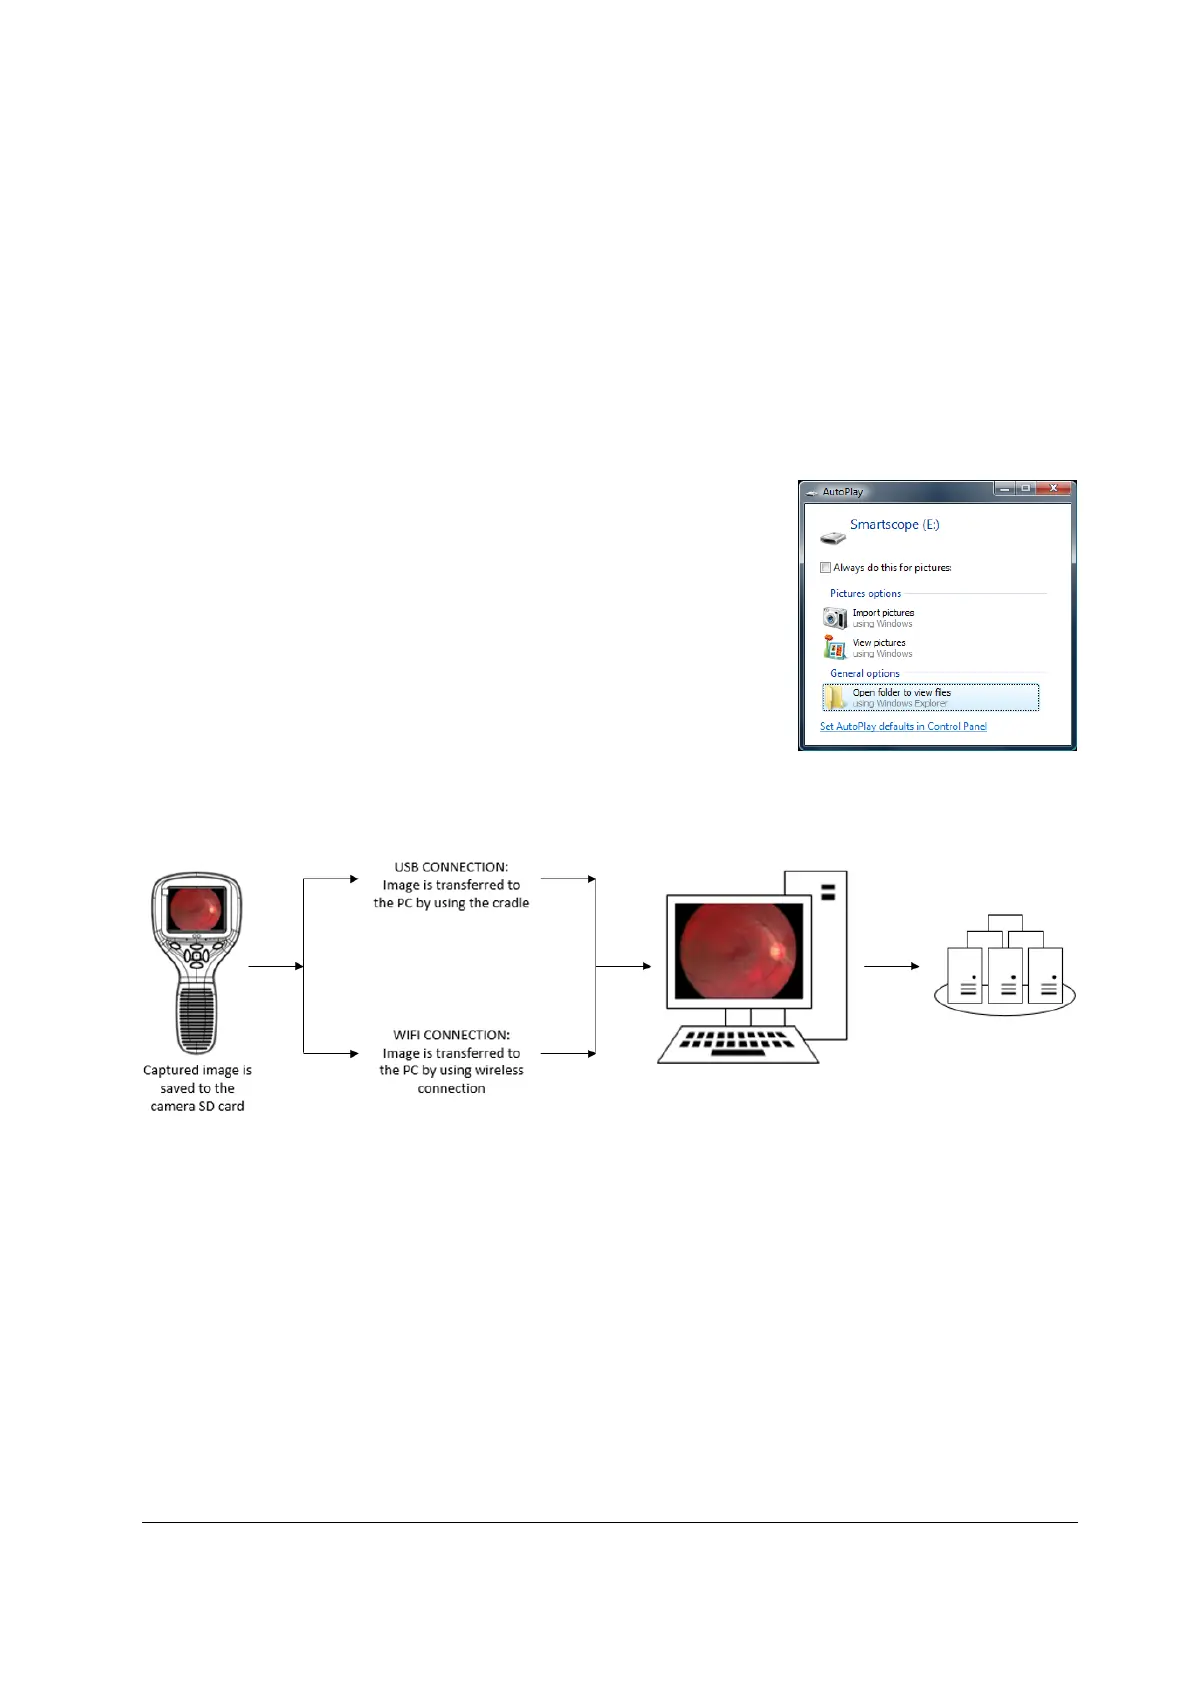
Image data transfer method to PC is similar as with a digital camera.
When connected to a PC running Microsoft Windows 7®, Windows 8.1®
or Windows 10® operating system displays query for AutoPlay. It is
possible to select appropriate image viewing program or simply open
the folder to view and then store files to the hard disk of the PC.
Writing to the memory card from PC is not enabled by default.
In case device has WLAN functionality, USB write protection must be turned off. WLAN enables wireless
image transfer from camera to PC. Image transmission system is shown below:
Instructions how to establish WLAN connection with Optomed Client refer to Appendix C.
7.2.1. Pay-per-study
In case camera is in pay-per-study mode, images can be viewed only with Optomed Workstation Software.
There are no other changes in camera functionality.