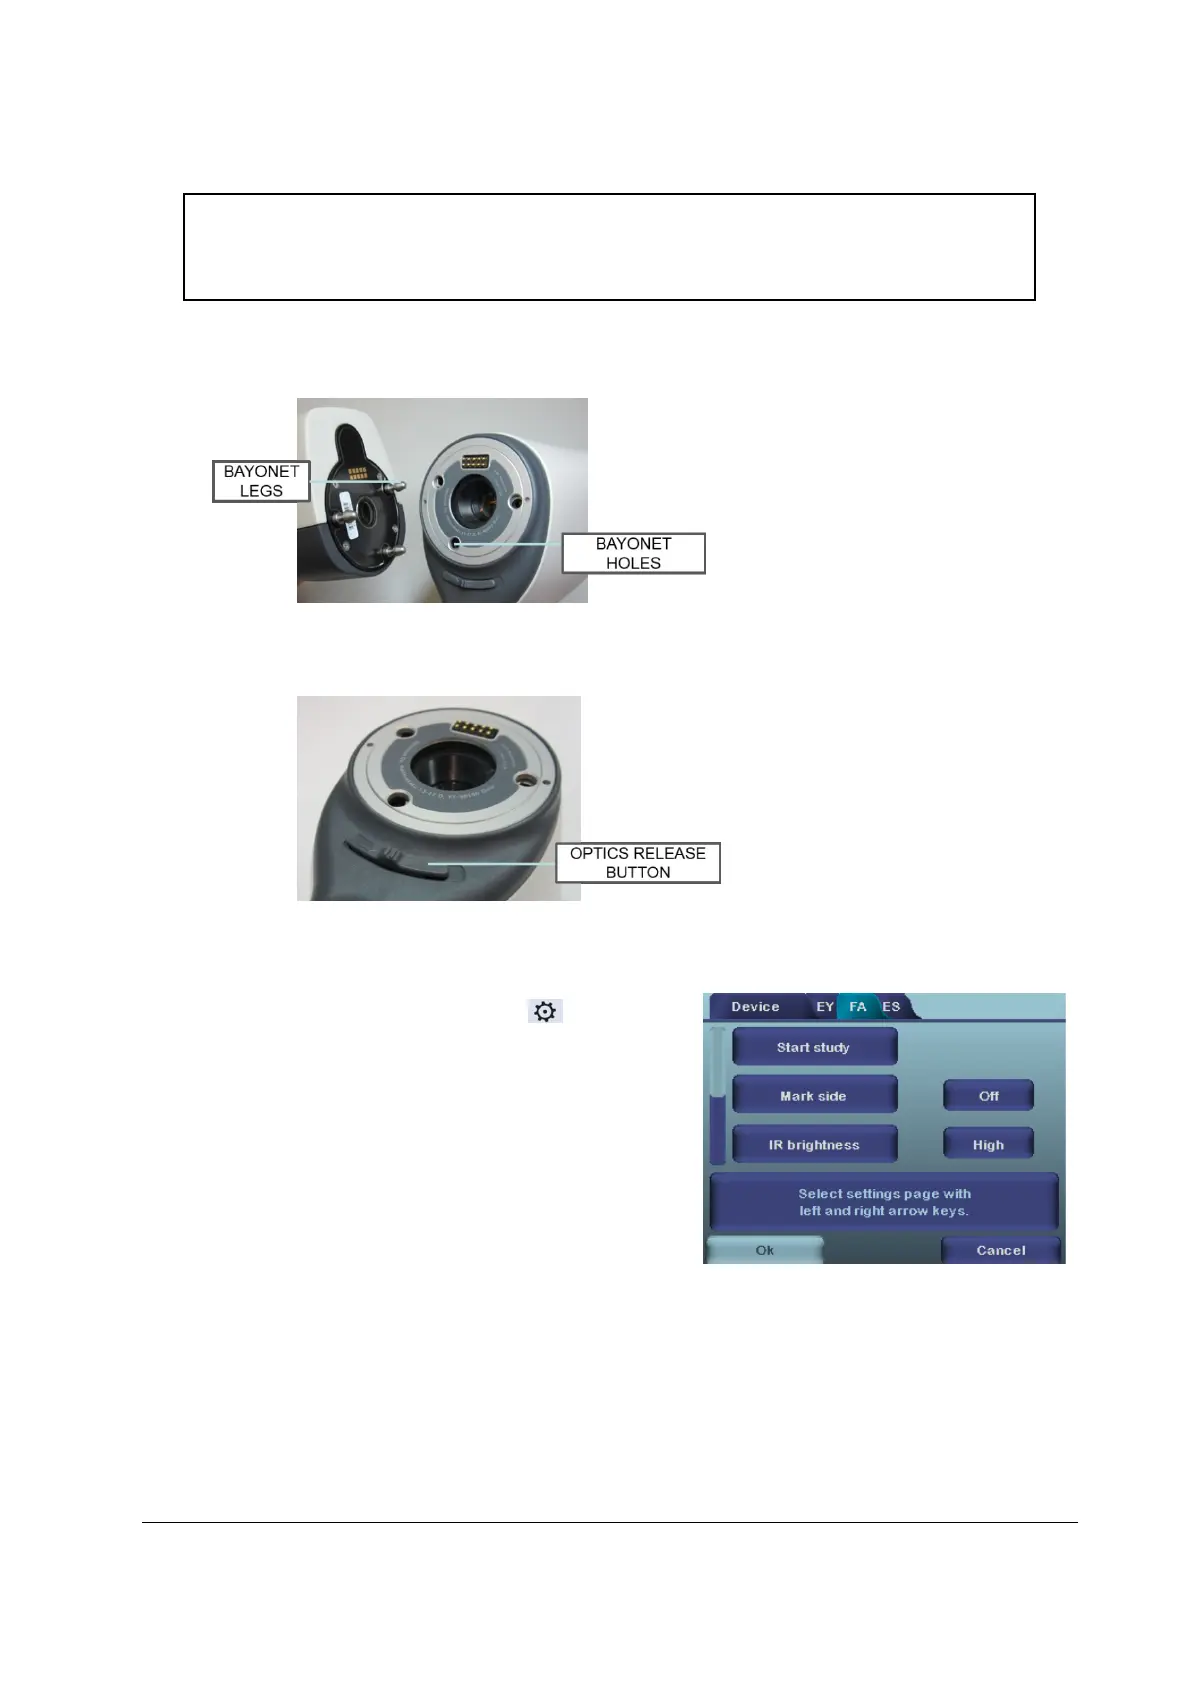
7.4. Attaching and detaching optics module
NOTE:
Optic modules used with Optomed Smartscope M5 must include text “SMARTSCOPE”. It is
not allowed to attach other objects to the bayonet connector.
Optics is attached by placing it in front of the bayonet area of the device. Three bayonet legs are placed
on the holes and optics is pressed firmly to the device:
Optics is released by sliding release button that is located in front of the device above the dual action
shutter:
7.5. Device Menu
Menu is opened by pressing right soft key for 1s.
Menu has different tabs. One is for device settings such as
language selection. There is one tab for retinal imaging (EY),
fundus angiogram imaging (FA) and anterior eye imaging
(ES).
Arrow keys are used to move between tabs: use arrow key
up until tab is active and use left and right arrow keys to
change active tab. Light blue color indicates active tab.
Arrow keys change values in the menu. Active value is indicated with light blue color. Changed values
are saved by using left soft key (“Ok”) and cancelled by pressing right soft key (“Cancel”). Some values
are confirmed by pressing the Middle key.