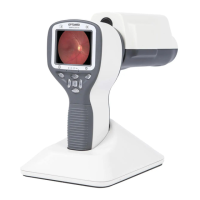
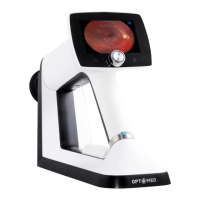
8. Retinal imaging using optics module Smartscope EY4
Optomed Smartscope EY4 digital ophthalmic camera is intended to capture digital images and video of
the fundus of the human eye. The device set for retinal imaging consists of:
• Camera handset M5
• Attachable ophthalmic lens EY4
• Eye cup for EY4
• Cradle for charging and image transfer
Smartscope EY4 is intended for non-mydriatic imaging. This means that infrared is used for targeting
image to the eye fundus and visible light is flashed when image is taken. Pupil does not respond to the
infrared light so examination is convenient for the patient. Constant illumination can be selected from
device menu if mydriatic drops are used. Pictures can also be taken using infrared light for both aiming
and capturing.
Smartscope EY4 has 9 internal fixation targets for the patient to fixate at while imaging. Below section will
guide how to control the fixation lights.
STEPS FOR RETINAL IMAGING:
1. The examination room should be as dark as possible.
2. Both the patient and the examiner shall be seated while taking the images.
3. Either autofocus or manual focus can be used. Autofocus range is -15 to +10 diopters.
If patient has a refractive error and autofocus is off, focus need to be adjusted:
• Hyperopia: camera is focused to distance by pressing arrow key up. One click of the key is
approximately 1 Diopter.
• Myopia: camera is focused closer by pressing arrow key down. One click of the key is
approximately 1 Diopter.
4. Aiming light is automatically turned on when camera enters live view.
5. Middle fixation target is lit when pressing left soft key and it provides a macula centered image. To
change the fixation target press Left Soft Key and use arrow keys to navigate between the 9 targets
as shown in the graphics in lower left corner of the display. If fixation target is turned off ask patient
to look at a target in a wall 2-3 meters behind the operator.
6. Capturing light is adjusted using left and right arrow key. There are brightness levels from 0 to 10,
default value is 5, and typical levels are from 2 to 8. There are also low brightness levels 0.2, 0.4, 0.6
and 0.8 if brightness level 1 is too bright.
When using IR/White capture mode changing illumination brightness affects only the white capturing
flash. If using IR/IR or White/White both aiming and capturing light are changed.
7. Aim help circle on the screen guides user when to take image. When retina is not fully in view the
circle is red. Once the aim is good and retina fully appears on screen the circle turns green indicating
a good moment for capturing the image.
8. Approaching the eye is started from 10 centimeters (4 inch) distance. If internal fixation target is not
used patient is asked to look at a target in a wall 2-3 meters behind the operator (patient’s eye targets
to infinity and stays still). Pupil is approached until the reflection from the eye fundus can be seen.