DRAFT
Proprietary and Confidential
24 Acme Packet 1100 Hardware Installation Guide
SYSTEM INSTALLATION
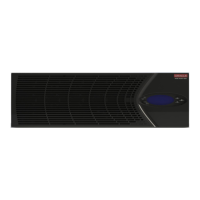
3. Attach the rack mount flange to the chassis as shown by inserting a #6-32 x
5/16” screw into each of the holes, and use a Phillips screwdriver to hand-
tighten and secure each screw.
4. On the left side of the chassis, align the two holes in the flange mount with the
t
w
o holes toward the front of the chassis.
Figure 4 - 4. Rack Mount Flange Installed on the Left Side of the Acme Packet 1100
5. Attach the rack mount flange to the chassis as
shown by inserting a #6-32 x
5/16” screw into each of the holes and then use a Phillips screwdriver to hand-
tighten and secure each screw.
6. Ensure that all of the screws are tight and
tha
t the flange brackets are securely
attached to the chassis.
Installing the
Flange-Mounted
Chassis
The following procedure describes how to install the flange-mounted Acme Packet
1100 to each side of the chassis into a 2- or 4-post chassis rack.
Prerequisites
• The flange
mounts should be attached to the Acme Packet 1100 as described in
the previous procedure.
• To prevent overheating, ensure that there is enough room for appropriate
airflow on either side of the chassis and that there is adequate ventilation in the
room in which the chassis is being installed.
• Ensure that there is enough room to access the front and back panel of the
chassis for purposes of reviewing front/back panel LEDs and inserting/removing
cables from the back panel.
• Screws/washers (customer-supplied) for attachment to the equipment rack.
To install a flange-mounted Acme Packet 1100
into a 2- or 4-post rack:
1. Align the holes in each of the rack mount flanges with the appropriate holes in
the chassis rack, and then suppor
t the rack in place.
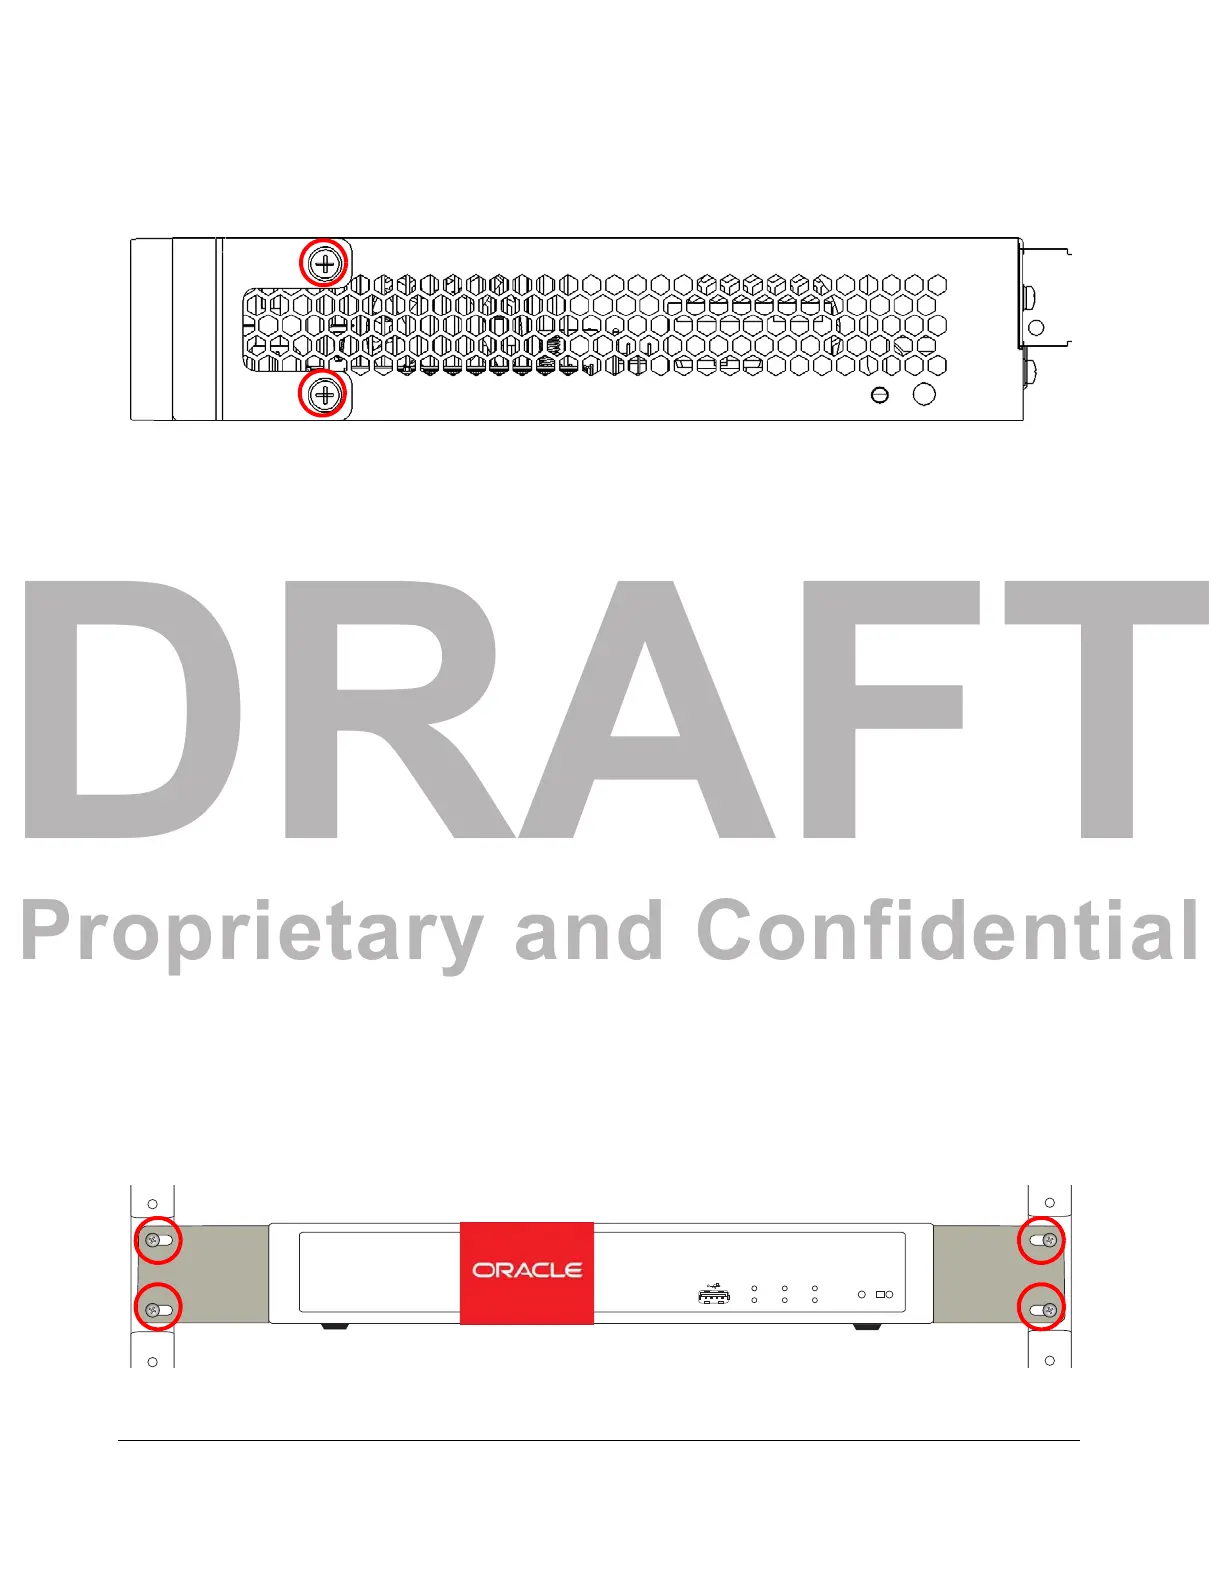
2. Attach the flange-mounted Acme Packet 1100 cha
ssis to the rack by inserting a
screw and washer (customer-suppliecd) into each of the 2 holes on one side of
the flange mount. Then use a Phillips screwdriver to tighten and secure each
screw.
NET MGT INT EXT
PWR
ACME PACKET 1100
OK
LNK
ACT
LNK
ACT
LNK
ACT
Figure 4 - 5. Installing the Chassis in the Rack

 Loading...