33
Step 33:
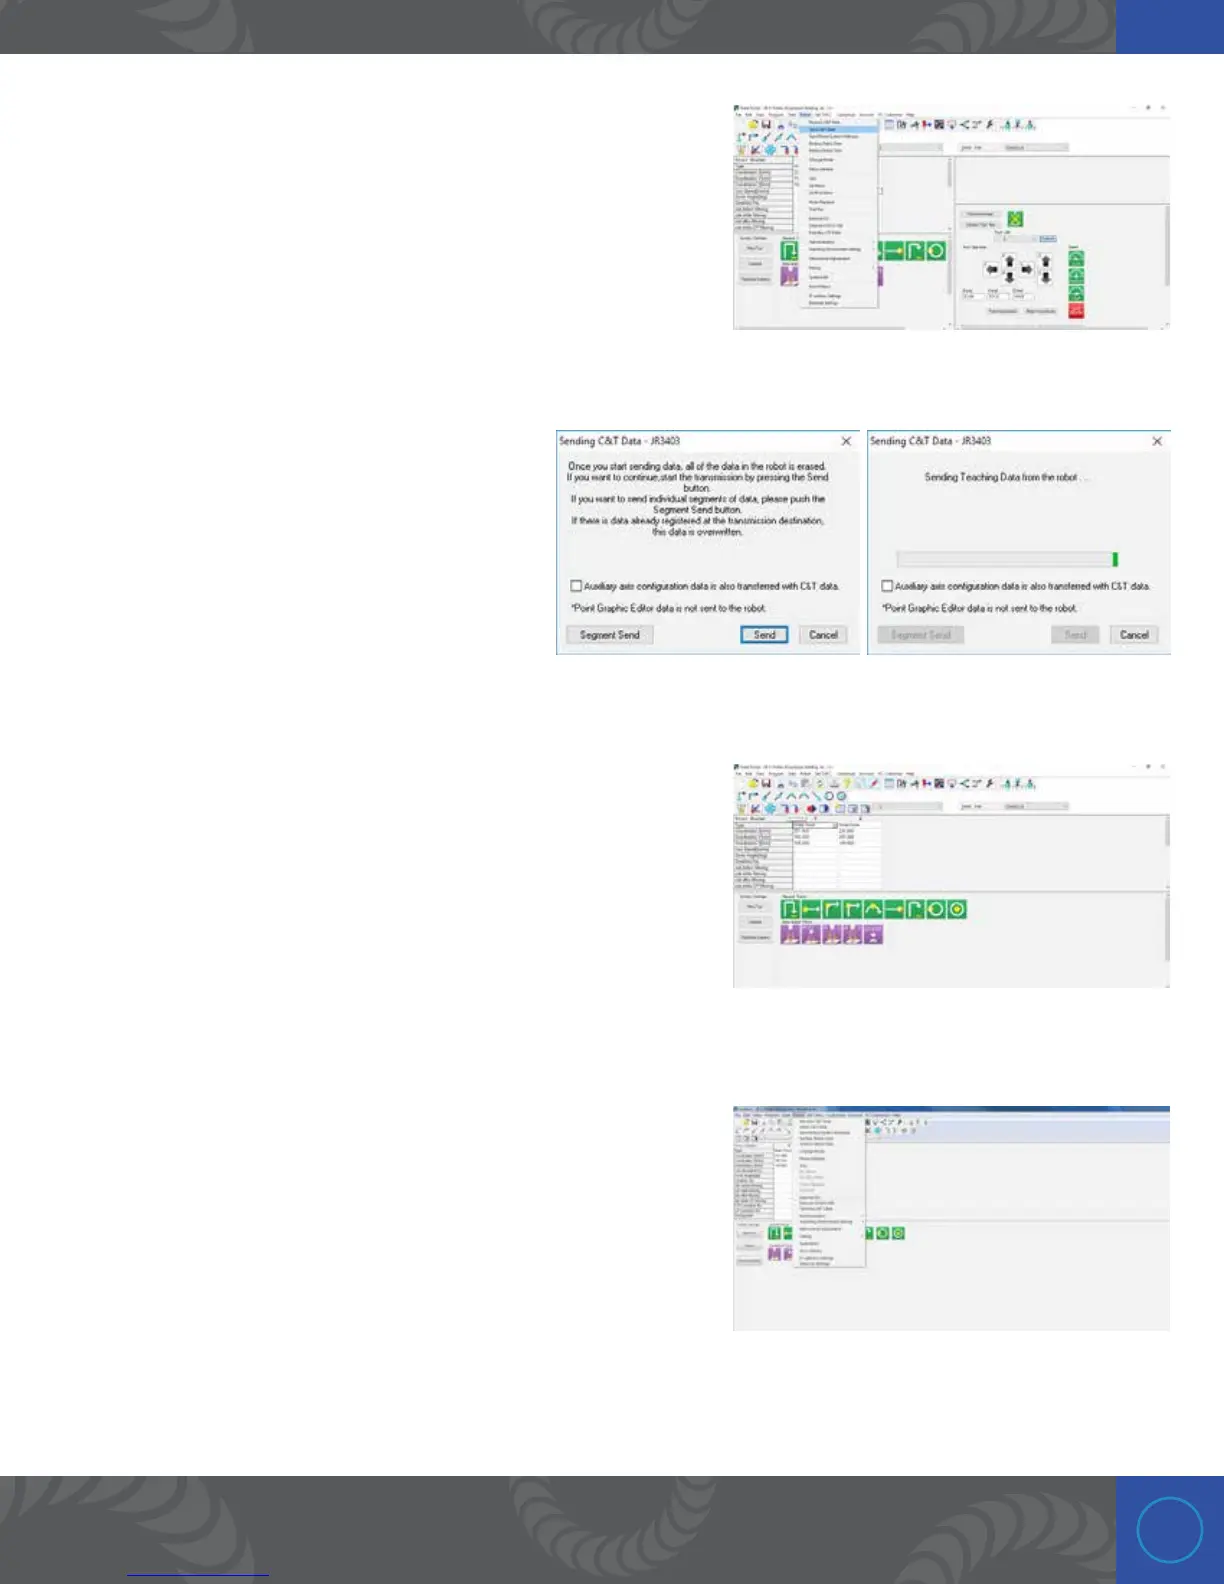
At this time we will save our data again by clicking on the “Save”
icon. Next we will send the data to the Janome robot. To do so,
click on “Robot” in the menu bar, and then click on “Send C&T
Data.”
Step 34:
On the popup window, click the “Send” button.
e program will show a progress bar. Once
complete, click “OK” on the new popup window.
Step 35:
To move the weld head to one of the programmed weld points,
click on the point, and then click the “Go Move” icon. e robot
will move to that location, but will not yet send a signal to Orion
i2 CNC EV to weld.
Step 36:
Next click on “Robot,” then drop down and click on “External
I/O.” is new screen displays the status of the weld ready
signal, the good weld signal, and give access to manually
trigger a weld.

 Loading...


