c Series User Manual
8
Become Familiar with the Microscope
e Orion Microscope has been designed to provide maximum visual clarity, eye protection and ease of use. One challenge
using the microscope is getting used to bringing the work piece to the welding electrode while looking through the
microscope. is is an easy challenge to overcome. To begin, follow these steps with the welder on pause. *While the welder
is on pause, it will not be able to make a weld when the work piece touches the electrode.
• Rest your hands on the table and position the work piece close to the welding electrode before looking into the
microscope.
• Make sure your focus is at the tip of the electrode.
• Use slow, controlled movements.
• It is helpful to have your hands resting and to only use your fingers to move the
work piece up to the electrode.
• Place the work piece surface perpendicular to the point of the electrode. *As
discussed in later chapters, the angle of the electrode tip relative to the work
piece surface is very important and will take practice.
• Now practice making soft contact with the work piece to the electrode.
• *Once you feel comfortable, attach the alligator clip to the work piece and touch the play button to begin performing
real welds.
Darkening Lens Setup *(If you purchased the
Darkening Lens System)
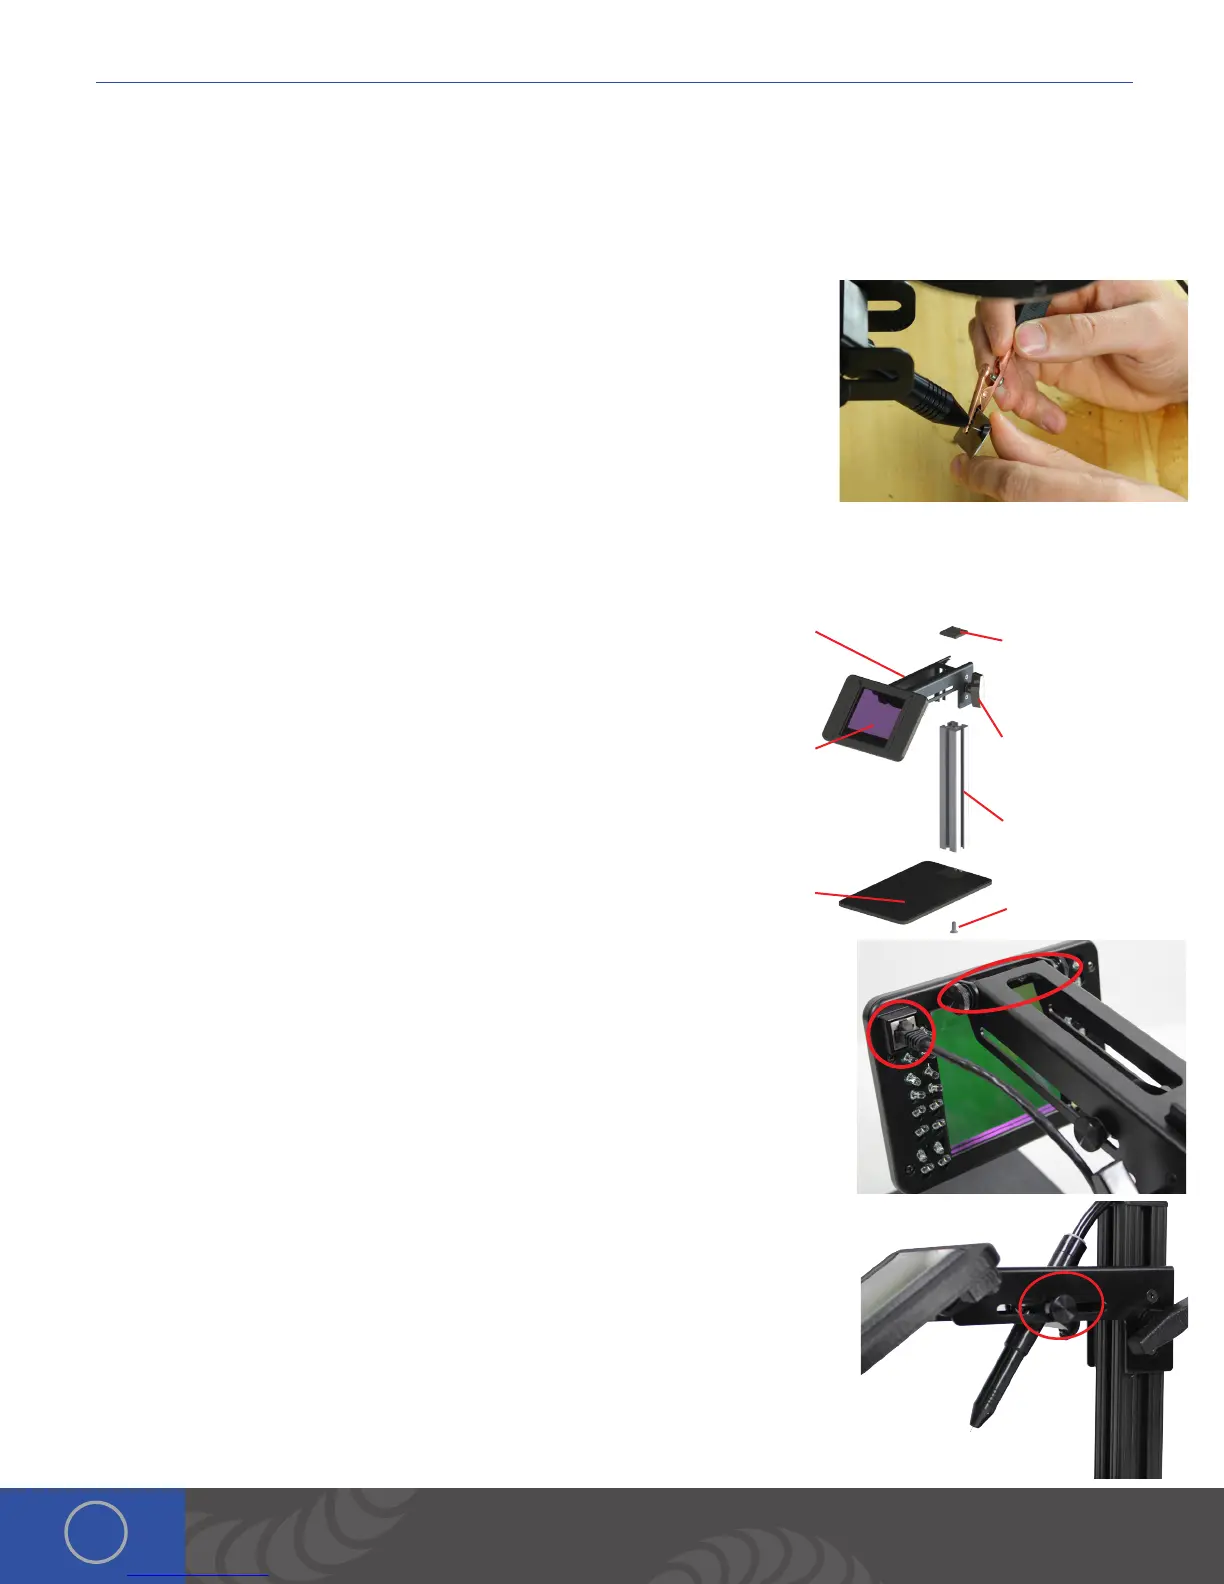
SET UP THE DARKENING LENS
e Orion’s darkening lens system is easy to use. e darkening
lens will automatically darken when the weld takes place.
is allows the user to have a clear view of the work piece and
protection from the flash during the welding process.
1. Remove Darkening Lens parts from the box and place them
on your workbench.
2. Connect the Base Plate to the Base Plate Stand by running
the included Phillips screw through the bottom of the Base Plate into the Base
Plate Stand. *e Phillips screw will be attached to the bottom of the Base Plate
Stand. Unscrew it then follow this step
3. Slide the Darkening Lens Arm onto the Base Plate Stand. Adjust it to your desired
height then tighten the Arm Height Adjuster Knob.
4. Place the Base Plate Stand Cap on top of the Base Plate Stand.
5. Adjust the Darkening Lens Position by loosening/tightening the adjuster knobs
on the back of the Darkening Lens Arm.
6. Plug the Darkening Lens cable into the Darkening Lens light ring. Ensure that the
other end of the cable is securely fastened into the “Microscope” port on the
back of the welder.
7. Insert the Orion stylus into the Stylus Holder on the Darkening Lens Arm. Adjust
the position of the stylus by loosening/tightening the adjuster knobs on either
side of the Darkening Lens Arm.
Adjuster
knobs
DARKENING LENS
CABLE
BASE PLATE
STAND CAP
BASE PLATE
STAND
BASE
PLATE
PHILLIPS
SCREW
DARKENING
LENS ARM
ARM HEIGHT
ADJUSTER KNOB
DARKENING
LENS

 Loading...


