7OrionWelders.com
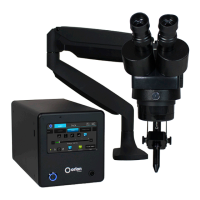
• Loosen/tighten the allen on the microscope arm to adjust the spring
pressure. Turn the allen clockwise if the arm does not hold the microscope
up. Turn the allen counter clockwise if the arm does not allow the
microscope to come down.
ADJUST WELDING STYLUS POSITION
• Loosen the screws on either side of the stylus holder.
• Adjust the welding stylus to a 45-degree angle then slightly tighten the screws
on the sides just enough to hold the stylus in place at a 45-degree angle.
• While looking through the microscope, slide the welding stylus forward and
backward until the tip of the stylus is in the center of your focus.
• Now securely tighten the stylus holder by tightening the screw on the bottom of
the stylus holder.
ADJUST THE MICROSCOPE FOCUS
• Twist the knob on the microscope forward and backward to raise and lower the head.
is will allow you to focus the microscope on the welding stylus.
• Place your finger under the welding electrode to help judge the correct focus location.
Focus the microscope until the texture on the skin of your finger is clearly visible.
INSERT THE SUPPORT BAR
• Find the support bar holder on the side of the L shaped stylus holder arm.
• Pull off the black rubber end cap.
• Unscrew the support bar tightening screw then insert the support bar.
• Replace the rubber end cap.
Microscope LCD Filter Shutter
e microscope LCD filter shutter allows an unobstructed working view before welding and completely protects the user’s
eyes during the welding process. e Orion’s internal computer verifies the microscope LCD filter shutter has been closed
before allowing the weld to take place. In the case that the shutter does not close, the microscope lens is equipped with >UV
16 and >IR 16 for maximum eye protection.

 Loading...