32
4. Check the res are inated to between 20 & 40 psi. Light riders can run lower pressures.
5. Check the chain for ghtness and lubricaon.
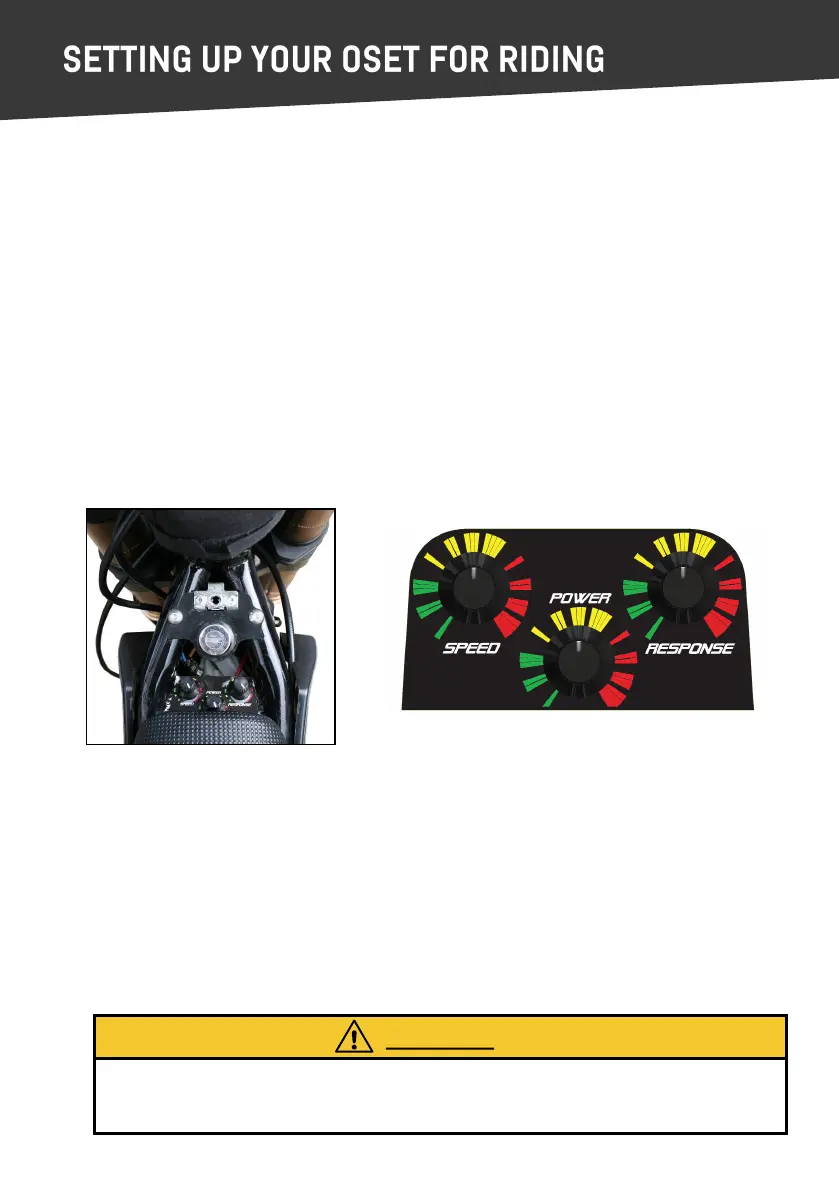
6. Set the controls correctly for the rider.
A. With the wheels on the ground, sit the rider on the bike.
B. Adjust the lever posions so they are easy to reach, and check that the
brakes are funconing correctly, and at the desired level. Adjust the ‘reach’
of the levers to suit the rider. For more informaon see page 19.
Improper set-up is dangerous! It is your responsibility to set the machine to the
ability of the rider. Failure to do so could result in injury and damage to the ma-
chine.
CAUTION
1. Set the speed dial to the correct level for the rider.
Low for non-experts and all riders under 10 years old.
ALWAYS CHECK BEFORE RIDING.
2. Set the ‘response’ dial to the correct level for the rider.
Low for all non-experts and all riders under 10 years old. ANTI-CLOCKWISE for low.
CLOCKWISE for high.
3. Set the ‘power’ dial to the correct lever for the rider.
Low for non-experts and all riders under 10 years old.
ANTI-CLOCKWISE for low. CLOCKWISE for high.
A. Ensure everyone is clear of the bike.
B. Place the bike on a stand or block, so both wheels are above the ground.
C. Switch the bike on.
D. Turn speed dial to low. Set to high for experienced/advanced
riders over 10 years old ONLY.
Turn the power dial in very small increments to the desired seng. ALWAYS start the rider on the
slowest sengs!