2.6 Fuse Replacement
If a fuse is blown, first check the cause of the blown fuse, then replace the fuse with a new
one as follows.
CAUTION! For continued protection against fire hazard, replace only with the
same type of fuse. Before replacing a fuse, disconnect the power cable from the
AC line.
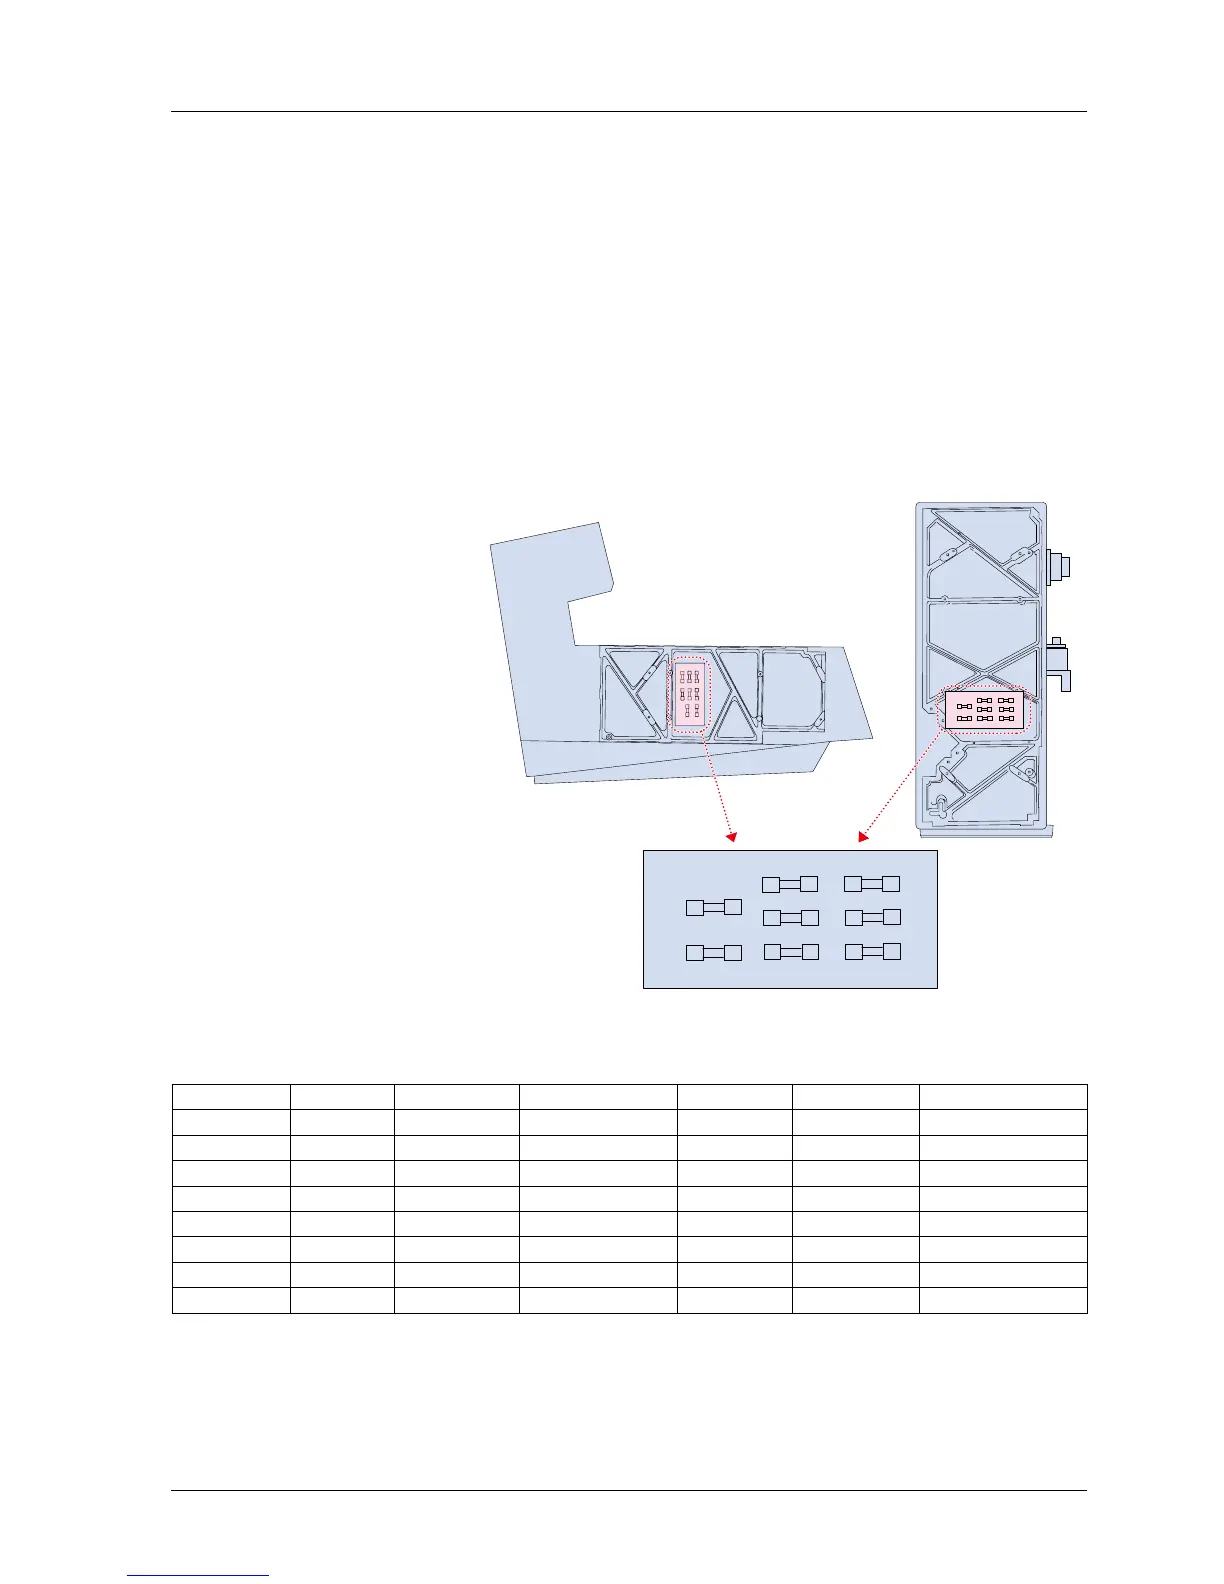
Replacement of the Main Fuses
1. Remove the left side panel by removing the screws holding it.
2. Referring to the Figure 2-12, find the fuse location.
3. Locate the blown out fuse(s).
4. Replace the blown out fuse(s) with a new one(s).
Figure 2-12 Fuse Location
Fuse Specifications
Number Current Voltage Size Carry Otari No. Used For
F1 2A 125V 5.2 x 20mm 110%
FH9-030
Power Supply
F2 2A 125V 5.2 x 20mm 110%
FH7F020
Reel Motor
F3 2A 125V 5.2 x 20mm 110%
FH9-030
-18V (Slow Blow)
F4 2A 125V 5.2 x 20mm 110%
FH9-030
+18V (Slow Blow)
F5 3A 125V 5.2 x 20mm 110%
FH7F030
+5V
F6 4A 125V 5.2 x 20mm 110%
FH7F040
+24V
F7 5A 125V 5.2 x 20mm 110%
FH7F050
Capstan Motor
F8 1A 125V 5.2 x 20mm 110%
FH7F010
VU Lamp
MX-5050mkIV-2/BIII-2 Operation and Maintenance Manual
1999-02 11
 Loading...