Operating Instructions
11. FOCUS button <F> <N>
These are used to adjust the lens focus manually when the manual
setting is established for the lens focus.
The focus is adjusted in the far using the <F> button and in the near
using the <N> button.
12. FOCUS AUTO button <FOCUS AUTO>
This is used when automatically adjusting the lens focus.
13. FOCUS MANU button <FOCUS MANU>
This is used when manually adjusting the lens focus.
The FOCUS buttons (<F> and <N>) are used when performing the
actual adjustment.
14. OPT button <ON> <OFF>
Turn night mode on/off.
<NOTE>
• In night mode, video output will be in black and white. In addition,
the iris will be forcibly opened.
• White balance adjustment is not possible in night mode.
• ND filter switching is not possible in night mode.
15. HOME button <HOME>
When this is pressed for 2 seconds, the unit’s direction (panning or
tilting) returns to the reference position.
16. ZOOM button <T> <W>
These are used to adjust the lens zoom.
The zoom is adjusted in the wide-angle using the <W> button and in
the telephoto using the <T> button.
17. FAST button <FAST>
This is used to change the movement speed at which the panning, tilting,
zooming and focusing operations are performed to the high speed.
When the button is tapped, the movement speed can be set to the
normal high-speed operation. When the button is held down, it can be
set to an even faster high-speed operation. Tap the button to return
the movement speed to the normal high-speed operation.
<NOTE>
• The operating speed for panning and tilting when the preset
memory settings have been called can be changed using the
“Preset Speed” item of the camera menu.
18. SLOW button <SLOW>
This is used to change the movement speed at which the panning,
tilting, zooming and focusing operations are performed to the low speed.
When the button is tapped, the movement speed can be set to the
normal low-speed operation. When the button is held down, it can be
set to an even slower low-speed operation. Tap the button to return
the movement speed to the normal low-speed operation.
19. IRIS AUTO button <IRIS AUTO>
This establishes the setting for adjusting the lens iris automatically in
line with the light quantity.
20. IRIS MANU button <IRIS MANU>
This establishes the setting for adjusting the lens iris manually.
The <IRIS +> and <IRIS –> buttons are used when performing the
actual adjustment.
21. IRIS + button <IRIS +>
This is used to adjust the lens iris in the opening direction.
22. IRIS – button <IRIS –>
This is used to adjust the lens iris in the closing direction.
Setting the remote control IDs
The wireless remote control (optional accessory) is capable of operating
up to four units.
IDs are used to set which units are selected when the CAMERA <1>,
<2>, <3> and <4> buttons on the wireless remote control have been
pressed.
• When operating a multiple number of these units using wireless
remote controls, set a different remote control ID for each control.
• When using one unit, set the remote control ID to “CAM1” unless the
setting needs to be changed.
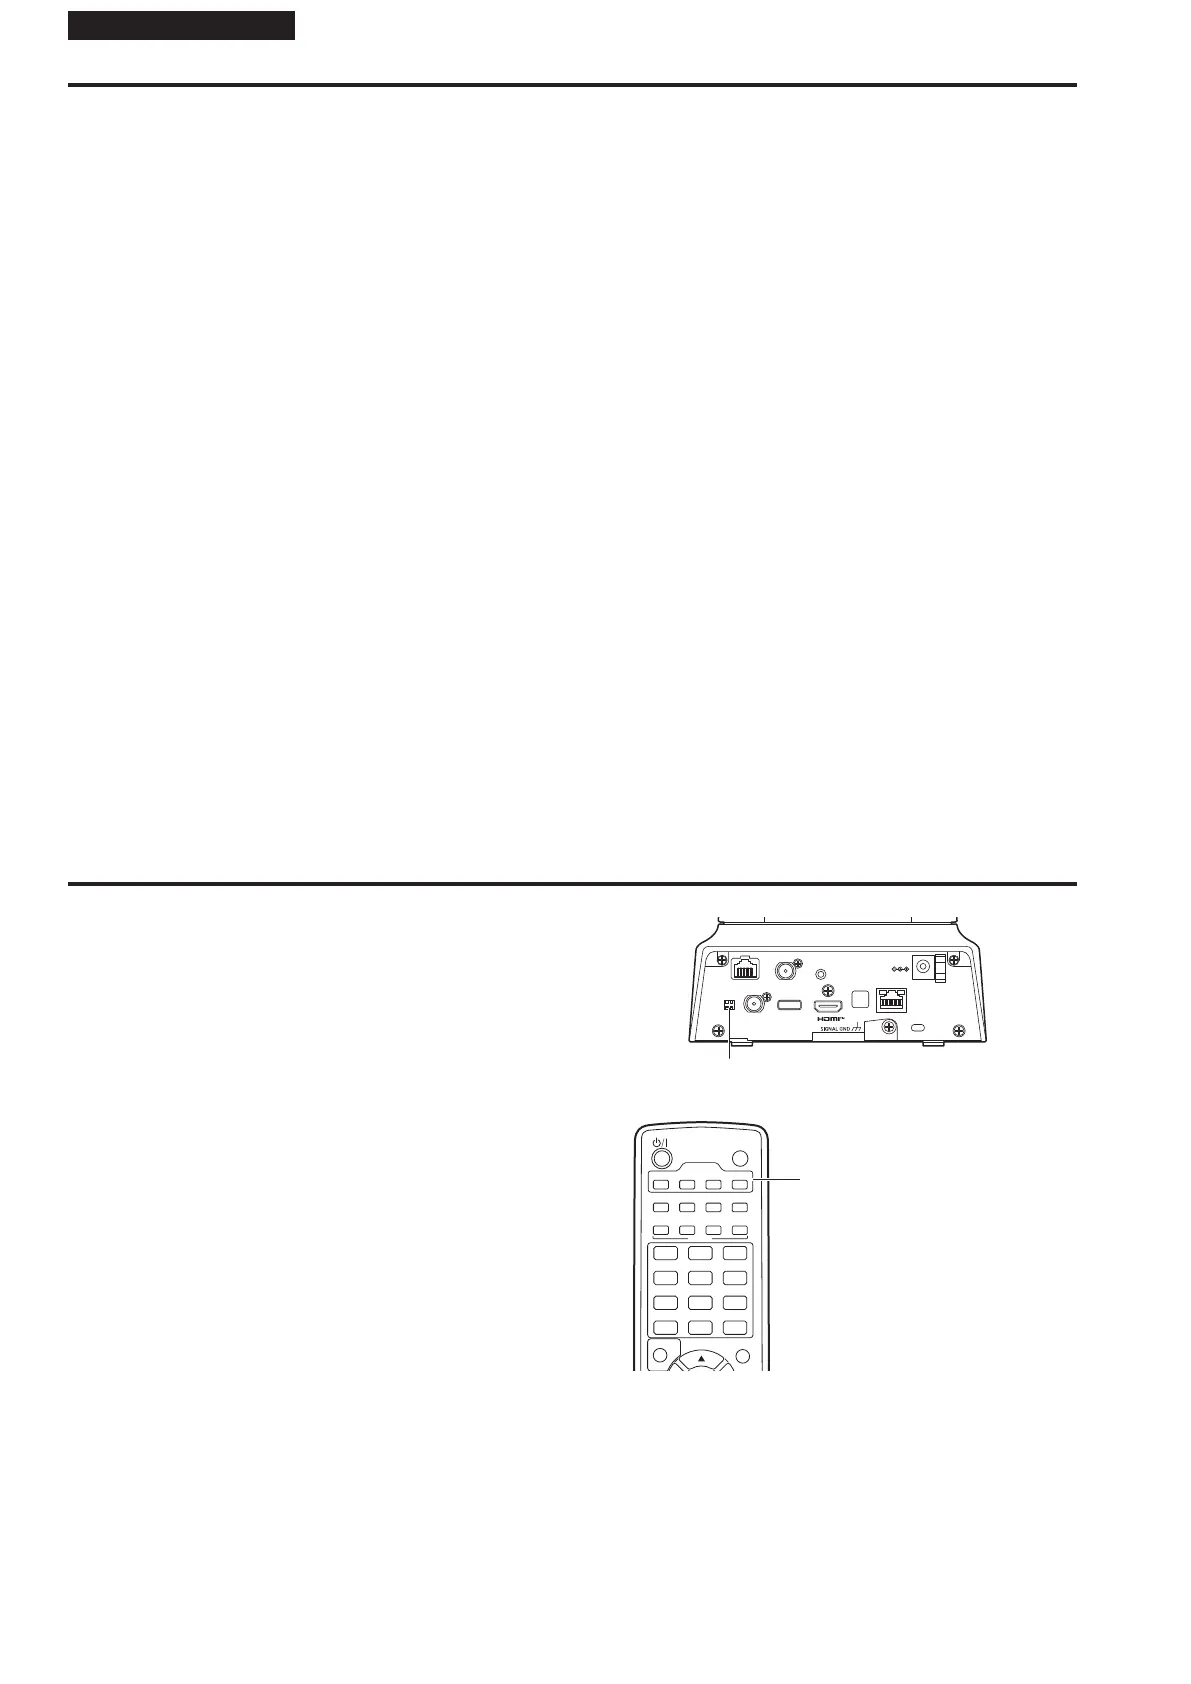
Setting procedure
Operate the IR ID switches on the unit's rear panel, and select “CAM1”,
“CAM2”, “CAM3” or “CAM4” as the remote control ID. (→ page 49)
The IR ID switch settings “CAM1” to “CAM4” correspond to the
CAMERA <1> to <4> buttons on the wireless remote control.
(The factory setting is “CAM1”.)
RS-422
IR ID
3G SDI OUT
G/L IN
AUDIO IN
LAN
LINK ACT
DC IN 12V
SERVICE
IR ID switches
SET
MODE
ON
ー
OPT
ー
OFF
OFF
LOW
HI
AUTO
MENU
CAMERA
GAIN
1 2 3 4
1
4
7
10 11 12
8 9
5 6
2 3
PRESET MEMORY
PRESET
HOME
CAMERA <1> to <4> buttons
56
Parts and their functions (continued)
 Loading...