141
16.3.4 CU-S24TKV
Caution! When handling electronic controller, be careful of electrostatic discharge.
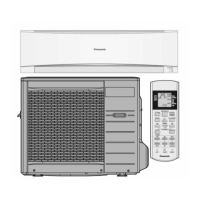
1. Remove the 5 screws of the Top Panel.
Fig.1
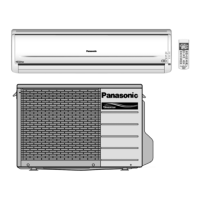
2. Remove the 7 screws of the Front Panel.
Fig.2
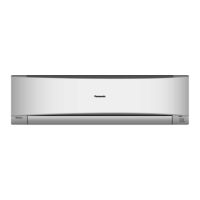
3. Remove the screw of the Terminal Board Cover.
4. Remove the Top Cover of the Electronic
Controller by 4 hooks.
Fig.3
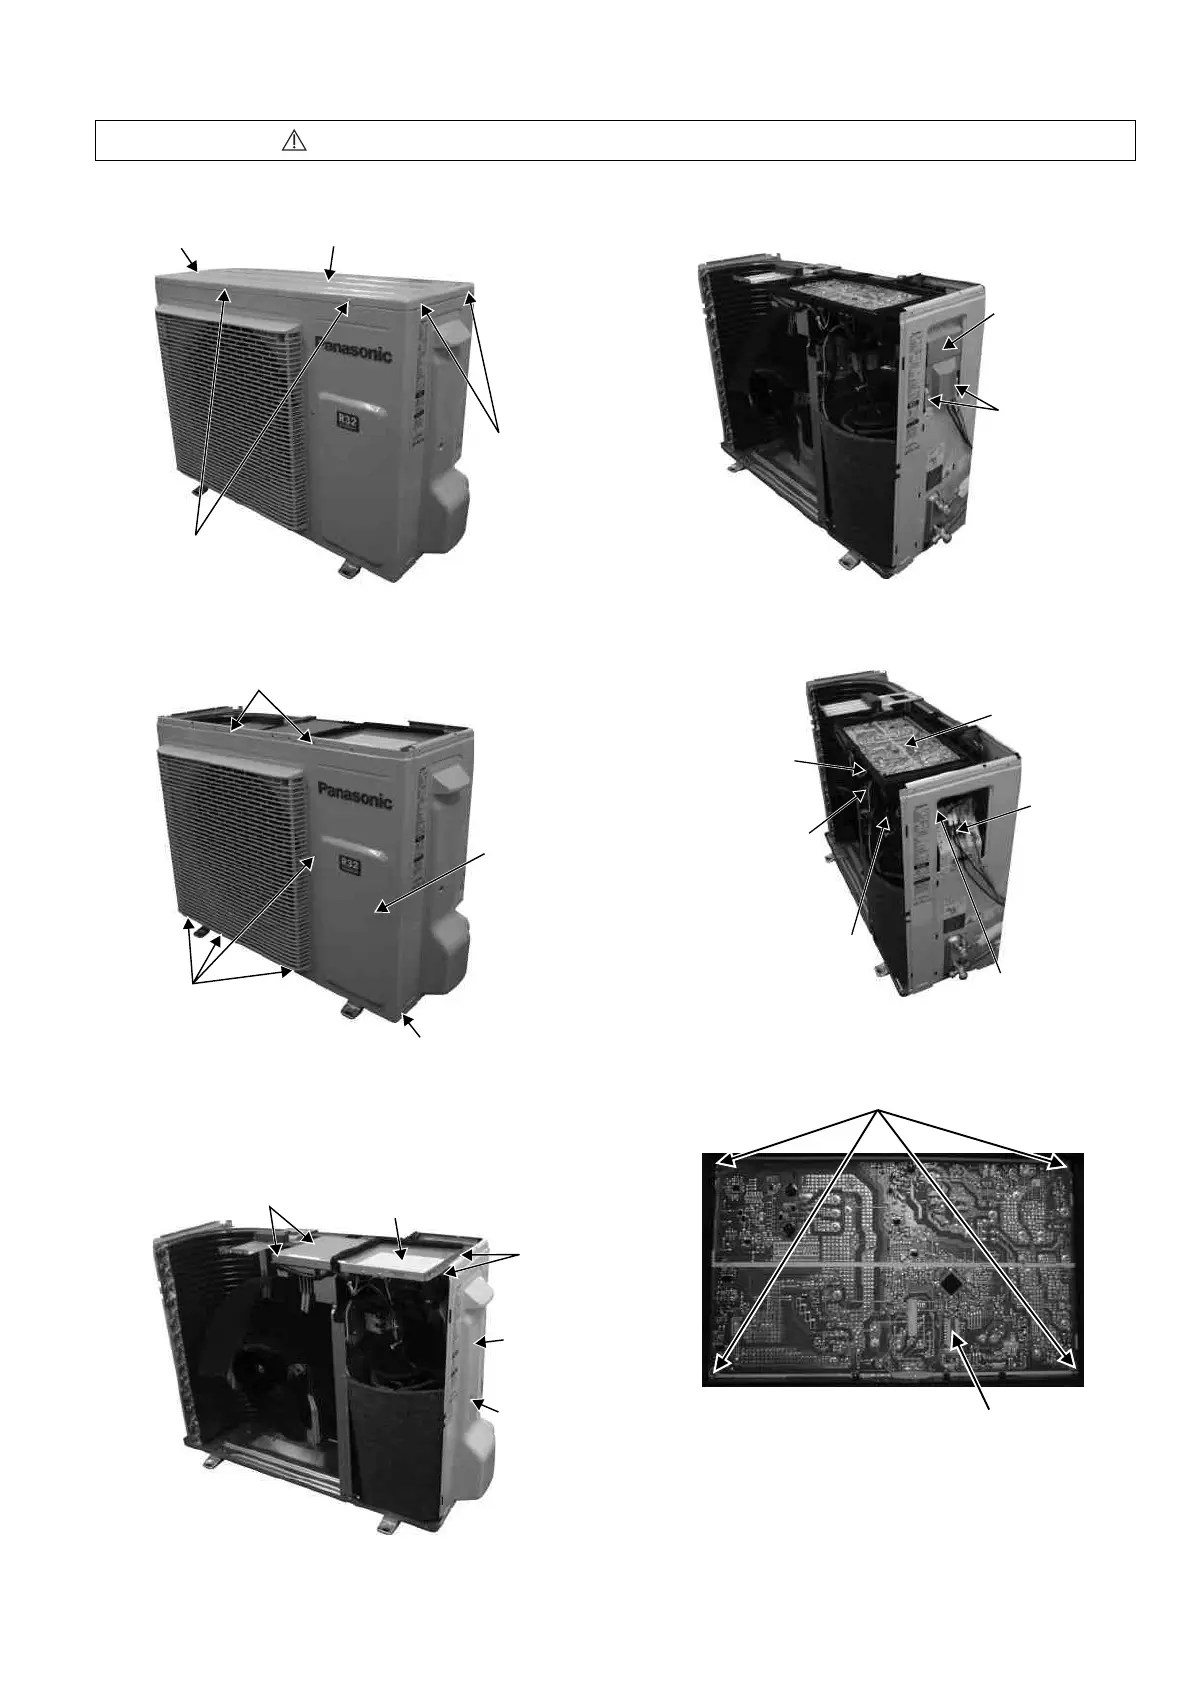
5. Remove 2 screws for the plate of Terminal Board
Cover.
Fig.4
6. Remove the Control Board.
Fig.5
7. Remove the 4 screws of the Electronic Controller.
Fig.6
Screws
Screws
Screw
Top Panel
Screws
Screws
Screw
Front Panel
Screw
Top Cover
Terminal
Board
Cover
Hooks
Hooks
Plate of
Ter mi nal B oa r d
Cover
Screws
Release screw
of Control Board
Release 3 terminal
connectors and
earth wire screw
Control Board
Remove 2 connectors from
reactor and compressor connector.
Release screw of
Control Board and
earth wire screw.
Detach all connectors
rom the electronic controller.
1) Fan motor connectors
(CN-MTR1 & CN-MTR2)
) Sensor connectors
(CN-TH1 & CN-TANK)
3) Expansion valve connector
(CN-STM1)
Electronic Controller
Screws
 Loading...