142
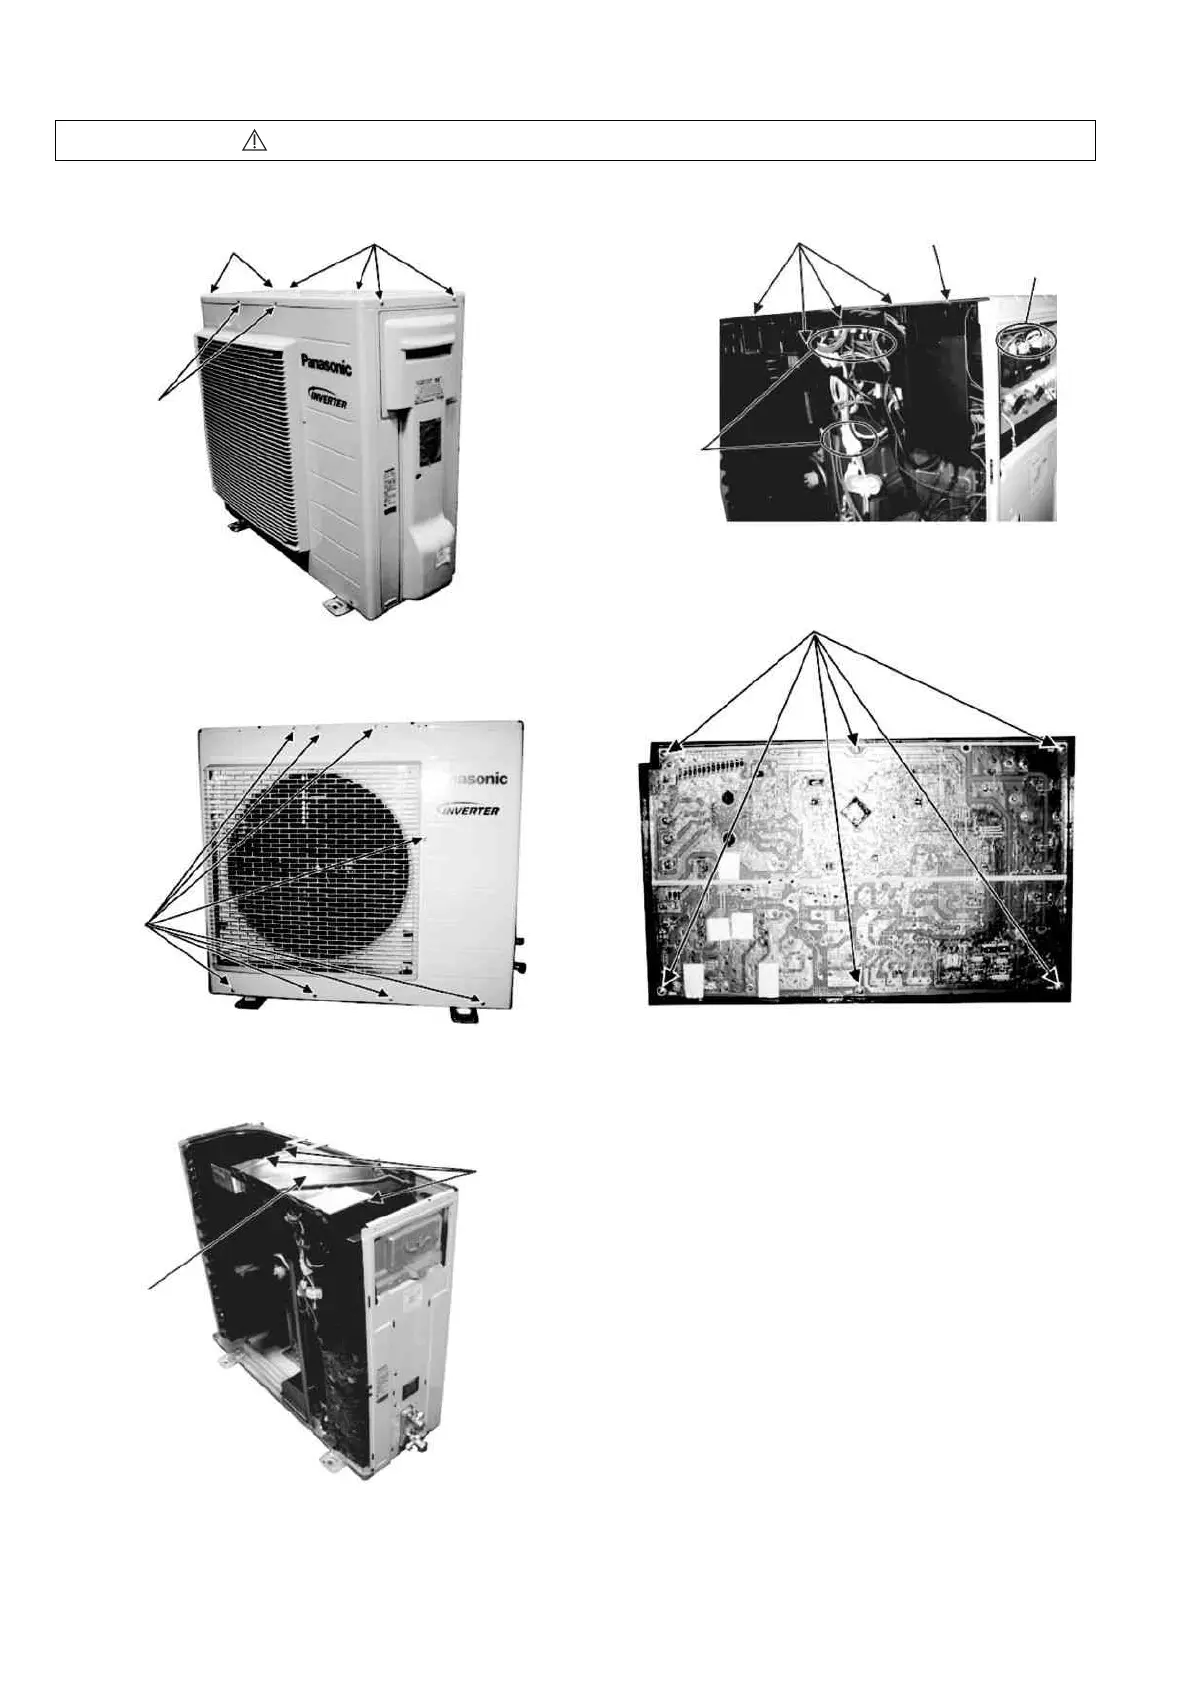
16.3.5 CU-S28TKV
Caution! When handling electronic controller, be careful of electrostatic discharge.
1. Remove the 4 screws of the Top Panel.
Fig.1
2. Remove the 10 screws of the Front Panel.
Fig.2
3. Remove the Top Cover of the Electronic
Controller.
Fig.3
4. Remove the Control Board.
Fig.4
5. Remove the 8 screws of the Electronic Controller.
Fig.5
Screws
Screws
Screws
Screws
Top Cover
Hook
Control board
Release 7
terminal
connectors
Release the hooks
Release 8
connectors
Screws
 Loading...