3.2 Installation of the PBX
Installation Manual 75
3.2.12 Wall Mounting (KX-TDE100)
WARNING
• MAKE SURE THAT THE WALL THAT THE SHELF WILL BE ATTACHED TO IS
STRONG ENOUGH TO SUPPORT THE SHELF. IF NOT, IT IS NECESSARY FOR THE
WALL TO BE REINFORCED.
• ONLY USE THE WALL-MOUNTING EQUIPMENT (ANCHOR PLUGS, SCREWS,
METAL BRACKET) INCLUDED WITH THE PBX.
• WHEN DRIVING THE SCREWS INTO THE WALL, BE CAREFUL TO AVOID
TOUCHING ANY METAL LATHS, WIRE LATHS OR METAL PLATES IN THE WALL.
• WHEN PLACING THE METAL BRACKET, MAKE SURE THAT THE "TOP" ARROW IS
POINTING UPWARD.
• WHEN THIS PRODUCT IS NO LONGER IN USE, MAKE SURE TO DETACH IT FROM
THE WALL.
Notes
• Do not block the openings of the shelf. Allow space of at least 20 cm above and 10 cm at the sides
of the shelf.
• Make sure that the surface behind the shelf is flat and free of obstacles, so that the openings on
the back of the shelf will not be blocked.
• Make sure that the surface behind the shelf is not made of wood.
• Be careful not to drop the shelf.
• For details about the dimensions and weight of the PBX, refer to "1.4.1 General Description".
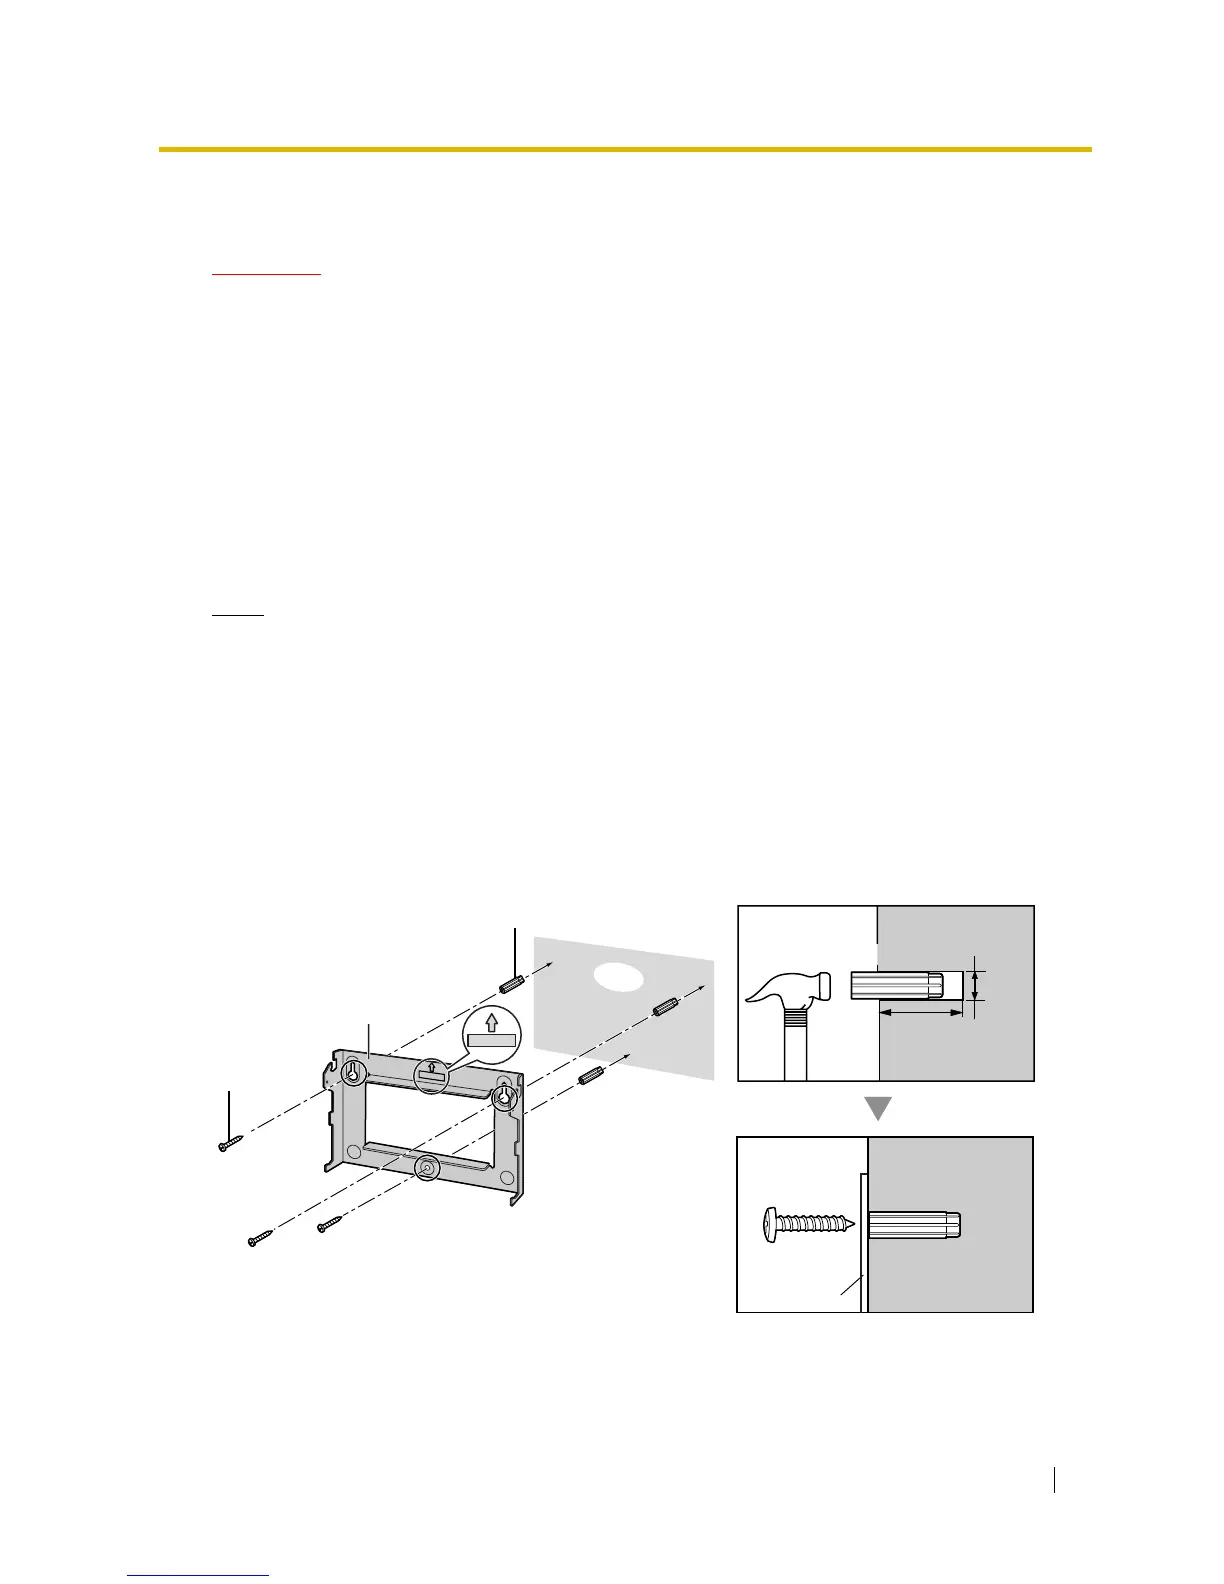
1. Install 3 anchor plugs in the wall, using the metal bracket as a template. Fix the metal bracket with 3
screws (A).
TOP
30 mm
8 mm
TOP
Metal Bracket
Screw (A)
Anchor Plug
Screw (A)
Metal Bracket
Hammer
Anchor Plug
Wall
 Loading...