Preparation/Basic
15
(ENG) DVQX1572
• Function buttons ([Fn6] to [Fn10]) are
touch icons.
Touch the [ ] tab on the recording screen
to display them.
29 3130 32 33
26
28
27
22
25
23
24
34 36 37 38
41
40
39
35
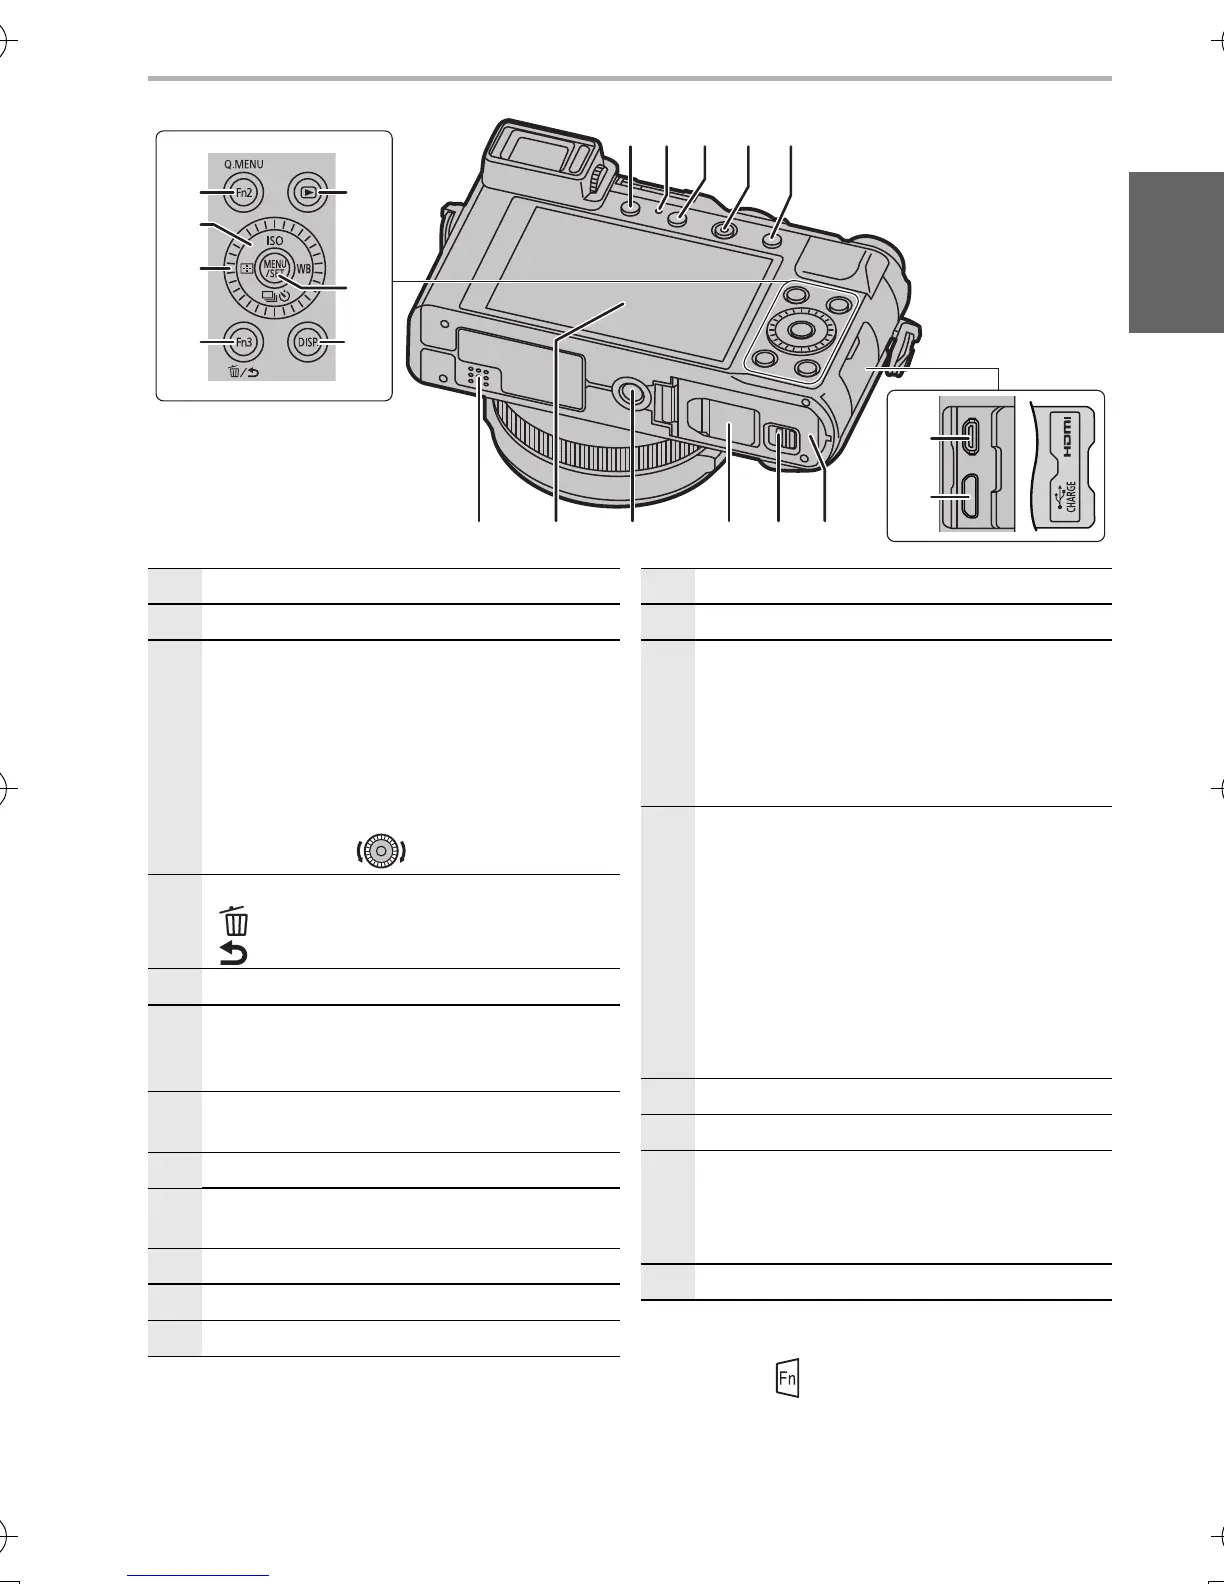
22 [Q.MENU] button/[Fn2] button (P31)
23 Cursor button (P27)
24
Control dial
• Selection of items or setting of values
etc., is performed.
• The operation of rotating the control
dial is illustrated as below in this
owner's manual.
When rotating the control dial to the
left or right:
25
[Fn3] button (P31, 37)/
[ ] (Delete) button (P51)/
[ ] (Cancel) button (P30)
26
[(] (Playback) button (P51)
27
[MENU/SET] button (P29)
• Confirmation of setting contents, etc.,
is performed.
28
[DISP.] button
• This switches the screen display.
29
[LVF] button (P22)/[Fn5] button (P31)
30
Charging lamp (P19)/
WIRELESS connection lamp (P57)
31 [Fn4] button (P31)
32 Motion picture button (P49)
33
[AF/AE LOCK] button
34 Speaker (P24)
35 Touch screen (P29)/monitor (P69)
36
Tripod mount
• It may not be possible to attach and
securely fasten a tripod with a screw
length of 5.5 mm (0.22 inch) or more
to the camera. Doing so may also
damage the camera.
37
DC coupler cover
• Always use a genuine Panasonic AC
adaptor (DMW-AC10PP: optional).
• When using an AC adaptor, ensure
that the Panasonic DC coupler (DMW-
DCC11: optional) and AC adaptor
(DMW-AC10PP: optional) are used.
• When using an AC adaptor (optional),
use the AC cable supplied with the AC
adaptor (optional).
38 Release lever (P18)
39 Card/Battery door (P18)
40
[HDMI] socket
• You can view pictures on a TV screen
by connecting your camera to your TV
with the HDMI micro cable.
41
[USB/CHARGE] socket (P19)
DC-LX100M2PPP-DVQX1572_eng.book 15 ページ 2018年8月7日 火曜日 午後5時10分
 Loading...