Preparation
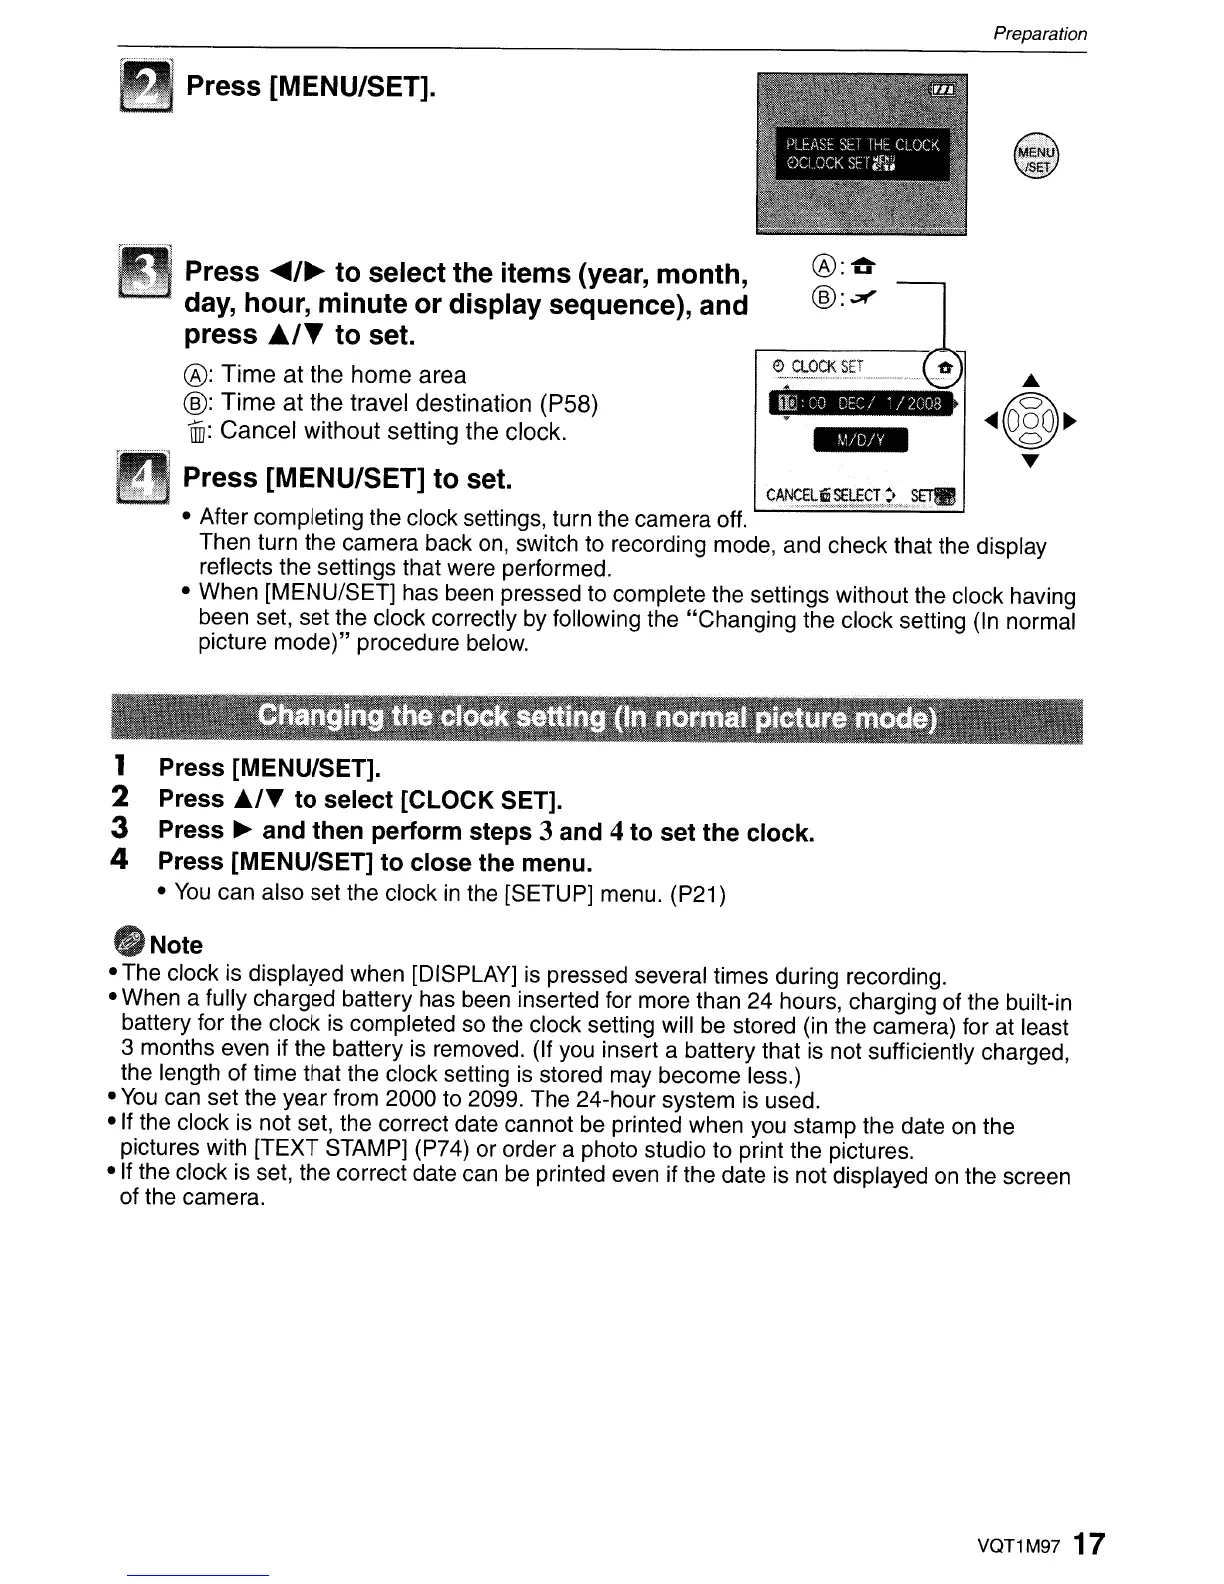
Press [MENU/SET].
-
tp;:..-..
\!y.
LI
~~:~~n_~
Press
~/~
to select the items (year, month,
day, hour, minute or display sequence), and
press
AI"
to set.
®:
Time
at
the
home
area
@:
Time
at
the
travel destination (P58)
lID:
Cancel
without
setting the clock.
DPress [MENU/SET] to set.
• After completing the clock settings, turn the camera off.
Then turn the camera back
on,
switch to recording mode, and check that the display
reflects the settings that were performed.
• When [MENU/SET] has been pressed to complete the settings without the clock having
been set, set the clock correctly by following the "Changing the clock setting (In normal
picture
mode)"
procedure below.
1 Press [MENU/SET].
2 Press
j./T
to select [CLOCK SET].
3 Press
~
and then perform steps 3 and 4 to set the clock.
4 Press [MENU/SET] to close the menu.
•
You
can also set the clock
in
the [SETUP] menu. (P21)
flNote
• The clock is displayed when [DISPLAY]
is
pressed several times during recording.
• When a fully charged battery has been inserted for more than 24 hours, charging of the built-in
battery for the clock is completed so the clock setting will be stored (in the camera) for at least
3 months even if the battery is removed. (If you insert a battery that
is
not sufficiently charged,
the length of time that the clock setting
is
stored may become less.)
•
You
can set the year from 2000 to 2099. The 24-hour system is used.
•
If
the clock is not set, the correct date cannot be printed when you stamp the date
on
the
pictures with [TEXT STAMP] (P74) or order a photo studio to print the pictures.
• If the clock is set, the correct date can be printed even if the date is not displayed
on
the screen
of the camera.
VQT1M97 17

 Loading...