13
3.4.2. INITIAL SETTINGS:
When you replace the MAIN PCB, be sure to perform the initial settings after achieving the adjustment by ordering the following pro-
cedure in accordance with model suffix of the unit.
1. IMPORTANT NOTICE:
Before proceeding Initial settings, be sure to read the following CAUTIONS.
2. PROCEDURES:
• Preparation
Insert the SD memory card which has a few photo data.
• Step 1. The temporary cancellation of initial setting:
Set the Drive mode lever to [ SINGLE ].
While keep pressing [ DISPLAY ] and [ FILM MODE ] buttons simultaneously, turn the Power on.
• Step 2. The cancellation of initial setting:
Press the [PLAYBACK] button, then playback the picture.
Press [ FILM MODE ] and “[ UP ] of Cursor buttons” simultaneously, then turn the Power off.
• Step 3. Turn the Power on:
Set the mode dial to [ P ], and then turn the Power on.
• Step 4. Display the INITIAL SETTING:
While keep pressing [ MENU/SET ] and “[ RIGHT ] of Cursor buttons” simultaneously, turn the Power off.
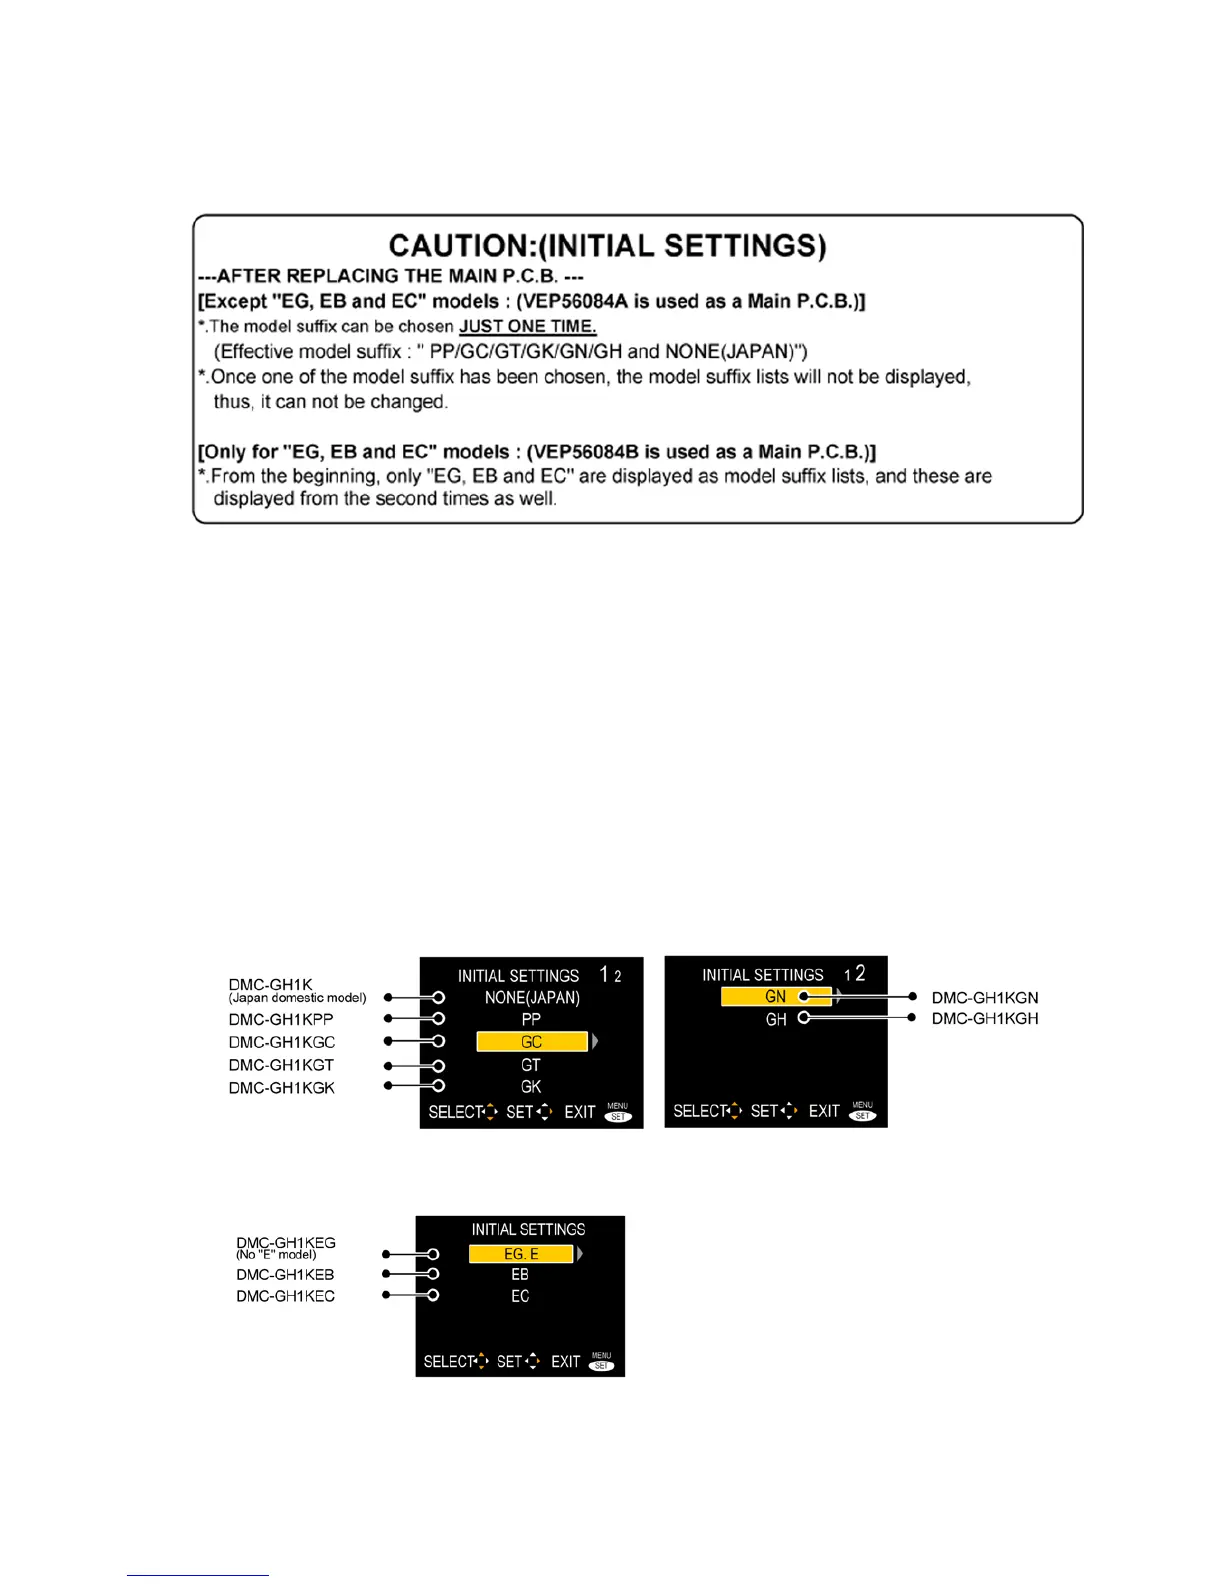
When MAIN P.C.B. is replaced, all of the model suffix is displayed as follows.
There are two kinds of “INITIAL SETTINGS” menu format.
[CASE 1. After replacing MAIN P.C.B.]
[Except "EG, EB and EC" models : (VEP56084A is used as a Main P.C.B.)]
When MAIN P.C.B. has just been replaced, all of the model suffix are displayed as follows. (two pages in total)
[Only for "EG, EB and EC" models : (VEP56084B is used as a Main P.C.B.)]
When MAIN P.C.B. has just been replaced, only 4 model suffix are displayed as follows.
 Loading...