53
9.4. Disassembly and Assemble Procedure for the Lens
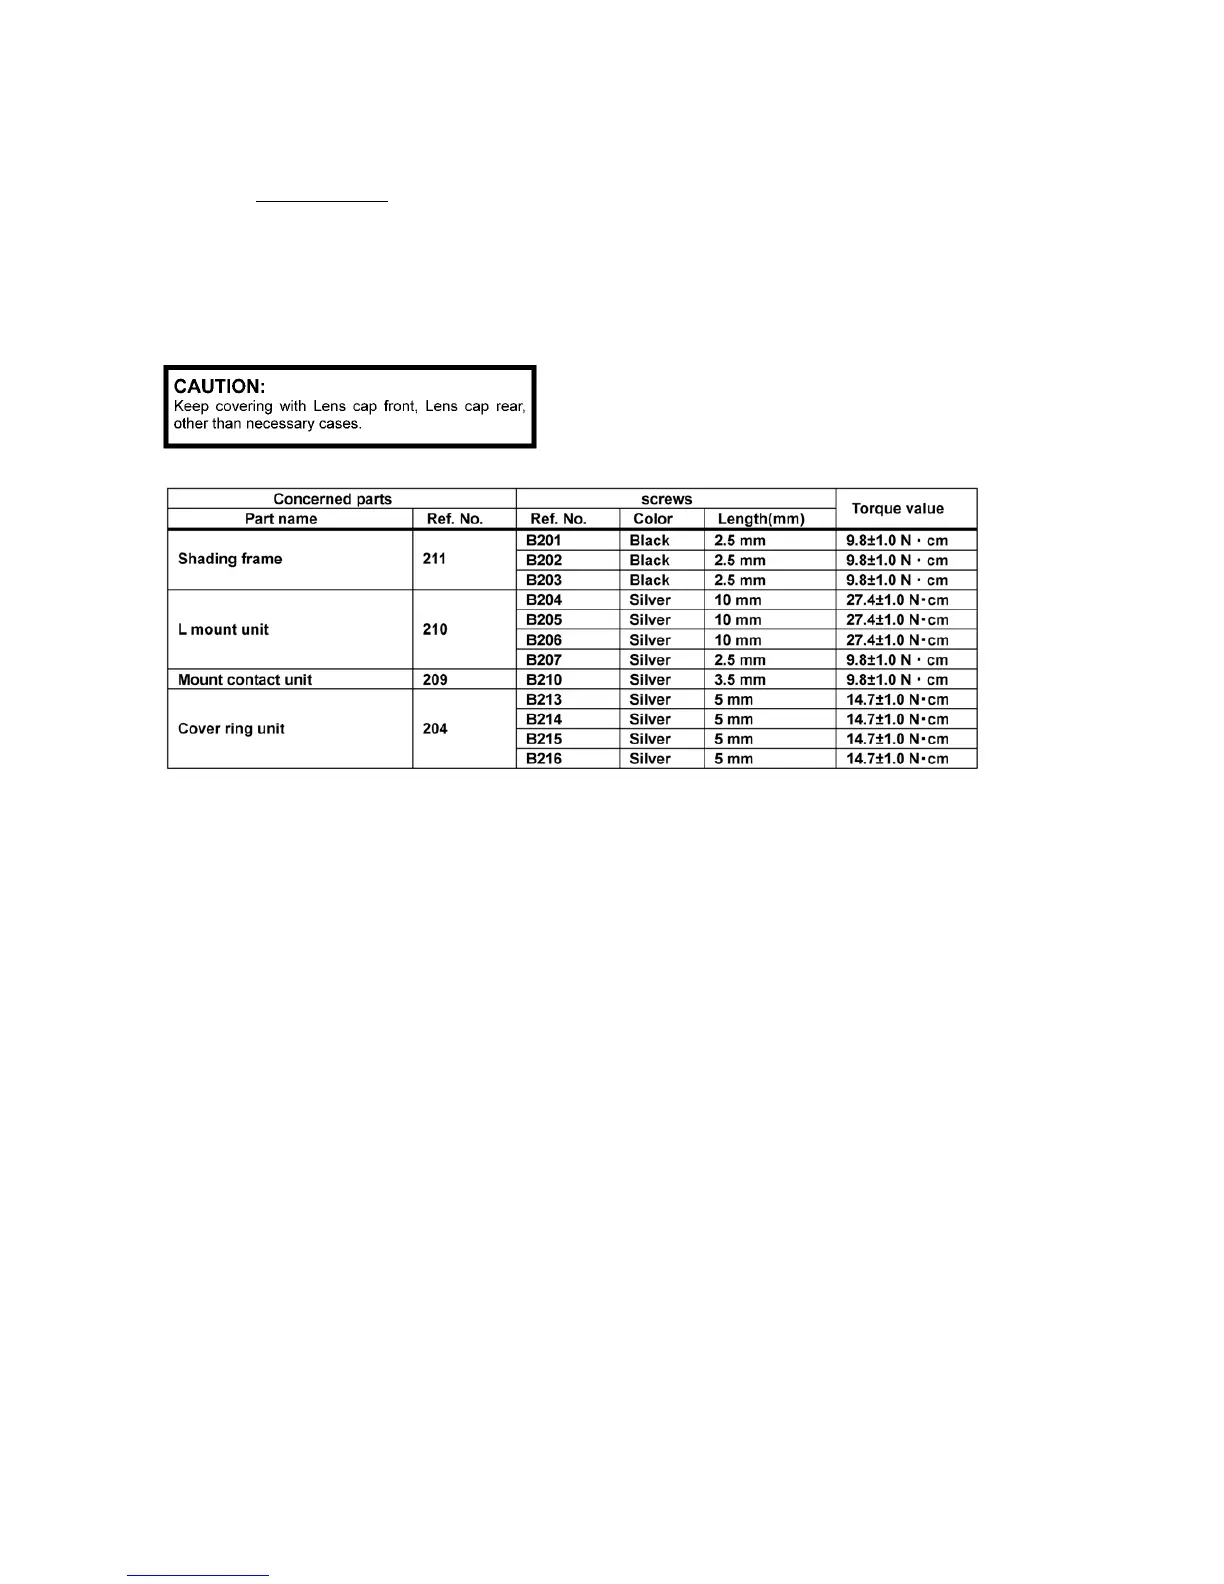
Refer to the following table and the illustration for disassembly and assembly.
NOTE:
1. To keep maintaining the dustproof environment, it is recommended dealing with Clean box.
(Refer to “ 8.2. Clean Box “
which is found in section "8.Service Fixture & Tools" of this manual.)
2. Do not allow dirt and dust to get into the inside part/component of the unit.
3. Do not touch the surface of the lens glasses with your fingers.
4. Blow off the dust on the surface of the lens with a blower brush.
5. Use lens cleaning KIT (BK)(VFK1900BK).
Interchangeable Lens (H-FS014140)
NOTE:
1. .When installing the screws, be sure to use the torque driver (RFKZ0456) and tighten the screws with specified torque, men-
tioned on the above table.
2. The Ref.B209 is no need to remove/install for disassembly and assembly.
Use VFK1390 (small driver) when the installation is necessary because the screw was lost.
 Loading...