EasyManua.ls Logo

Panasonic NA-F100A2 - User Manual

Panasonic NA-F100A2
28 pages
Print Icon
To Next Page IconTo Next Page
Loading...
Order No. PAPTH160301CE
Service Manual
Fully Automatic Washing Machine
Product Colour
Destination
White (W)
Thailand
NA-F100A2
The service information is designed for experienced repair technicians only and is not designed for use by the general
public. It does not contain warnings or cautions to advise non-technical individuals of potential dangers in attempting
to service a product. Products powered by electricity should be serviced or repaired only by experienced professional
technicians. Any attempt to service or repair the product or products dealt within this service information by anyone
else could result in serious injury or death.
WARNING
IMPORTANT SAFETY NOTICE
There are special components used in this equipment which are important for safety. These parts are marked by
in the Schematic Diagrams, Circuit Board Diagrams, Exploded Views and Replacement Parts List. It is essential that
these critical parts should be replaced with manufacturer’s speci ed parts to prevent shock, re or other hazards. Do
not modify the original design without permission of manufacturer.
© Panasonic Appliances (Thailand) Co., Ltd. 2016.
All rights reserved. Unauthorized copying and
distribution is a violation of law.
Service NA-F100A2.indd 1Service NA-F100A2.indd 1 4/26/2559 BE 11:50 AM4/26/2559 BE 11:50 AM

Questions and Answers

Summary

Repair Work Security Attention

Parts Identification

Specifications

Technical Information

Standard Wash Capacity

Details the maximum load capacity for various washing programs.

Standard Water Supply

Outlines the water supply duration and volume for different wash programs.

Installation

Check the Location

Guidelines for selecting a suitable and safe installation location for the washing machine.

Attach the Bottom Cover

Instructions for attaching the bottom cover to the washing machine unit.

Attach the External Drain Water Hose

Steps for correctly connecting the external drain water hose.

Connect Water Tap Adaptor and Supply Hose

Procedure for connecting the water supply hose to the tap adaptor and faucet.

Connect Power Plug and Grounding Wire

Guidance on safely connecting the power plug and establishing grounding.

Check Washing Machine Stability

Instructions to ensure the washing machine does not wobble during operation.

Perform Trial Operation

Steps for conducting a trial operation to check for leaks and sounds.

Operation Panel Overview

Washing Process

Washing Options

Delicate Wash Program

Program for gently washing delicate clothes and stylish garments.

Extreme Wash Program

Program for thorough cleaning with plenty of water in wash and rinse.

Blanket Wash Program

Instructions for washing washable blankets.

Air Dry Function

Details on removing water from clothes by tub rotation and air blowing.

Maintenance Procedures

Cancelling End Buzzer

How to cancel the end buzzer sound.

Setting Child Lock

Procedure to activate or deactivate the child lock safety function.

Turning the Tub by Hand

Method for manually turning the tub, for example, for filter access.

Lint Filter Maintenance

Instructions for removing, cleaning, and reattaching the lint filter.

Test Mode Operations

Troubleshooting Guide

Error Code Indications

U-Error Indications

Explanation of error codes starting with 'U' and their solutions.

H-Error Indications

Explanation of error codes starting with 'H' and their solutions.

Wiring Diagram

Disassembly Procedures

Controller Unit Disassembly

Steps for disassembling the electronic controller unit.

Panel Face B Disassembly

Instructions for removing and disassembling Panel Face B.

Parts Information

Parts Exploded View: Part A

Visual breakdown of major components for Part A.

Replacement Parts List: Part A

List of replacement parts with part numbers for Part A.

Parts Exploded View: Part B

Visual breakdown of major components for Part B.

Replacement Parts List: Part B

List of replacement parts with part numbers for Part B.

Parts Exploded View: Part C

Visual breakdown of major components for Part C.

Replacement Parts List: Part C

List of replacement parts with part numbers for Part C.

Parts Exploded View: Packing

Diagram showing packing materials and components.

Replacement Parts List: Packing

List of replacement parts related to packing materials.

Overview

This document outlines the service and operational procedures for the Panasonic NA-F100A2 Fully Automatic Washing Machine, designed for the Thailand market. It covers installation, daily use, maintenance, troubleshooting, and parts replacement.

Function Description

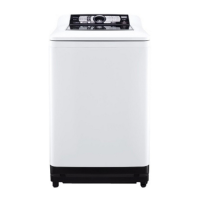
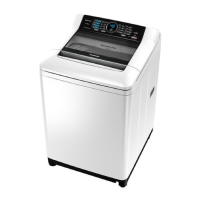
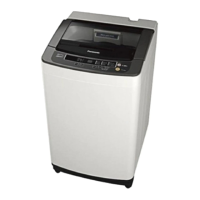
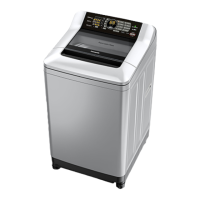
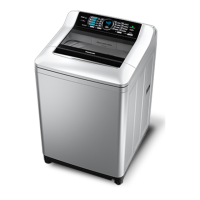
The Panasonic NA-F100A2 is a fully automatic washing machine designed to handle various laundry needs with ease. It offers multiple wash programs, including Normal, Energy Save (Speedy), Delicate, Baby-care, Fragrance, Blanket, Power Wash + Soak, Extreme Wash, Air Dry, and Tub Hygiene. Each program is tailored to specific fabric types and soil levels, ensuring optimal cleaning and fabric care. The machine features a pulsator for effective washing and a spin tub for efficient water extraction. Water supply pressure is regulated to ensure consistent performance, and a thermo protector safeguards the single-phase induction motor.

Usage Features

Installation: Proper installation is crucial for the washing machine's performance and safety. The manual emphasizes avoiding locations prone to freezing, dampness, direct sunlight, or uneven surfaces. The bottom cover must be attached securely, and the external drain water hose connected correctly, ensuring it is not directed upward, raised more than 10 cm above the floor, or extended beyond 3 meters. The water tap adaptor and water supply hose require firm connections to prevent leaks. Grounding is essential, especially for 2-pin power cords. After installation, the machine's stability should be checked, and a trial operation performed to detect any water leakage, abnormal sounds, or error displays.

Operation Panel: The operation panel provides intuitive control over the washing cycles. Users can change the water amount during a wash process by pressing "Water Level." The display shows the current water amount and, after approximately 5 seconds, the approximate remaining time. Water levels, except "Extra Low," offer three options that can be switched while the level indicator is lit. The "Preset" function allows users to set a delayed finish time for washing, ranging from 2 to 24 hours later (3 to 24 hours for Power Wash + Soak). This feature is not available for Delicate, Fragrance, Blanket, Tub Hygiene, and Air Dry programs. In case of a power failure, the Auto Restart function resumes operation from where it stopped. The machine automatically powers off if "Start/Pause" is not pressed within 10 minutes of power-on.

Washing Process: To start, turn on the power, select a program, and press "Start." The pulsator will move without water to measure the laundry amount (approximately 5 seconds), after which the water amount is indicated. Detergent should be added approximately 20 seconds after the water amount is displayed, as water supply begins then. The lid must be closed for operation to proceed.

Washing Options:

  • Delicate: For gentle washing of delicate clothes and stylish garments. It recommends loading laundry evenly, pressing down items that float easily, and using laundry nets for delicate underwear.
  • Extreme Wash: Designed for thorough cleaning of heavy dirt clothes, thick clothes (e.g., jeans), dark colors, towels, and duvets, using plenty of water in wash and rinse processes. The ring shower feature ensures water penetrates fabric texture for higher dirt removal efficiency, with two rinses at maximum water level.
  • Fragrance: This program is specifically designed for adding a large amount of fabric softener to impart a nice scent and softness. The buzzer sounds before the final rinse, pausing the operation to allow users to add diluted fabric softener directly into the tub.
  • Blanket: Suitable for washable blankets made of 100% synthetic fiber or 100% cotton, weighing 4.2 kg or less. Blankets should be placed in a net with the zipper facing up to prevent damage. Liquid detergent is recommended, and the water amount cannot be changed.
  • Air Dry: Removes water from clothes by air blown from the tub rotation. It is suitable for synthetic fiber clothes weighing 2.0 kg or less. This function does not use a heater, so clothes may feel cold and partially dry.

Maintenance Features

Cancelling End Buzzer: To cancel the end buzzer, press and hold "Start/Pause" and "Off/On" simultaneously for 3 seconds until two short beeps are heard. To reset, repeat the procedure until four short beeps are heard.

Setting Child Lock: The Child Lock function prevents children from falling into the tub. If the lid is opened during operation, a buzzer sounds, and if not closed within 10 seconds, the water is flushed out. This function does not lock the lid or button operations. To activate, close the lid, turn on the power, and press and hold "Air Dry" for 5 seconds until two short beeps are heard. To cancel, repeat the procedure until four short beeps are heard.

Turning the Tub by Hand: If it is difficult to reach the detergent or softener inlet, the tub can be turned clockwise by hand after turning on the power. This is not possible if there is water in the tub or if "Start" has been pressed.

Lint Filter: The lint filter should be cleaned after each operation. To remove, open the filter and remove lint. If lint is difficult to remove, soak and wash the filter in water. The filter must be attached in its original position before washing to prevent damage to clothes. If the filter is broken, a new one should be purchased from a local dealer.

Panasonic NA-F100A2 Specifications

General IconGeneral
Capacity10 kg
Spin Speed1000 RPM
Weight38 kg
Wash Programs10
Water Level SelectionYes
Foam SensorYes
Child LockYes
Voltage220-240 V
Frequency50 Hz
TypeTop Load
Dimensions (W x D x H)600 x 600 x 1010 mm

Related product manuals