18 Object group settings
1 2 3 4 5 6 7 8 9
1
2
3
4
5
6
7
8
(1)
(2)
(3)
(4)
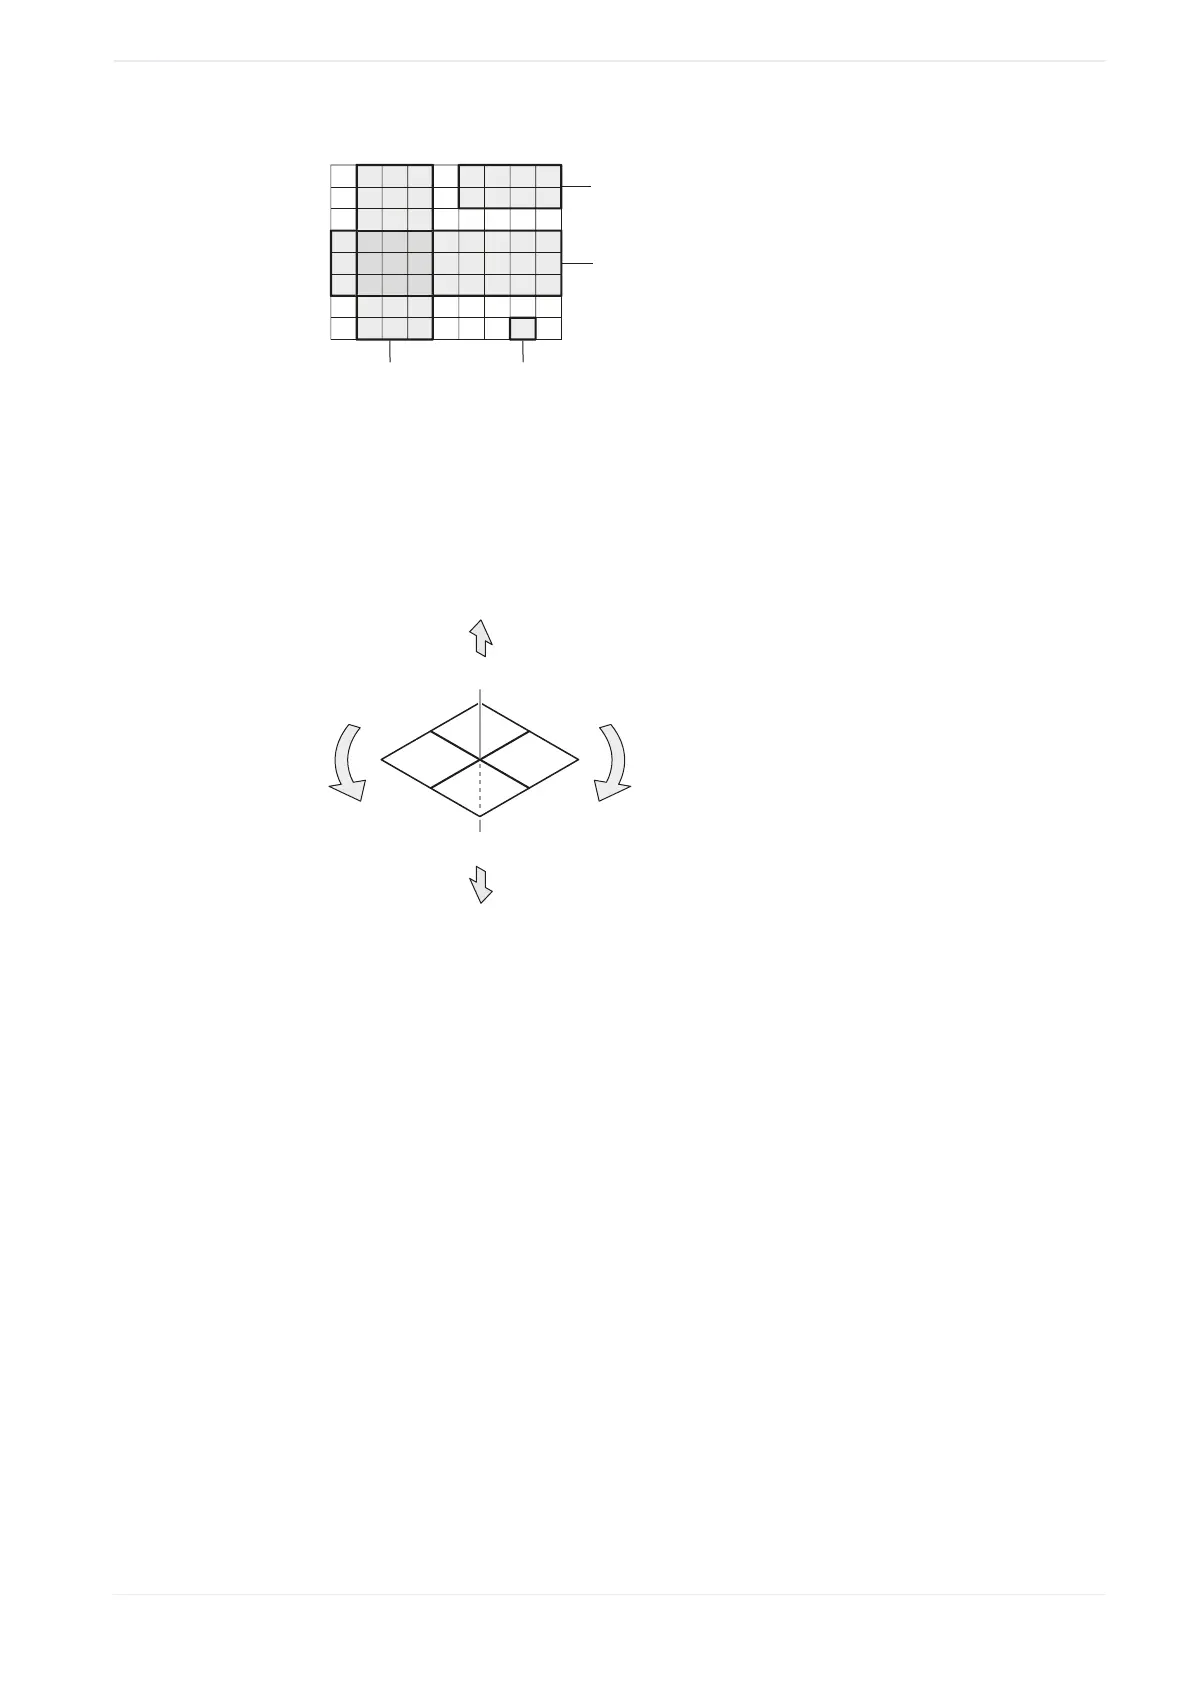
(1)
“Column”, “Start column”: 2, “Last column”: 4
(2)
“Single step”, “Start row”: 8, “Start column”: 8
(3)
“Row”, “Start row”: 4, “Last row”: 6
(4)
“Rectangle range”, “Start row”: 1, “Last row”: 2, “Start column”: 6, “Last column”: 9
You can specify different parameters to correct the marking position.
The following figure shows these parameters.
+Y
-Z
+X
-X
+Z
+
-
-Y
(1)
(2)
(3)
(5)
(4)
(1)
X-movement
(2)
Y-movement
(3)
Z-movement
(4)
Rotation (-)
(5)
Rotation (+)
• “ X-movement [mm]”, “Y-movement [mm]”:
Enter a value to move the selected element of the step & repeat object along the x-axis
and y-axis.
• “ Z-movement [mm]” (LP-GS except LP-GS051-L):
Enter a value to position the selected element of the step & repeat object along the z-
axis.
• “Rotation movement [°]”:
Specify an angle to rotate the selected element of the step & repeat object.
The rotation center is the reference point of the original marking object.
Correct the laser power:
• “Laser power correction [+/-%]”:
To correct the laser power of the selected element, enter a value in the text box. You can
enter a correction value between -50% and +50%.
ME-NAVIS2-OP-1 199