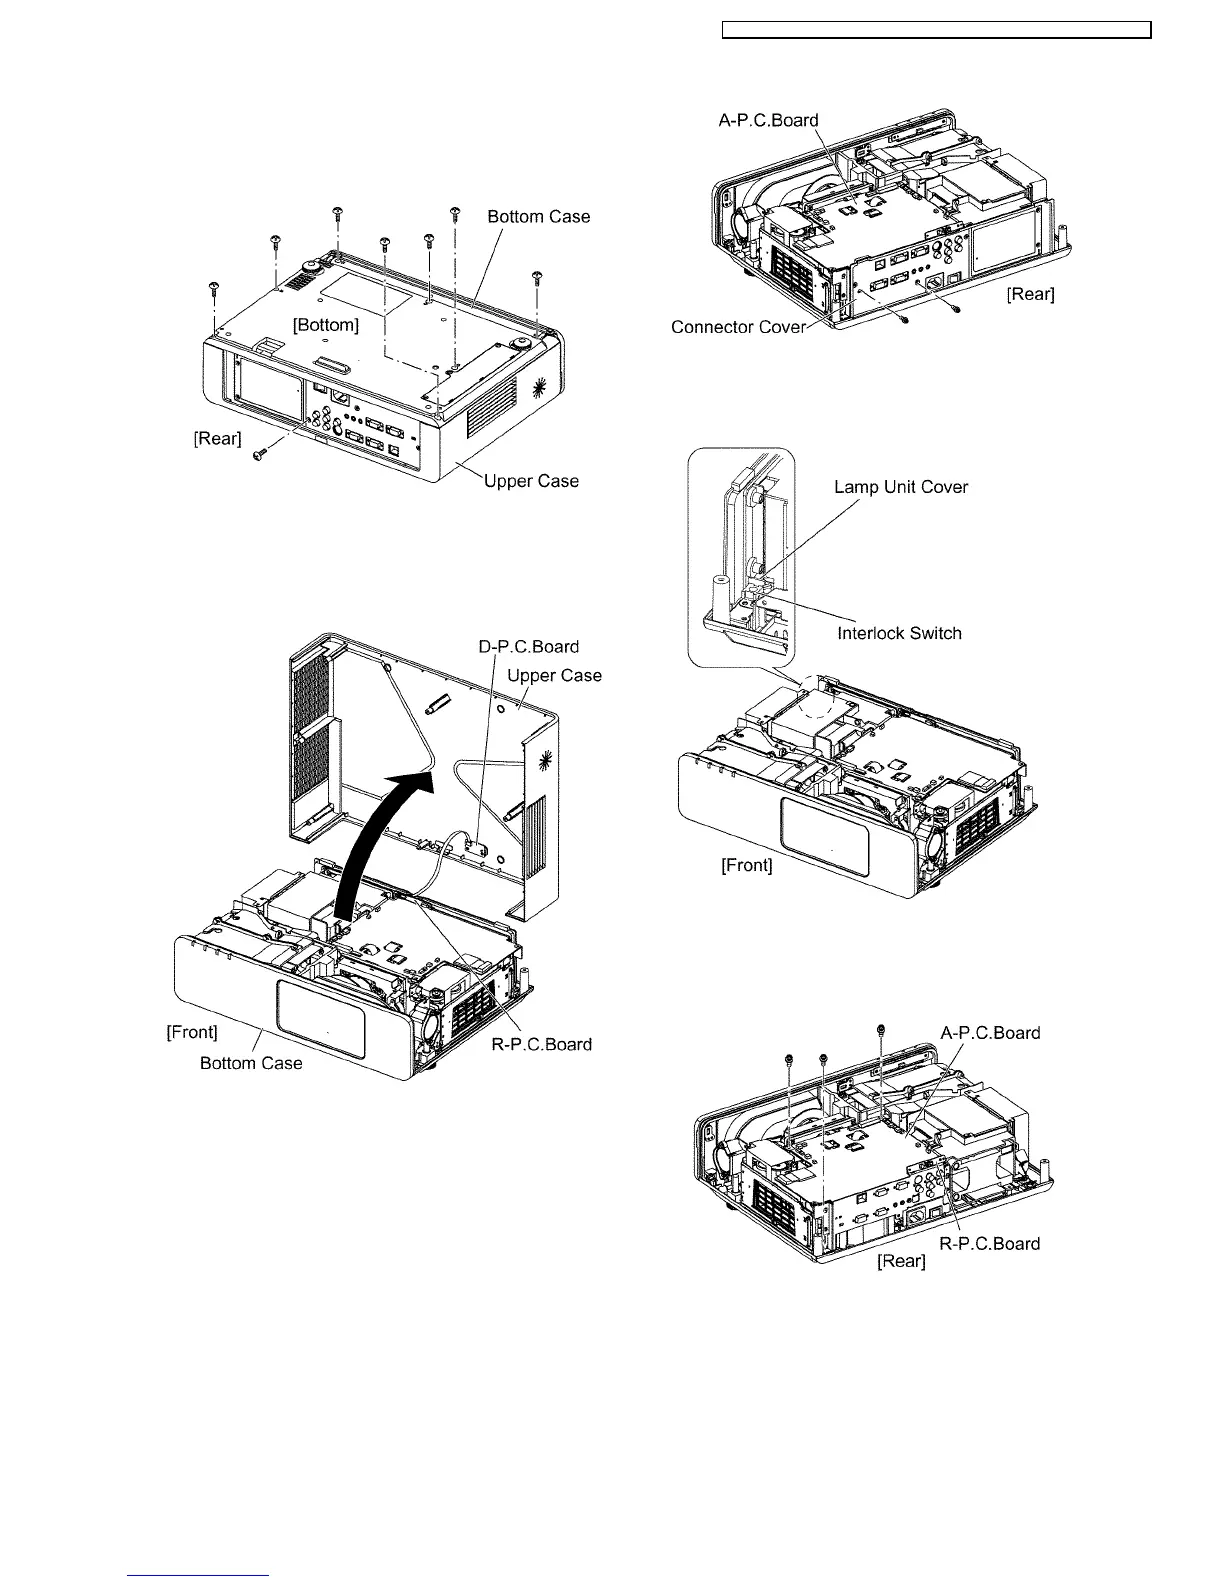
7.2. Removal of Upper Case
1. Turn the projector upside down.
2. Unscrew the 8 screws.
3. Return the projector to the normal position.
4. Lift the upper case upward.
5. Disconnect the flexible cable between D-P.C.Board and R-
P.C.Board, then remove the upper case.
7.3. Removal of A-P.C.Board
1. Remove the upper case according to the section 7.2.
"Removal of Upper Case".
2. Unscrew the 2 screws and remove the connector cover.
Note:
·
When reassembling, confirm the interlock switch is
normal status (the switch is in "ON" position).
3. Disconnect all connectors of the cables connected with the
A-P.C.Board.
4. Unscrew the 3 screws and remove the A-P.C.Board block.
5. Unscrew the 2 screws and remove the connector dustproof
cover.
Note:
·
R-P.C.Board is attached on the connector metal
fittings. Be careful with handling.
13
PT-F100NTU / PT-F100NTE / PT-F100NTEA / PT-F100U / PT-F100E / PT-F100EA
 Loading...