Note: You can return the tray by turning the gear jig clockwise.
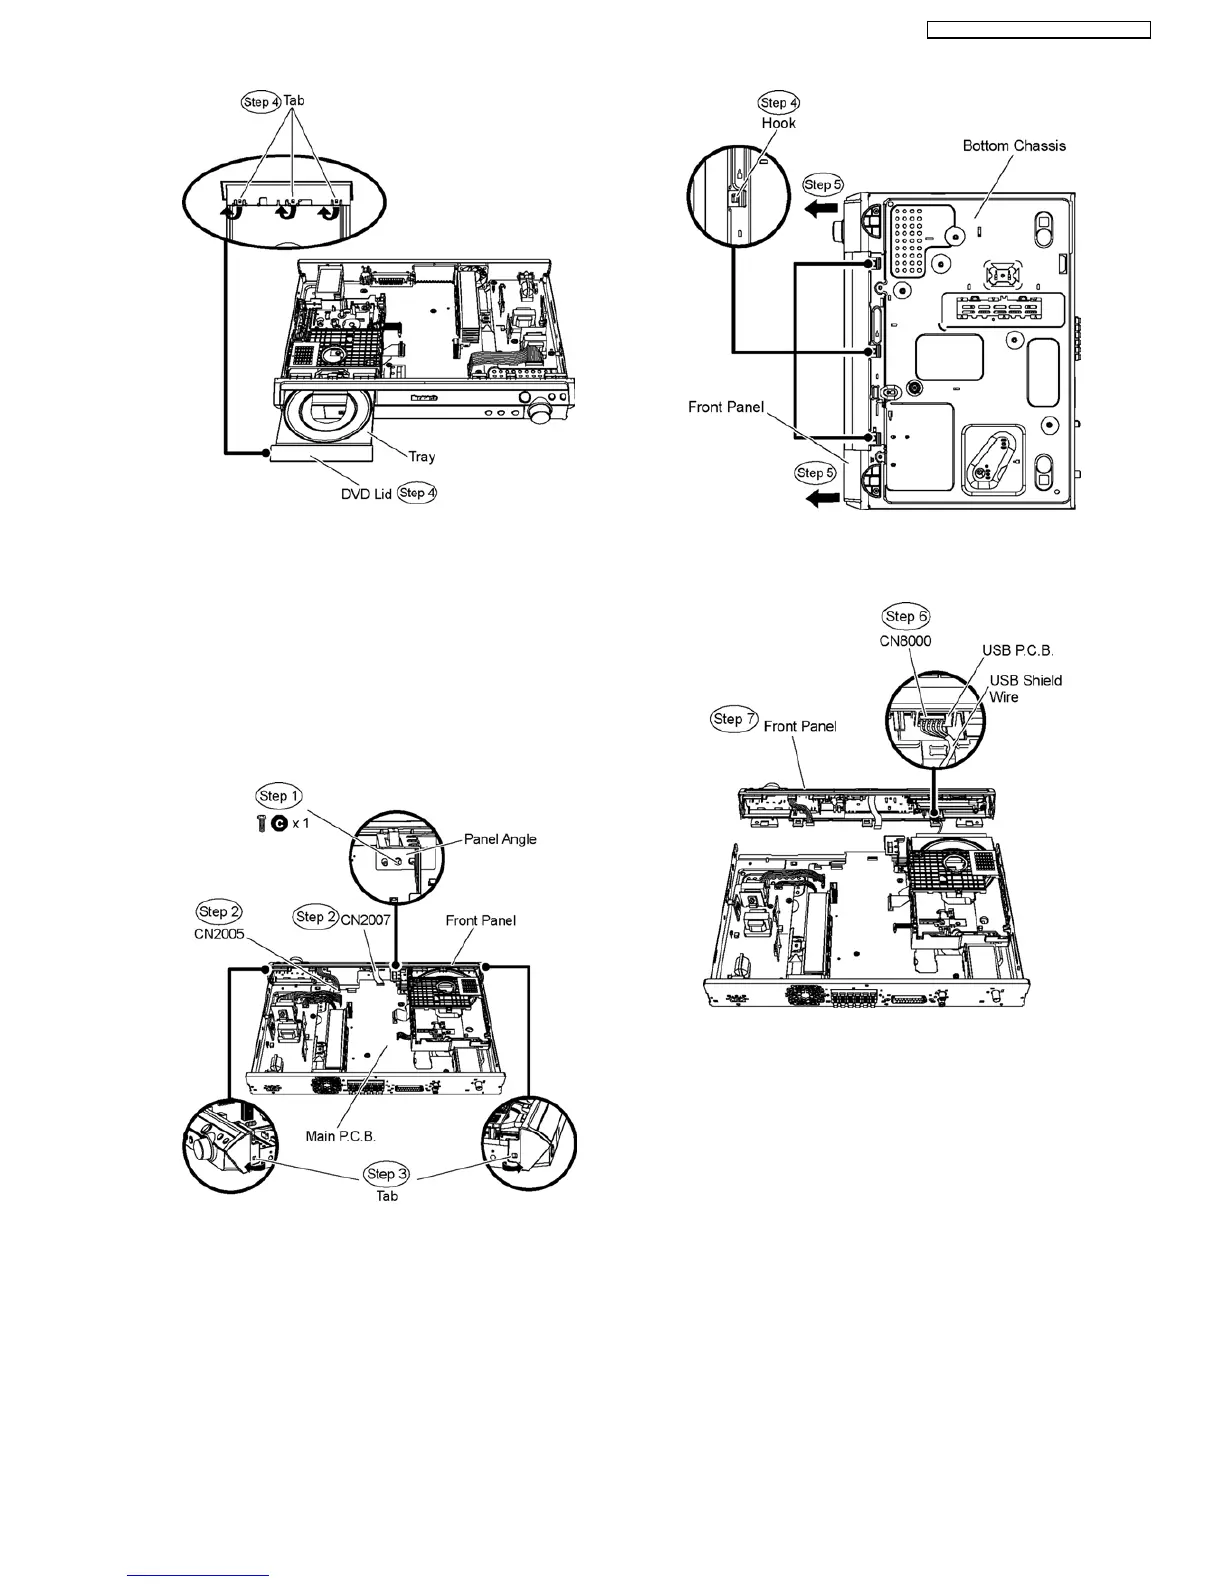
9.5. Disassembly of Front Panel
•
• •
• Follow (Step 1) to (Step 3) of Item 9.3.
•
• •
• Follow (Step 1) to (Step 4) of Item 9.4.
Step 1 Remove 1 screw from the panel angle.
Step 2 Detach FFC cables from the connectors (CN2005 &
CN2007) on Main P.C.B.
Step 3 Release the tab on each side of the front panel.
Step 4 Upset the unit and release 3 hooks at the bottom
chassis.
Step 5 Detach the front panel slightly forward in the direction of
arrow.
Caution: Do not attempt to exert strong force when
detaching the front panel.
Step 6 Detach USB shield wire from the connector (CN8000)
on USB P.C.B.
Step 7 Remove the front panel.
Special Note : Avoid placing the set in a position that might
cause damage to the jacks when removing the front panel.
9.6. Disassembly of Volume P.C.B.
•
• •
• Follow (Step 1) to (Step 3) of Item 9.3.
•
• •
• Follow (Step 1) to (Step 4) of Item 9.4.
•
• •
• Follow (Step 1) to (Step 7) of Item 9.5.
Step 1 Remove the volume knob.
39
SA-PT160E / SA-PT160EB / SA-PT160EG