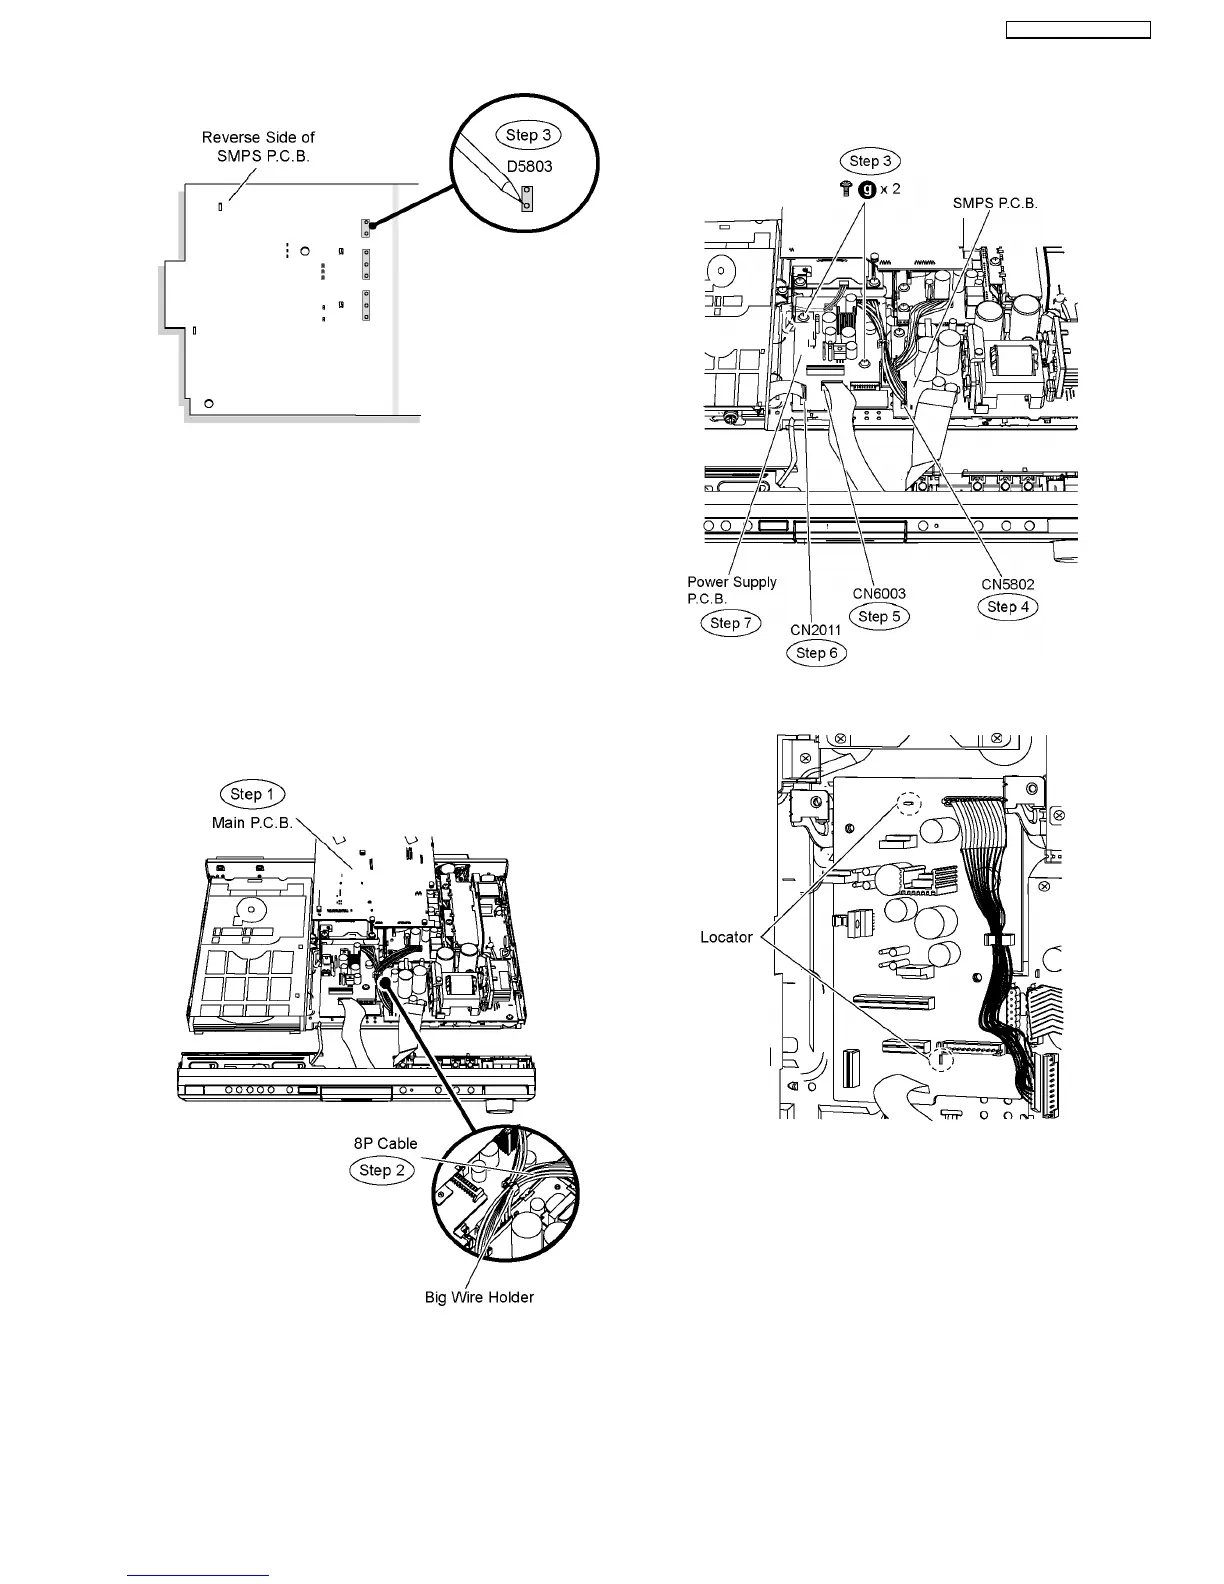
Special Note: Ensure pins of the regulator diode (D5803) are
properly seated and soldered on SMPS P.C.B.
9.23. Disassembly of Power Supply
P.C.B.
•
• •
• Follow (Step 1) to (Step 3) of Item 9.3.
•
• •
• Follow (Step 1) to (Step 5) of Item 9.6.
•
• •
• Follow (Step 1) to (Step 8) of Item 9.12.
Step 1 Move aside Main P.C.B. and position it according to the
diagram shown.
Step 2 Remove 8P cable (SMPS P.C.B. to D-Amp P.C.B.) from
the big wire holder.
Step 3 Remove 2 screws on Power Supply P.C.B.
Step 4 Detach 11P cable at the connector (CN5802) on SMPS
P.C.B.
Step 5 Detach 14P FFC cable at the connector (CN6003) on
the Power Supply P.C.B.
Step 6 Detach 11P FFC cable at the connector (CN2011) on
the Power Supply P.C.B.
Step 7 Remove Power Supply P.C.B.
Special Note: During reassembling procedures, ensure the
P.C.B. is seated properly at the locators.
9.24. Replacement of Regulator IC
(IC2903)
•
• •
• Follow (Step 1) to (Step 3) of Item 9.3.
•
• •
• Follow (Step 1) to (Step 5) of Item 9.6.
•
• •
• Follow (Step 1) to (Step 7) of Item 9.12.
•
• •
• Follow (Step 1) to (Step 7) of Item 9.23.
Step 1 Desolder pins of the regulator IC (IC2903) on the
reverse side of Power Supply P.C.B.
Step 2 Desolder pins of the heatsink extrussion.
63
SA-PT760P / SA-PT760PC
 Loading...