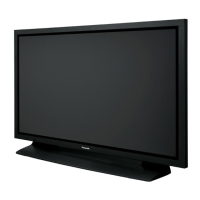
TH-65PF10WK/TK
22
2. Remove 19 screws and then remove P-Board.
8.10. Removal of SU-Board and SD-
Board
1. Remove the Flexible Cables from the connectors (SU1,
SU2, SU3, SU4, SU5, SD1, SD2, SD3, SD4, SD5).
2. Disconnect the connectors (SU45, SD46).
3. Remove 1 screw ( ) of the BC guide and then remove
the BC guide.
4. Remove 8 screws ( ).
5. Slide SU-Board and SD-Board to the left, remove SU-
Board and SD-Board from the connectors (SC41, SC42,
SC43, SC44).
Note:
The handling of a connector connecting with SC45-
SU45 and SC46-SD46 must note enough.
(DISCONNECTION and TRANSFORMATION,etc.)
8.11. Removal of SC-Board
1. Disconnect the connectors (SU45, SD46).
2. Remove 1 screw ( ) of the BC guide and then remove
the BC guide.
3. Remove 8 screws ( ).
4. Slide SU-Board and SD-Board to the left, remove SU-
Board and SD-Board from the connectors (SC41, SC42,
SC43, SC44).
5. Disconnect the 2 Fan Relay Connectors.
6. Remove 4 screws and then remove the Fan Block (A).
7. Disconnect the connectors (SC2, SC20, SC23).
8. Remove 11 screws of SC-Board and slide SC-Board in
the direction of the arrow (A) and then remove SC-Board.
Note:
Remove SC-Board not to damage the Flexible Cables
of SU-Board and SD-Board, parts on SC-Board.
8.12. Removal of SS2-Board and
SS3-Board
1. Disconnect the connectors (SS23, SS27).
2. Remove the Flexible Cables from the connectors (SS51,
 Loading...