20 21
Preparations / 配件及準備
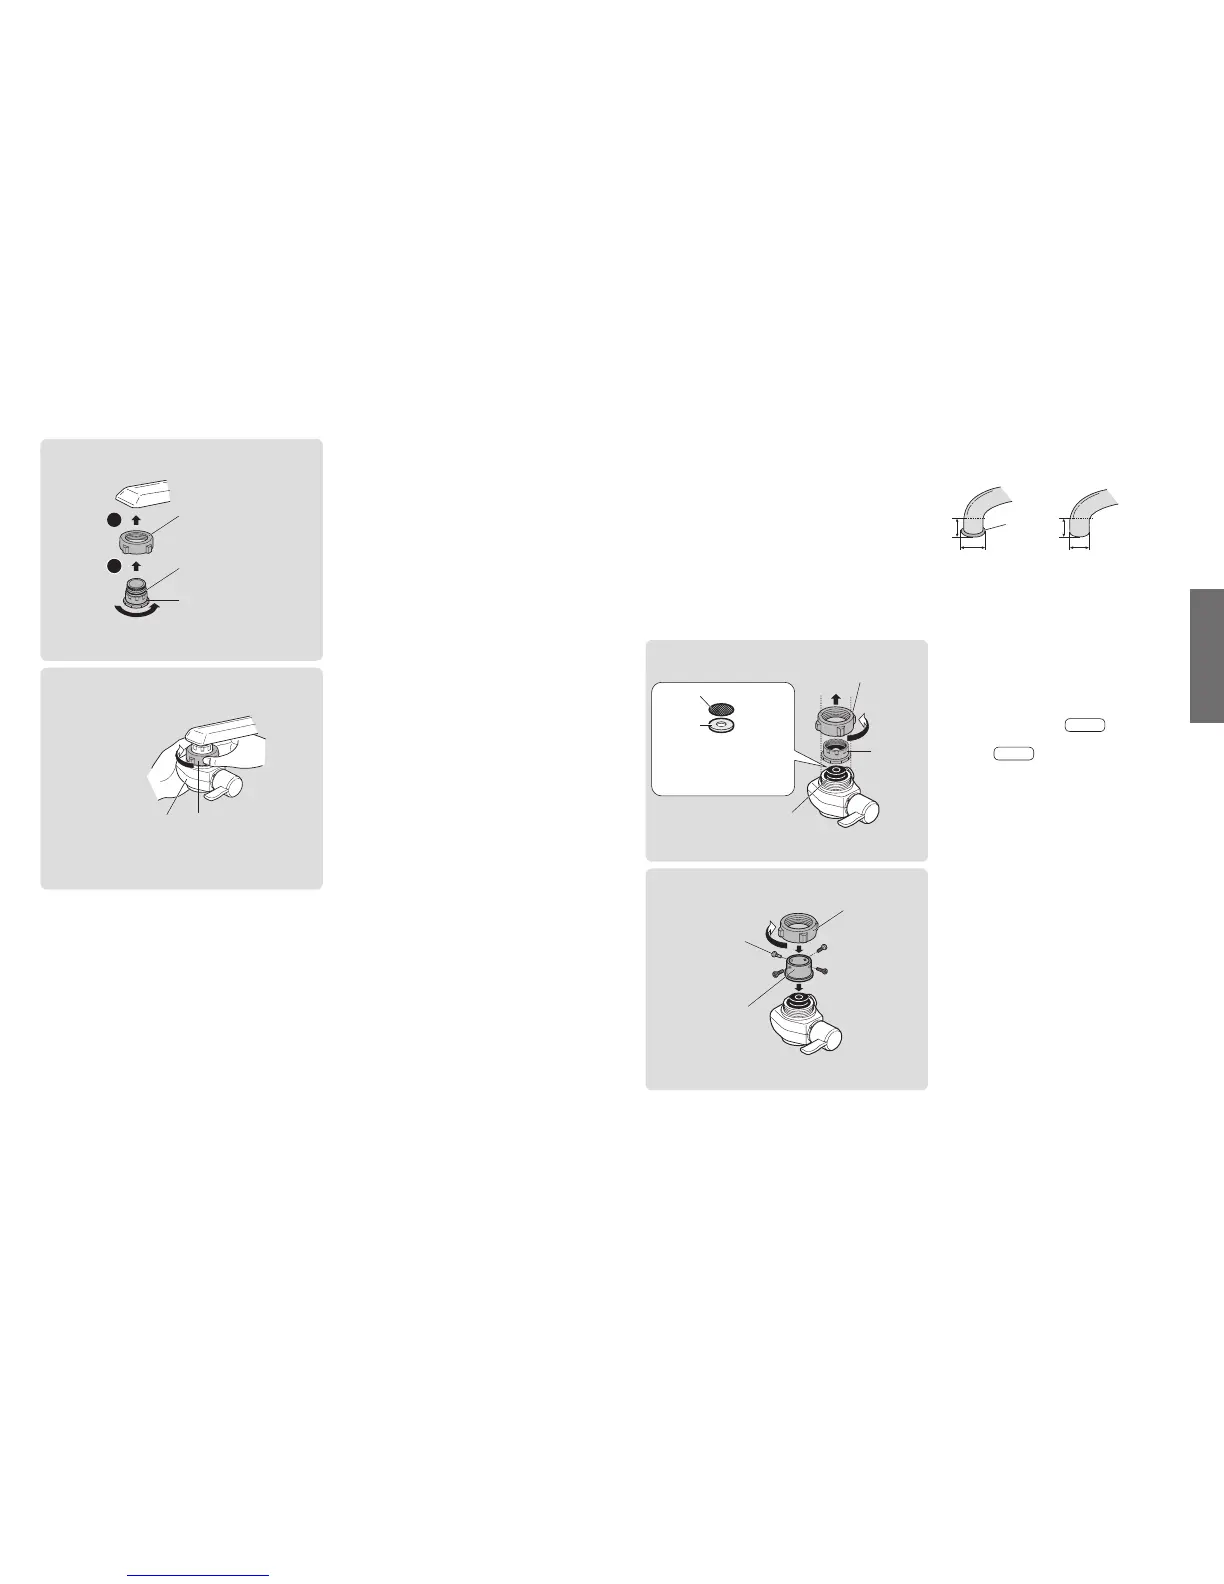
Attaching the Bypass Selector (continued)/安裝分水開關 (接續)
1
2
Mounting nut
螺帽
Adaptor
轉接器
Gasket
墊片
3
Attach the mounting nut and
adaptor.
安上螺帽和轉接器。
OThe adaptor should be screwed on
straight. Screwing it on tilted may strip
the threads, resulting in water leaks.
O要將轉接器垂直擰緊。斜著擰入的話,會
損壞其螺紋,造成漏水。
Mounting nut
螺帽
Bypass selector
分水開關
4
Attach the bypass selector and
tighten the mounting nut.
安 上 分 水 開 關,然 後 緊 固 螺 帽。
ODo not use any tools. (This may
damage the mounting nut.)
O不必使用任何工具。(這會損壞螺帽。)
• Keep all parts that are not used during installation, as they may be needed later if the unit is moved or the
faucet is changed.
• 沒有使用到的零件,請妥善保存,以備搬家或購買新水龍頭時之需求。
Faucet without an aerator
• Water faucet which can attach the Alkaline Ionizer with
accessory.
無充氣器的水龍頭時
• 需用一附件才能將電解水生成器連接到水龍頭上。
Mounting nut
螺帽
Adaptor
(Not used)
轉接器
(不使 用)
Filter
過濾網
Gasket
墊片
Return to the original
position after removing.
卸 下 後,將 其 放 回 原 位。
Do not remove the gasket
inside the bypass selector.
不要卸下分水開關內的墊片。
1
Remove the mounting nut and
adaptor.
卸下螺帽和轉接器。
OWhen the filter or gasket (made of
metal) drops off, please return to the
original position
P. 4 7
.
O過 濾 網、墊 片(金 屬 製)脫 落 時,請 恢 復 原
狀
P. 4 7
。
Mounting nut
螺帽
Installation adaptor
(Accessory)
安裝轉接器(附件)
Remove the screws.
(4 pcs.)
卸 下螺 絲(4個 )。
2
Insert the installation adaptor,
and tighten it with the mounting
nut.
插入安裝轉接器並用螺帽將其緊
固。